A little over two years ago I published a series of five posts outlining my initial foray into coffee processing. The technique I used at the time was a wet or washed method of taking recently picked coffee cherries through various stages to the point of roasting. While the end result was not outstanding in the cup, having been given the cherries with no information as to their exact source, type or quality, the whole process was always going to be a little hit and miss.
In saying that however, I was quite happy with how the actual processing techniques proceeded. I must admit to having quite an experienced mentor in the form of my mother, who has now been processing the coffee grown in the backyard for a number of years, culminating in a first place at the local Agricultural Society annual show just a few weeks ago.
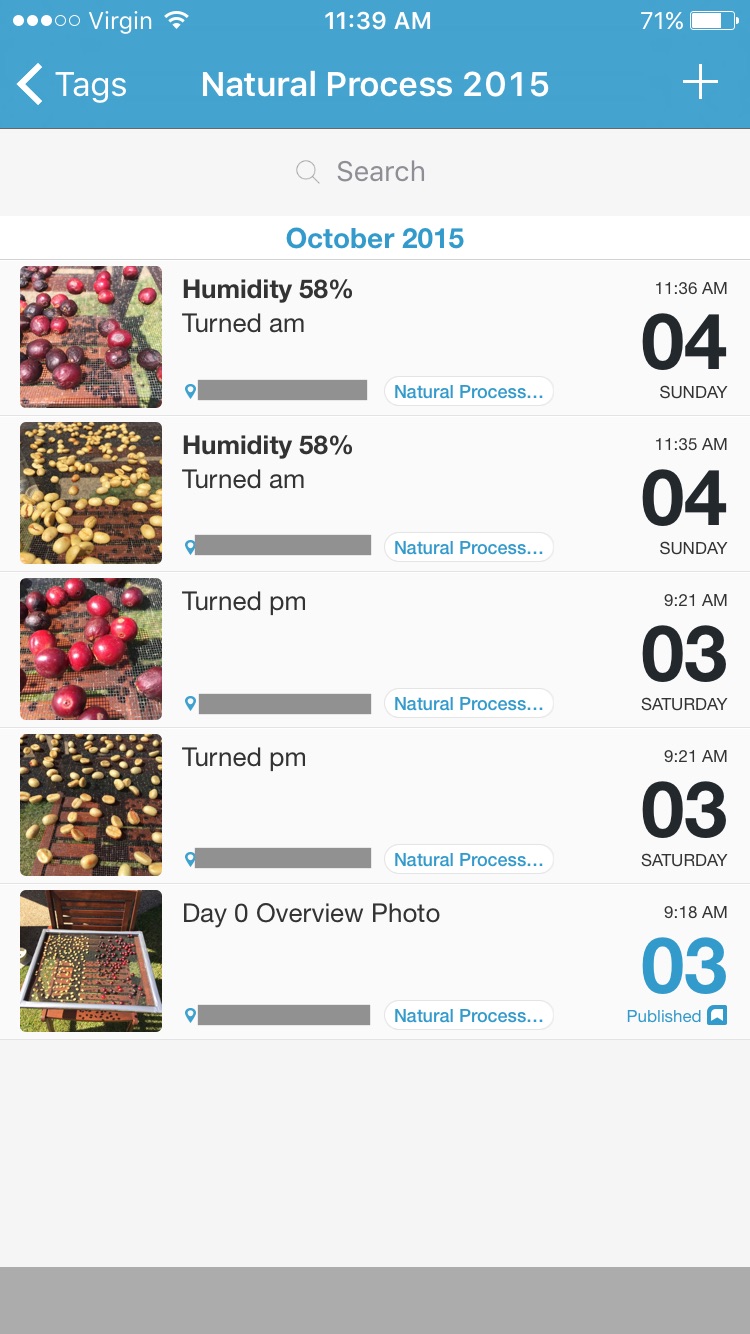
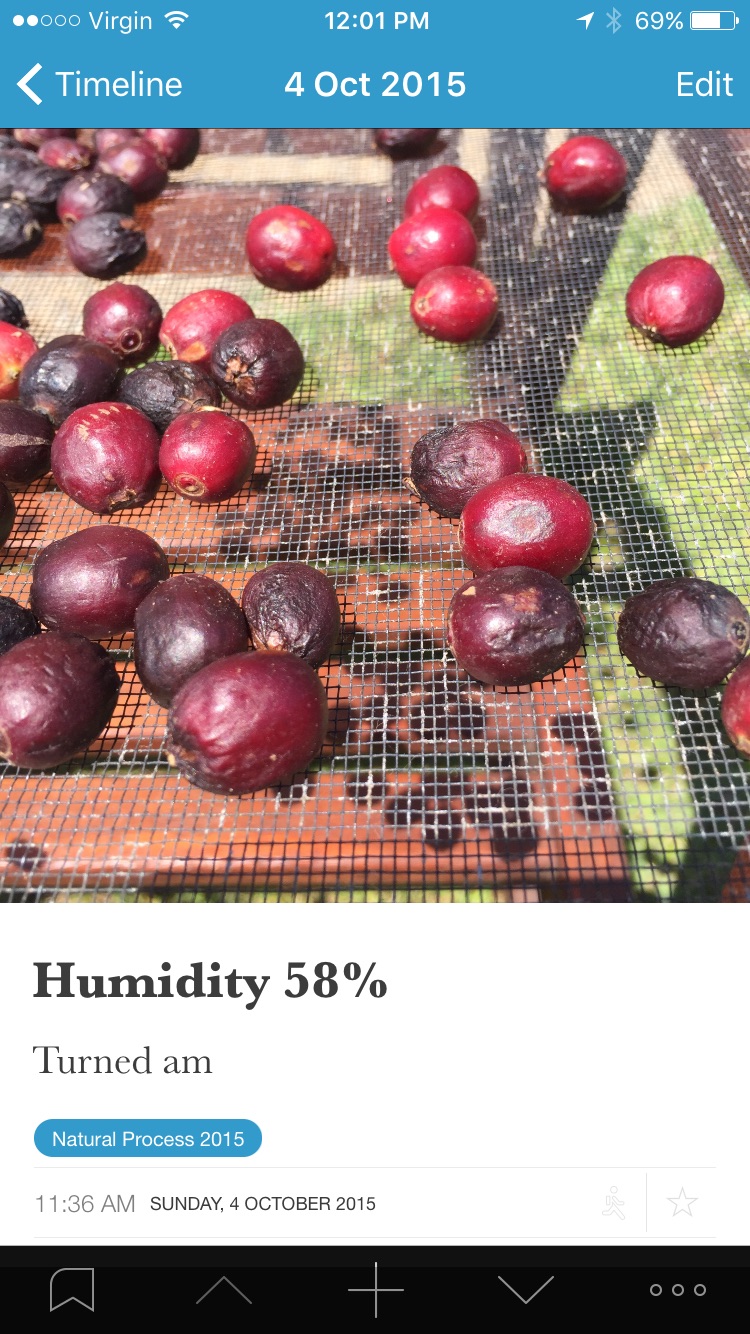
As I am currently in the middle of experimenting with some natural processing methods, I thought it might be worthwhile combining those five posts (originally titled Crop to Cup Parts 1 through 5) and republishing them together. Hopefully what follows will provide a little context, and also highlight some of the differences between the two styles of processing when I eventually write about what I currently have underway.
Although none of the original posts were excessive in length, I have included a table of contents should you wish to jump to any particular section of the article.
What follows is essentially unedited from what was originally published, except to improve the formatting and for clarity. I hope you find it as interesting to read as I found it going through the process.
Table of Contents:
1. Introduction, Pulping, and Fermentation
4. Parchment Removal (Hulling) and Roasting
1. Introduction, Pulping, and Fermentation (Top)
 While the title of this post may sound rather exotic, the reality is I have been lucky enough to be given a small, recently harvested crop of beautiful red coffee ‘cherries’. Receiving such a gift carries significant responsibility, and I am determined to process, roast and cup the resulting brew with all the dedication and care I can muster. As regular readers will know, I have been roasting at home for some time now (purchasing green beans online), however to this point have not processed beans straight from the tree.
This is a whole new ball game for me. How to proceed?


The first step was a call to my parents, who grow, and therefore regularly process, roast and drink their own crop. Next, an internet search to see what is out there on this topic. I was surprised to find the most helpful instructions on my state government’s Department of Agriculture, Fisheries and Forestry website. For additional reading on the types of processing methods, the International Coffee Organisation (ICO) provides a good summary.
Wet or Dry Processing
Firstly, there are two options, wet or dry processing. What follows in the section below outlines the wet processing method I plan to use, said to “better preserve the intrinsic qualities of the bean”. This method is the one outlined on the state government website, and also the one my parents use.
In the dry processing method, the entire coffee cherries are dried in the sun for approximately 4 weeks (to a minimum 12.5% moisture content), followed by removal of all outer layers around the bean by hulling equipment. States the ICO:
The dry method is used for about 90 percent of the Arabica coffee produced in Brazil, most of the coffees produced in Ethiopia, Haiti and Paraguay, as well as for some Arabicas produced in India and Ecuador. Almost all Robustas are processed by this method.
Wet processing generally follows the procedure outlined below, though obviously on a fairly large scale for commercial operators. As opposed to the dry method, the seed is extracted and fermented first, the drying process then follows, again until the beans reach 12.5% moisture content. The beans are then stored, and the hulling process is completed just prior to export. Again from the (ICO):
The wet method is generally used for Arabica coffees, with the exception of those produced in Brazil and the Arabica-producing countries mentioned above as users of the dry method. It is rarely used for Robustas.
My wet processed micro lot
The wet processing technique I am using involves the following steps:
- Pulping
- Fermentation
- Drying
- Parchment removal (hulling)
- Roasting
- Brewing
Comparing the method my parents use with those online saw many similarities, with only some of the time frames differing a little in each stage. Today we will look at Pulping and Fermentation, and return in future posts as my drying process proceeds.
Pulping

Seed extraction in the pulping phase.
Here we are removing all of the skin and pulp (flesh) from the cherry, and extracting both halves of the coffee ‘seed’ from inside, and should occur as soon as possible after harvesting. Be sure to discard any under-ripe (green) or overripe (black) fruit which will reduce the quality of what ends up in the cup.
This process can either be done by hand (squeezing each cherry between your thumb and finger), or in the bottom of a bucket using a piece of wood to squash the fruit, resulting in the seeds being forced out from the flesh. Adding water will then allow removal of the skins and one other critical element – any floating beans. Good coffee beans will not float, and those that do should be discarded as they are unusable, and will spoil the batch.

Removal of floating beans (left); fermentation (right).
Fermentation
There is not a lot to say about this step, apart from the fact it should last anywhere from 18-48 hours to a few days, and involves natural enzymes breaking down the ‘mucilage’ (the outer slippery substance) around the parchment layer. Fermentation should be done in a plastic bucket or container (metal may affect the taste), with the entire bean mass covered by water. To test for completeness of this phase, washing a small amount of beans should see the ‘slippery’ coating disappear, resulting in a clean, gritty feel. If so, agitate and wash the remaining beans until he water is clear (again removing any that float), which may take several washes. Once washed and clean, the beans are then ready for drying.
At the time of writing this post, the pulping is completed, and the beans are sitting fermenting…
2. Transition to drying (Top)

Coffee drying in the sun. Dolka Plantation Costa Rica (Photo credit: Wikipedia)
With the fermentation phase now complete, we move on to the drying phase of processing. You may remember from the first part of this series, coffee processing is broken up into the following stages, as described by both the Queensland Department of Agriculture, Fisheries and Forestry, and my mother, who is very experienced and knowledgeable in these matters:
- Pulping
- Fermentation
- Drying
- Parchment removal (hulling)
- Roasting
- Brewing
At the completion of Crop to Cup Part 1, we left the beans fermenting in water at stage 2 above. I was a little unsure of how long this may take (72 hours or up to a week), though armed with the knowledge this phase would be complete when the mucilage (slippery outer layer) was easily rubbed away. Daily testing was undertaken, until on day 7 (exactly as predicted by my mother), rubbing one of the beans between thumb and finger resulted in a slightly gritty/pebbly feel rather than a slippery one.
Time to move on to drying.
Drying
Once the beans have fermented for long enough, they are required to undergo a final wash and rinse, before being laid out on drying beds. In aid of passing down the coffee loving tradition to the next generation, my son was enlisted to rub off the mucilage, with repeated washes then performed to remove any remaining on the outside of the bean. Agitating the beans and replacing the water over three washes was sufficient to achieve this. 
Looking back to our Department of Agriculture guide, the drying process is described as follows:
The beans should be spread out in a thin layer no more than 3 cm thick, stirred three times a day, and be protected from rainy weather. Drying in this way can take 5-30 days, depending on the seasonal weather pattern.
As you can see below, an initial drying of the beans was done on a small towel, before transfer to a drying rack to allow plenty of airflow around the beans. The rack is situated under cover to avoid any weather or dew, however sees the mid to late afternoon sun, which should assist with drying. Given the small crop I am processing, a single layer of beans was placed on the drying bed, with little chance of any mould formation (the reason for stirring daily), though I aim to ensure the beans are turned regularly.

I hope you will join me in a couple of weeks for the next post in this series, where we will be up to removing the remaining parchment layer and roasting our crop!
3. Drying (Top)

The first two stages of this process were outlined in Parts 1 and 2 of this series, along with the initial phase of stage 3, in which today we learn that patience is indeed a virtue.
Drying continued…
Every day I walk past my drying rack, checking (and turning) the beans, as the remaining moisture is drawn out, courtesy of the great weather we have been having of late in South East QLD. No rain to speak of (though many gardens need it), and fairly low humidity (compared to usual levels) have made for what I would consider perfect ‘bean drying’ weather. Although the beans have been undercover and would not be directly affected by rain, the increased humidity and overall moisture in the air would likely have required a longer period of drying.
The ideal drying time?
For further information here we again refer to our two main sources: The Department of Agriculture, Forestry and Fisheries (DAFF)
Whichever method of drying you use, the parchment on the coffee bean will dry to a pale straw colour and be brittle to touch. At this stage, test the dryness of the beans by removing the parchment by hand off several coffee beans. If dry, the bean inside should be greyish blue in colour, hard, and likely to break when bitten between the teeth, if not soft and chewy. If soft, continue the drying process.
The “methods” of drying referred to above include the natural sun drying method I am following, or alternatively, a food dehydrator, which must be kept at 40 degrees celsius over the course of several days to complete the drying. Whilst a dehydrator may be a more rapid method of drying, some of the romance is lost, if I imagine hundreds of square metres of beans drying in the sun on a Colombian hillside. Though the strength of this argument wanes a little when my entire crop fits into my palms cupped together. Anyway, for the current crop, sun drying it shall be.
…and from my mother:
I usually leave it at least two weeks to dry out. Sometimes you might get away with 10 days or so, but two weeks just to be safe. Your best guide is to crack off the parchment layer with your thumbnail, and if you get a good split or cracking noise you can be fairly sure it is dry enough. Once I have removed this layer and simply have the green bean, a couple of days more drying will really finish them off.
We agreed that my planned two further weeks (making four in total) drying time would not be to the detriment of the end result (that is, be too long). The four-week time frame is due to a holiday occurring in the middle of this process, rather than specifically planning a drying time of this length. I do note however this does coincide with the upper end of the 5-30 day recommendations of the DAFF.
Drying – Two Weeks In
As noted above, after two weeks I am now half way through my planned drying time and testing a couple of the beans would appear to show that everything is on track. You will see in the picture below that the outer parchment is quite dry (it also comes away from the inner bean with a nice crack when pressure from my thumb is applied).

Referring to the DAFF instructions above, the bean is blue/grey in colour and feels reasonably hard, though I did not see the need to give it the ‘bite test’. In another two weeks I would expect the beans will be well and truly dry and begging to be roasted, at which time I will provide an update with another post.
In the mean time, have a look at my magazine Brew – Ways of Coffee on Flipboard for some great articles I have collected from around the web.
4. Parchment Removal (Hulling) and Roasting (Top)
The fourth instalment in this Crop to Cup series looks at the final steps of processing, followed by the roasting of our “microlot” of coffee, kindly received straight off the tree from a barista friend about a month ago. As with anything, good things come to those who wait, and four weeks after starting, we are almost to the point of tasting the fruits of our labour.
To date, we have worked our way through Pulping, Fermentation (Crop to Cup – Part 1), Drying (Crop to Cup – Part 2), Drying again (yep – it took a while) (Crop to Cup – Part 3), and we continue on below.
Parchment Removal (Hulling)
In Part 3 of this series, drying continued in preparation for the final “hulling” or parchment removal prior to roasting. After a further two weeks drying (four in total) it was time to remove the parchment layer.
As I have written in previous posts, the beans being “dry enough” and the parchment ready for removal, is determined both by observing an appropriate drying time (approximately two weeks to a month), and having the parchment split easily off the inner bean upon attempted removal. According to the Department of Agriculture, Fisheries and Forestry (DAFF):
Inadequate drying – greater than 12 per cent moisture – will cause mouldiness and stale aroma during storage.
Upon proceeding with the hulling by hand (or rather thumbnail and finger), it is clear this is quite a labour intensive undertaking. After 1 hour, the parchment layer was removed from our crop, and we were a step further along in the process.

Given the time and labour intensive nature of this part in the process, the DAFF suggests the following:
Place the beans, a small quantity at a time, in a food processor or similar type of blender. Use plastic blades to avoid breaking the coffee beans. Blend at low speed for approximately 30 seconds to remove the parchment from the beans.
My mother uses a similar approach, blending on low-speed for 8-9 seconds, which she finds removes much of the parchment layer without damaging the green bean inside. Whether done by hand or machine, you will be left with a fine outer layer of “silver skin” remaining on much of the bean. Enlisting the assistance of my son to provide a quick rubbing of the beans between his hands removed this final layer. Blowing away any remaining silver skin completes the process.

We were now ready for roasting!
Roasting
With a dry weight of 35 grams, there was certainly no margin for error, and had me thinking I really should be calling this a “nanolot”, as “micro” probably doesn’t go far enough (yes an hour of hulling for 35 grams of green beans – as I said – very labour intensive!).
So proceed with care I did.

The roast was undertaken via my usual breadmaker / heat gun set up which I have previously written about. The heat ramp was very slow, and the total roast time 12 minutes, with the beans pulled out 3 minutes after first crack. The result looked like a pretty even roast, and was cooled and bagged. A few days rest and it will be ready for tasting.

Check back soon for the much-anticipated taste test!
5. Tasting (Top)

Here we go, the finale in the Crop to Cup series, where we sample the end result of the past 6 weeks caring for and nurturing (let’s be honest – processing) our microlot of coffee beans. As you can see by the image above, it was going to go one of two ways. Over this time we have worked through pulping and fermentation (Crop to Cup – Part 1); drying (Crop to Cup – Part 2, and Crop to Cup – Part 3); and hulling (Crop to Cup – Part 4) prior to roasting.
After such a long process, my concern was that I would be somewhat biased about the result. Also, given I had such a small amount, how was I going to brew? After setting aside half of the massive 27 gram (roasted) crop to return to the generous barista who gave me the coffee cherries in the first place, only enough remained for a single brew, whichever method I chose.
After much deliberation, I went with my Hario V60. My rationale being I wanted a method that would allow me to assess the coffee on its own merits rather than being combined with milk, and in the knowledge that the returned beans to my barista friend would be tasted as espresso. The V60 seemed like a good fit as I would be able to enjoy six or so weeks worth of care and attention for a little longer, rather than having an espresso that was both created and consumed in a flash. Though in saying that, I would also be in for a longer period of disappointment and torture if the resulting brew was horrible.

So, how did it turn out?
The Taste Test
The coffee
Jen’s Australian Microlot
Harvest Year: 2013
Wet processed; sun-dried
Sorry, no further information regarding the exact origin of these beans!
Method
Hario V60 Pourover
The Result
The section I have been waiting to get to for some time now!
In summary, the resulting brew was fairly ordinary, however drinkable nonetheless. Overall, it lacked any real body and had minimal sweetness, even as the brew cooled. Underneath there were some very mild floral and herby notes doing their best to be tasted. Accompanying these were some earthy flavours which thankfully did not overpower the brew, though lingered in an aftertaste that was a little, shall we say … strange.
Generally speaking, none of the flavours really overpowered the brew, making it a little “flat” overall. Given the light to medium roast of the beans, perhaps in retrospect I should have roasted them a little darker.
Feedback from my barista friend on the espresso experience was not positive at all. The concentrated form of an espresso shot seemed to magnify everything that was wrong with the beans, particularly the lack of any discernible body. I am told it was quite a flavourless experience.
Conclusion; Know This
In conclusion, although a little labour intensive, processing from the original cherries into something I could roast and then brew was a very satisfying experience. Yes, the taste test above did not reveal anything outstanding, however the brew was certainly drinkable and knowing that both the roast and brewing variables could be tweaked and improved if more of the “raw materials” were available was a promising sign for any future attempts.
I must also note here that I am comparing this with some fairly high quality beans I routinely purchase from Ministry Grounds Coffee, my usual supplier.
If you have followed this 5 part series, thanks for sticking with it over the past couple of months. I hope it has given some insight into small batch coffee processing had you not already experienced it yourself. For me it will be back to the usual roasts and posts. I’m not sure if the labour intensive nature of processing from scratch suits my lifestyle. Then again, my mother did say there is a nice young coffee tree in a pot she is saving until my next visit.
Perhaps I am about to become a grower as well…
Follow @petedenison