Coffee: A Natural Processing Experiment Part 3 – Results and Conclusion

Welcome to the third and final post in a three-part series on a small-scale coffee processing experiment I undertook in my back yard. The first two posts can be found here:

Coffee: A Natural Processing Experiment Part 1- Processing Methods

Coffee: A Natural Processing Experiment Part 2 – Methods and a little madness

A quick recap:

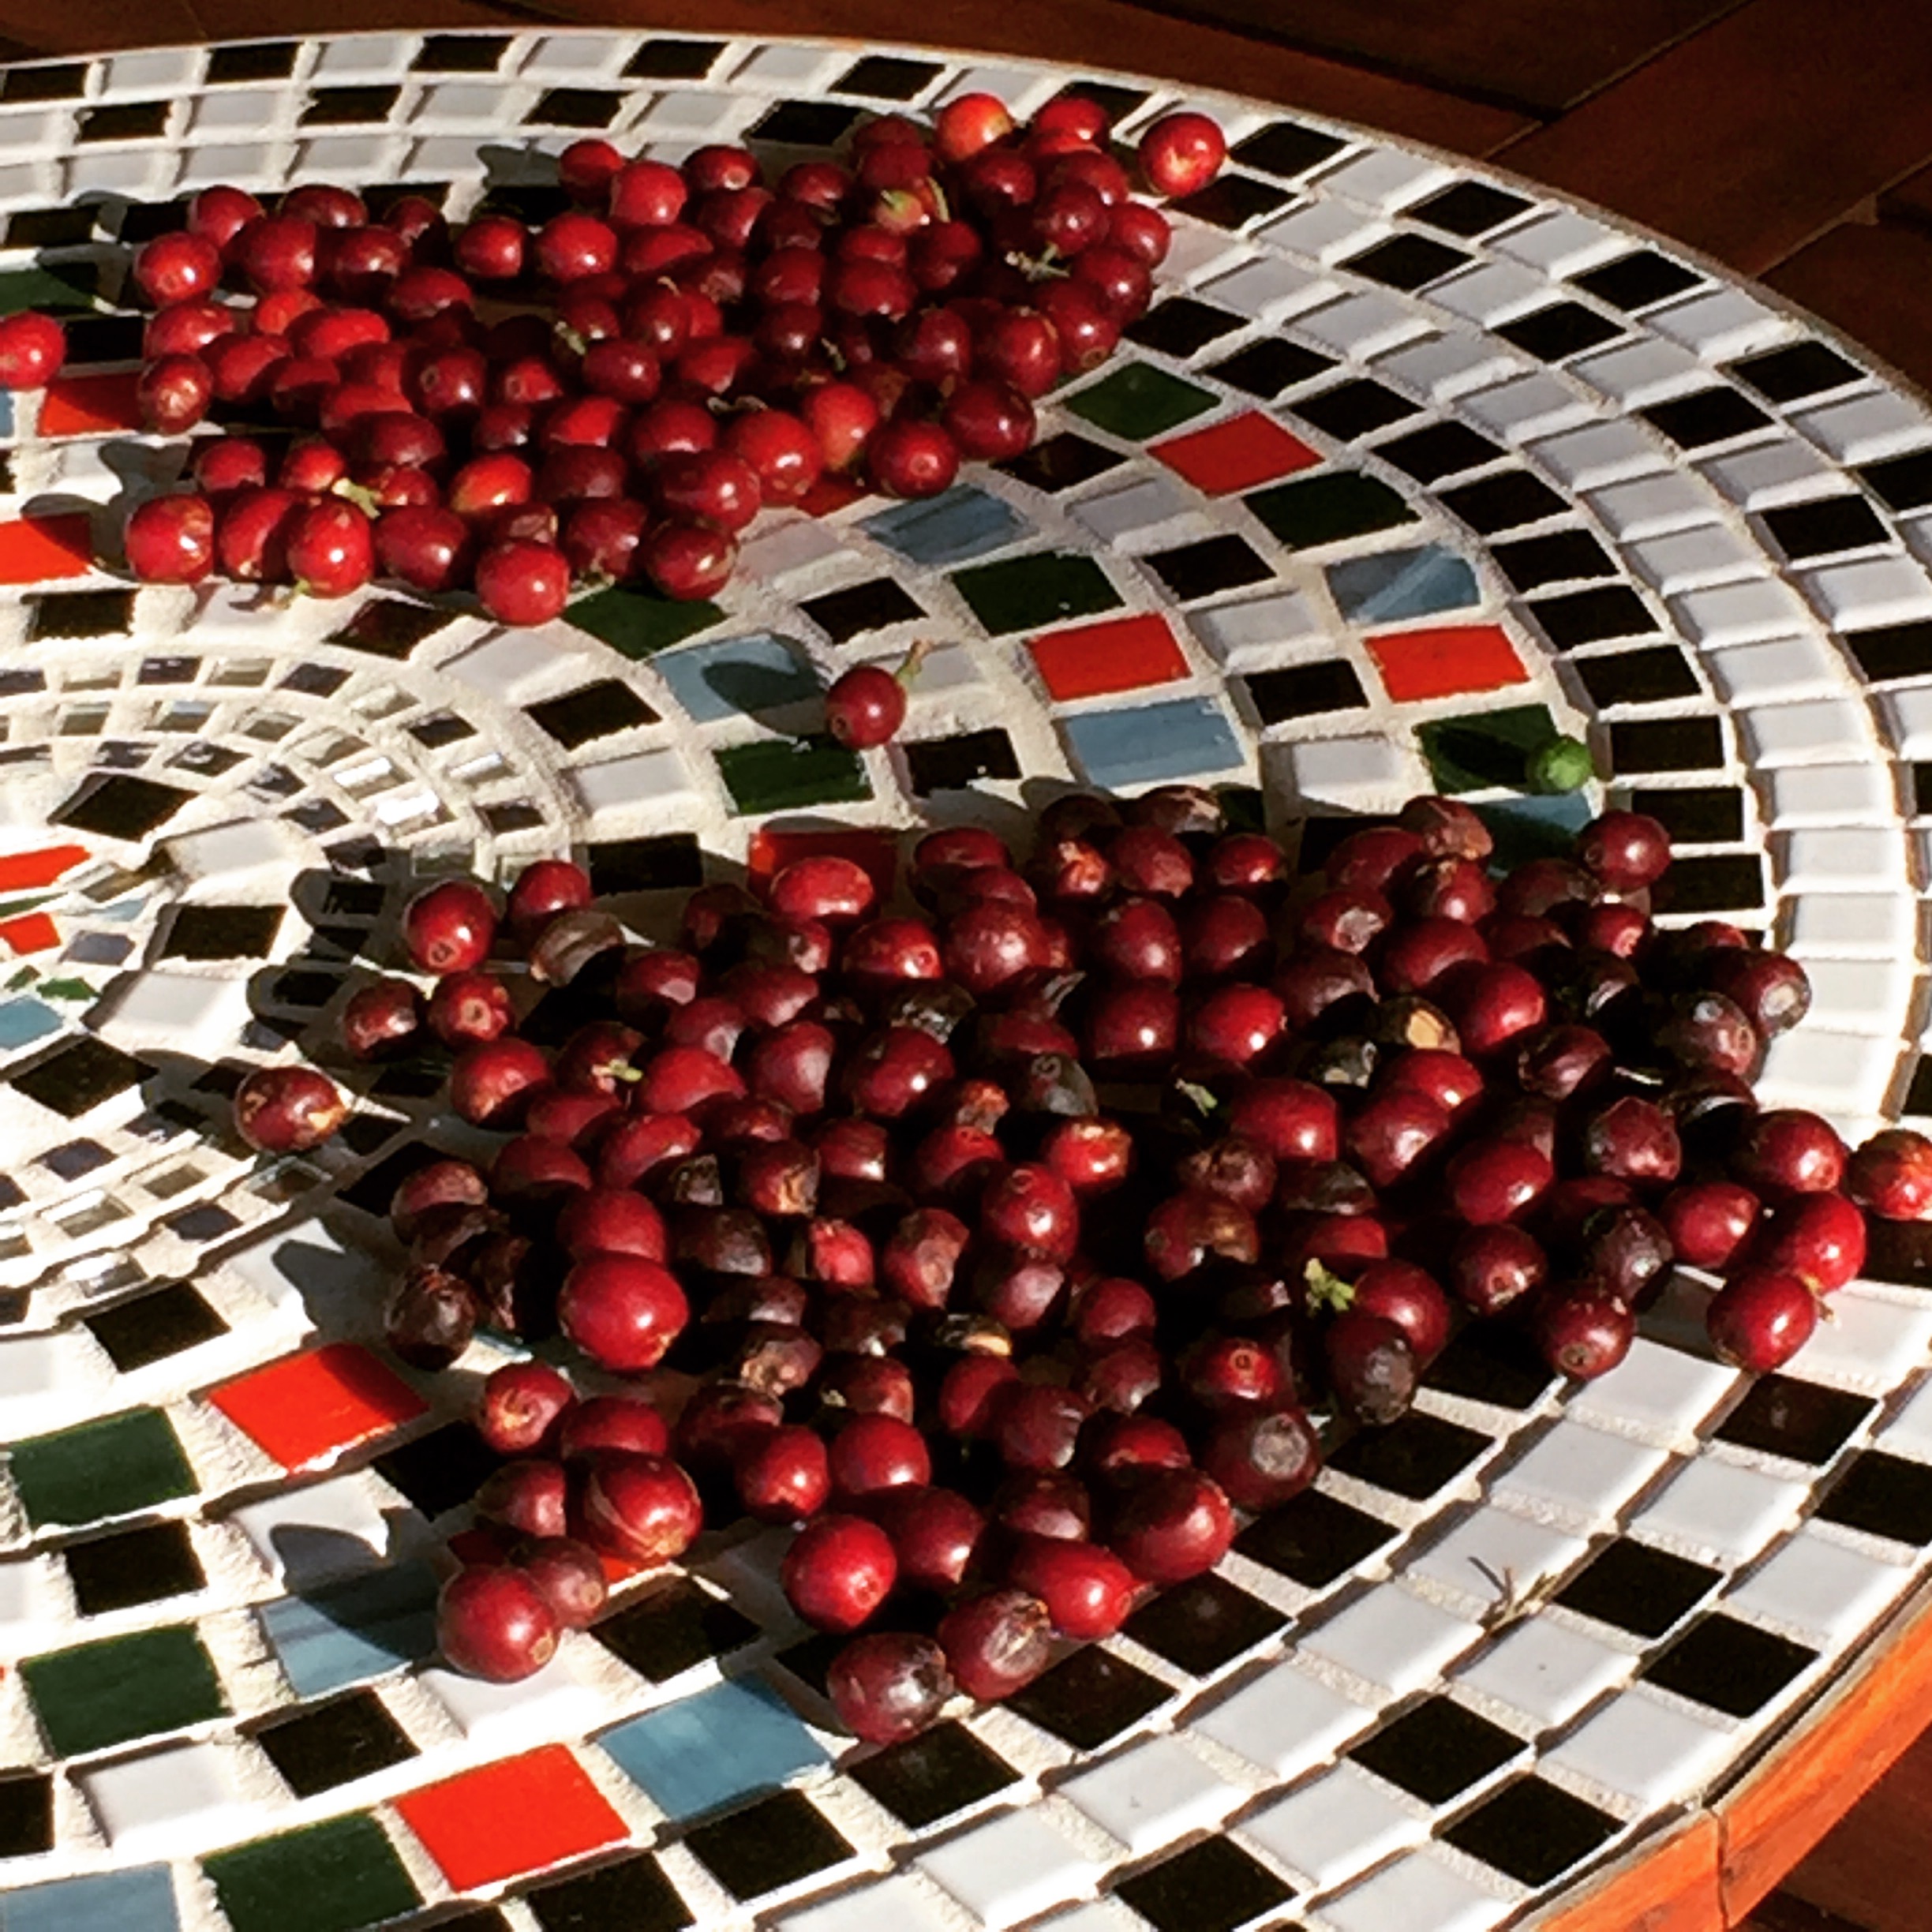
Late last year I picked a small crop from the coffee trees which are thriving at my parents house in northern New South Wales. Having processed a batch of the same coffee using a washed method a couple of years ago, I decided to try my hand at natural methods. The previous two posts and what follows below describe how things went for two separate batches: one “honey” processed, and the other a “natural” processed batch.
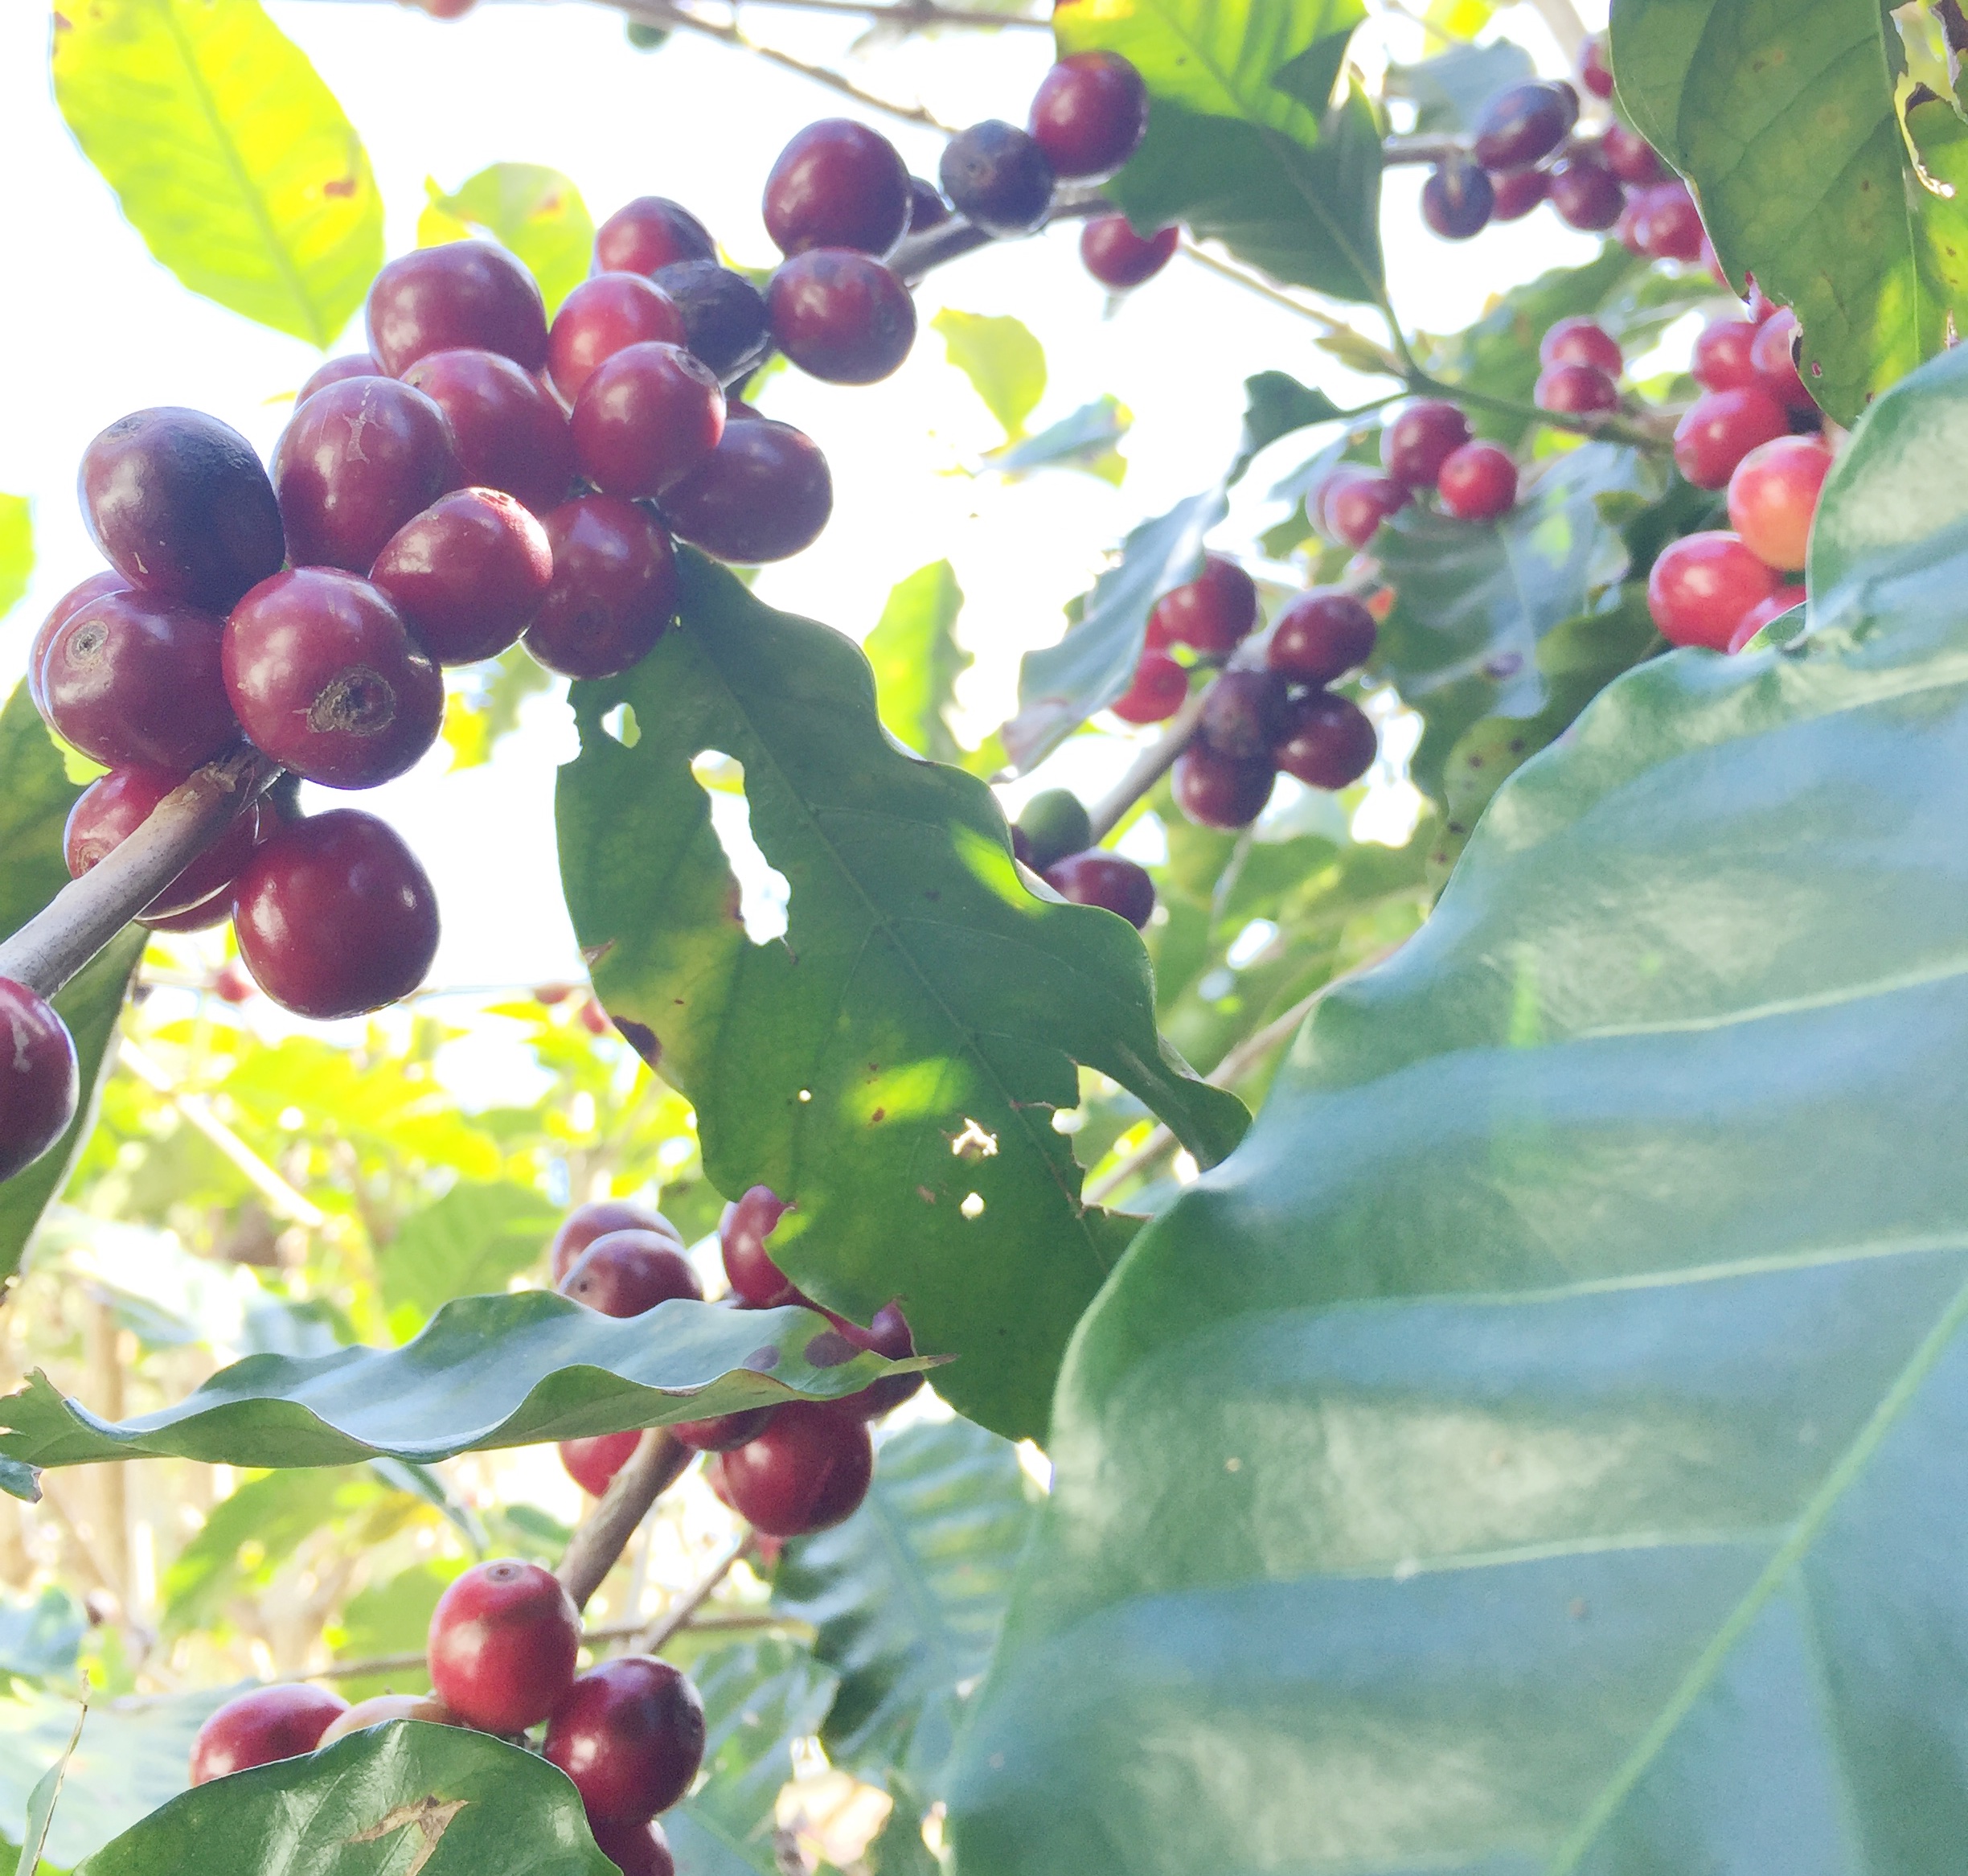
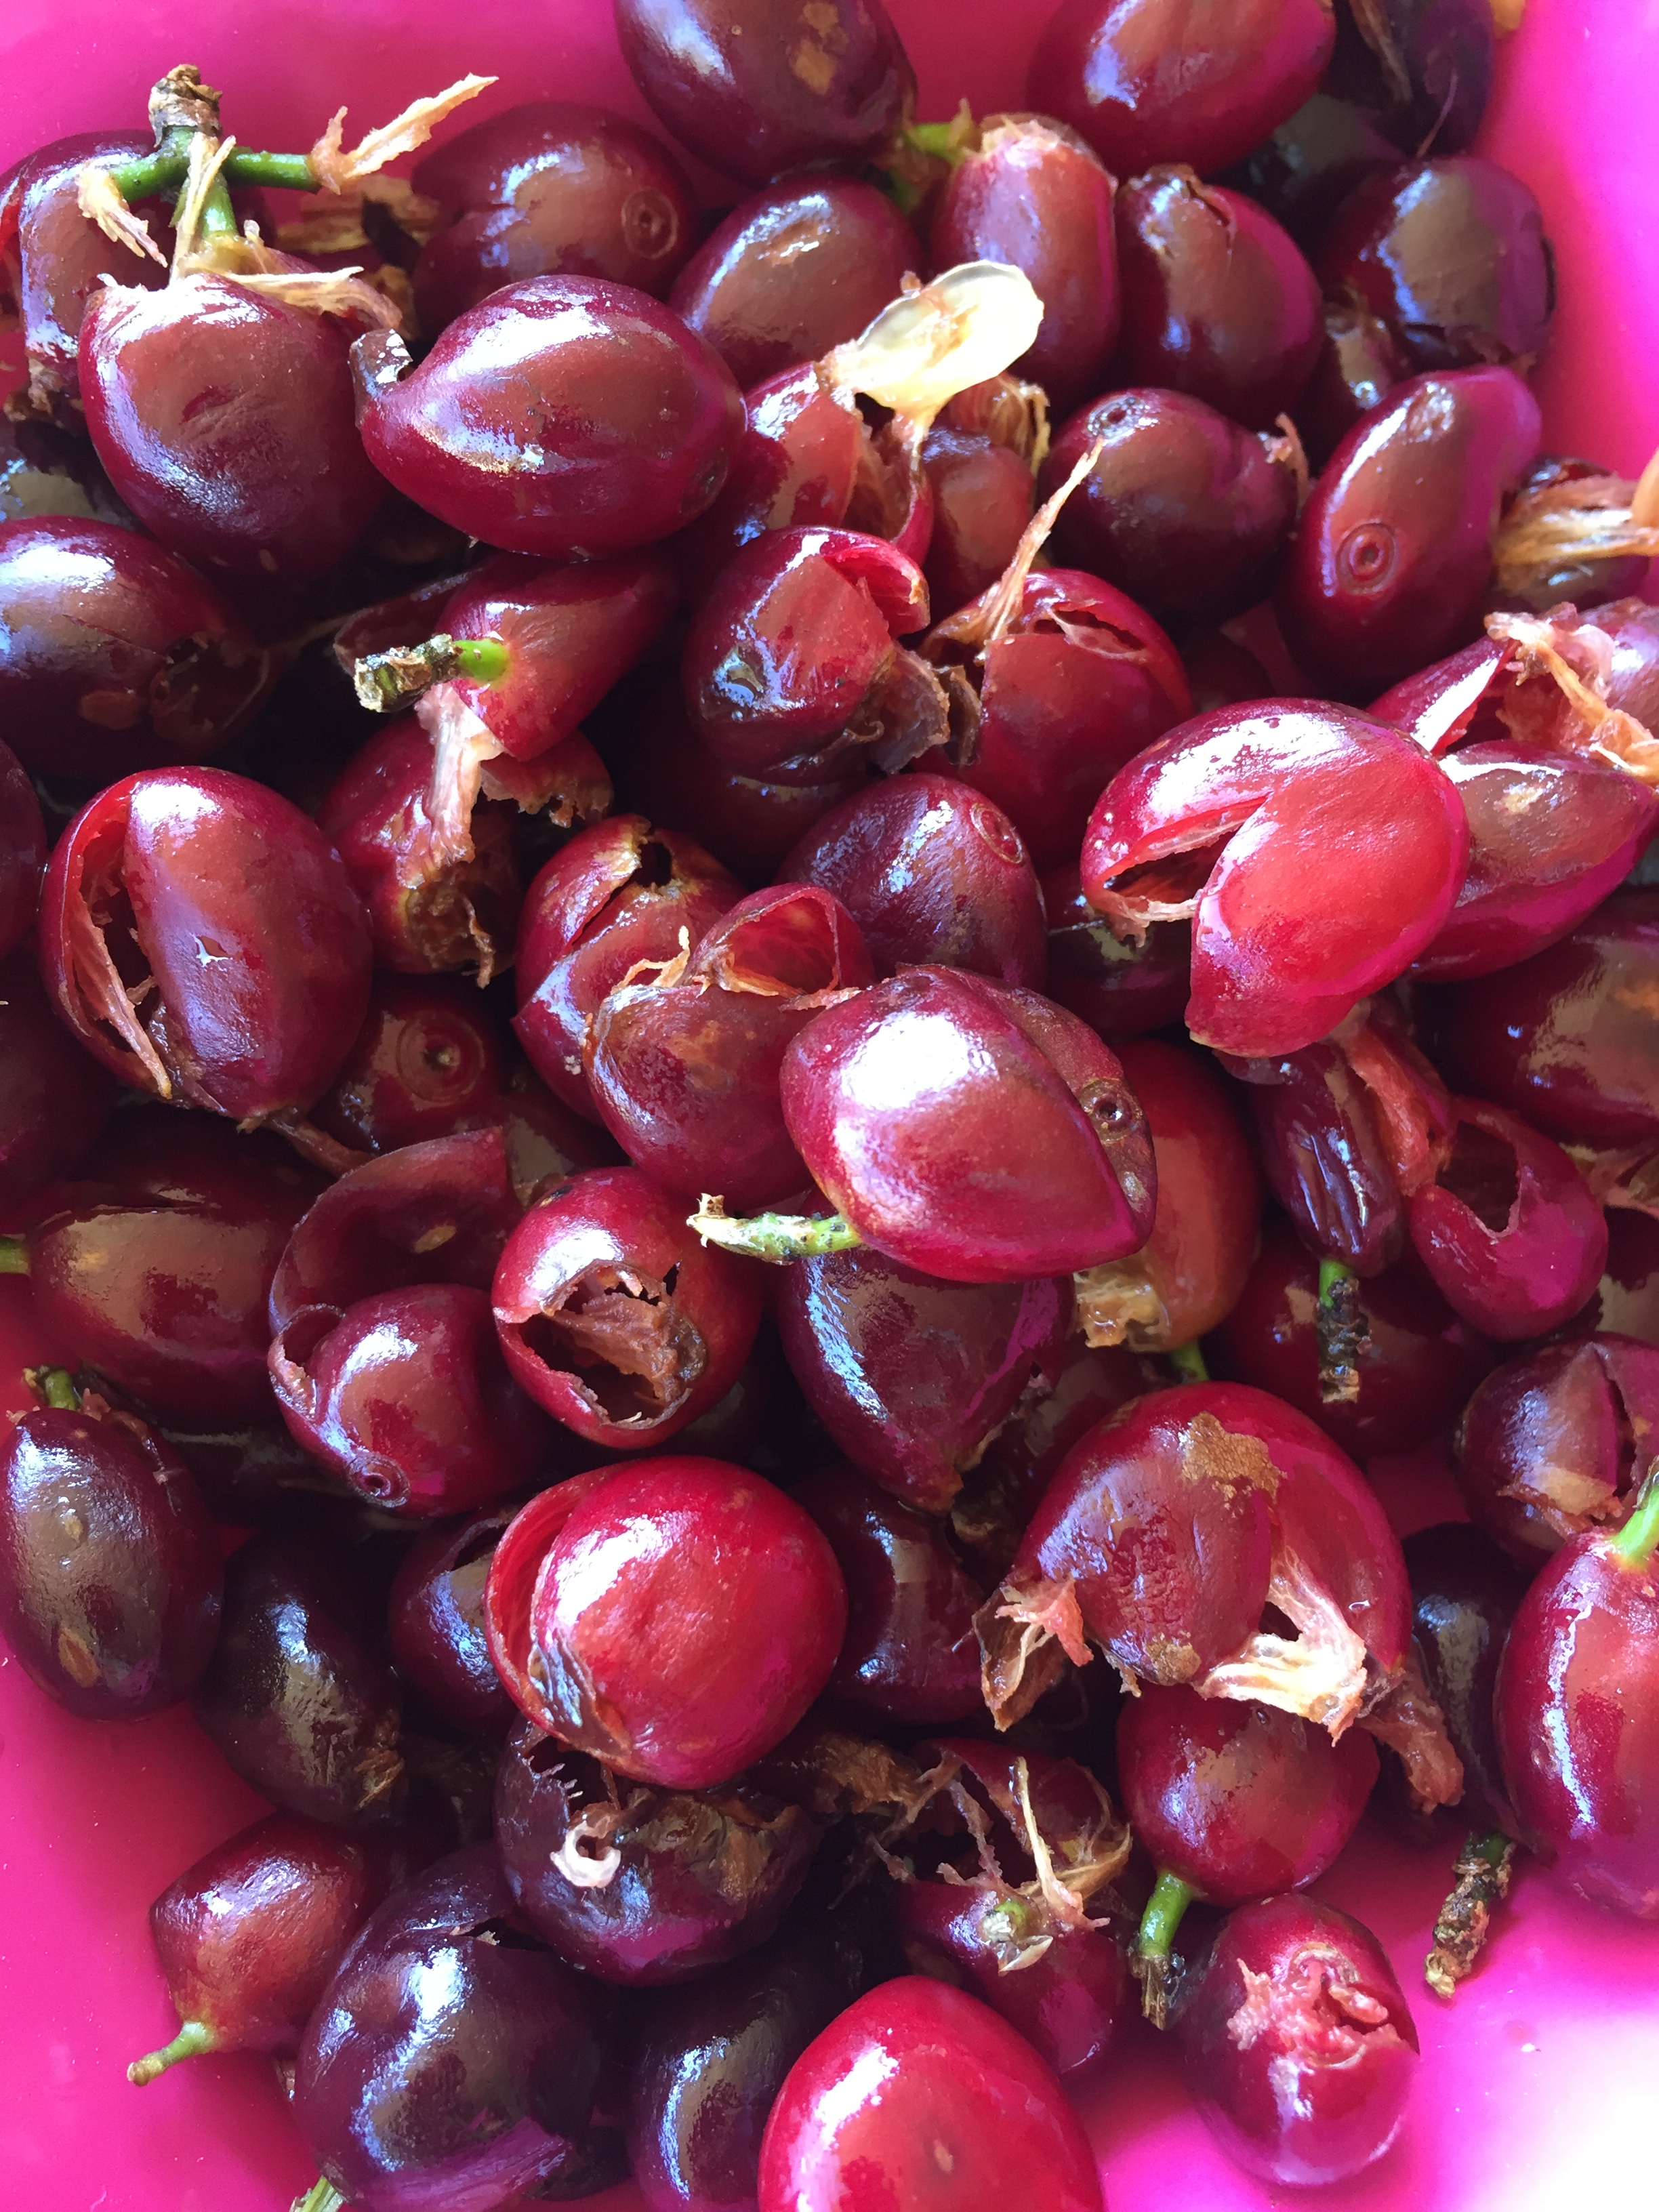
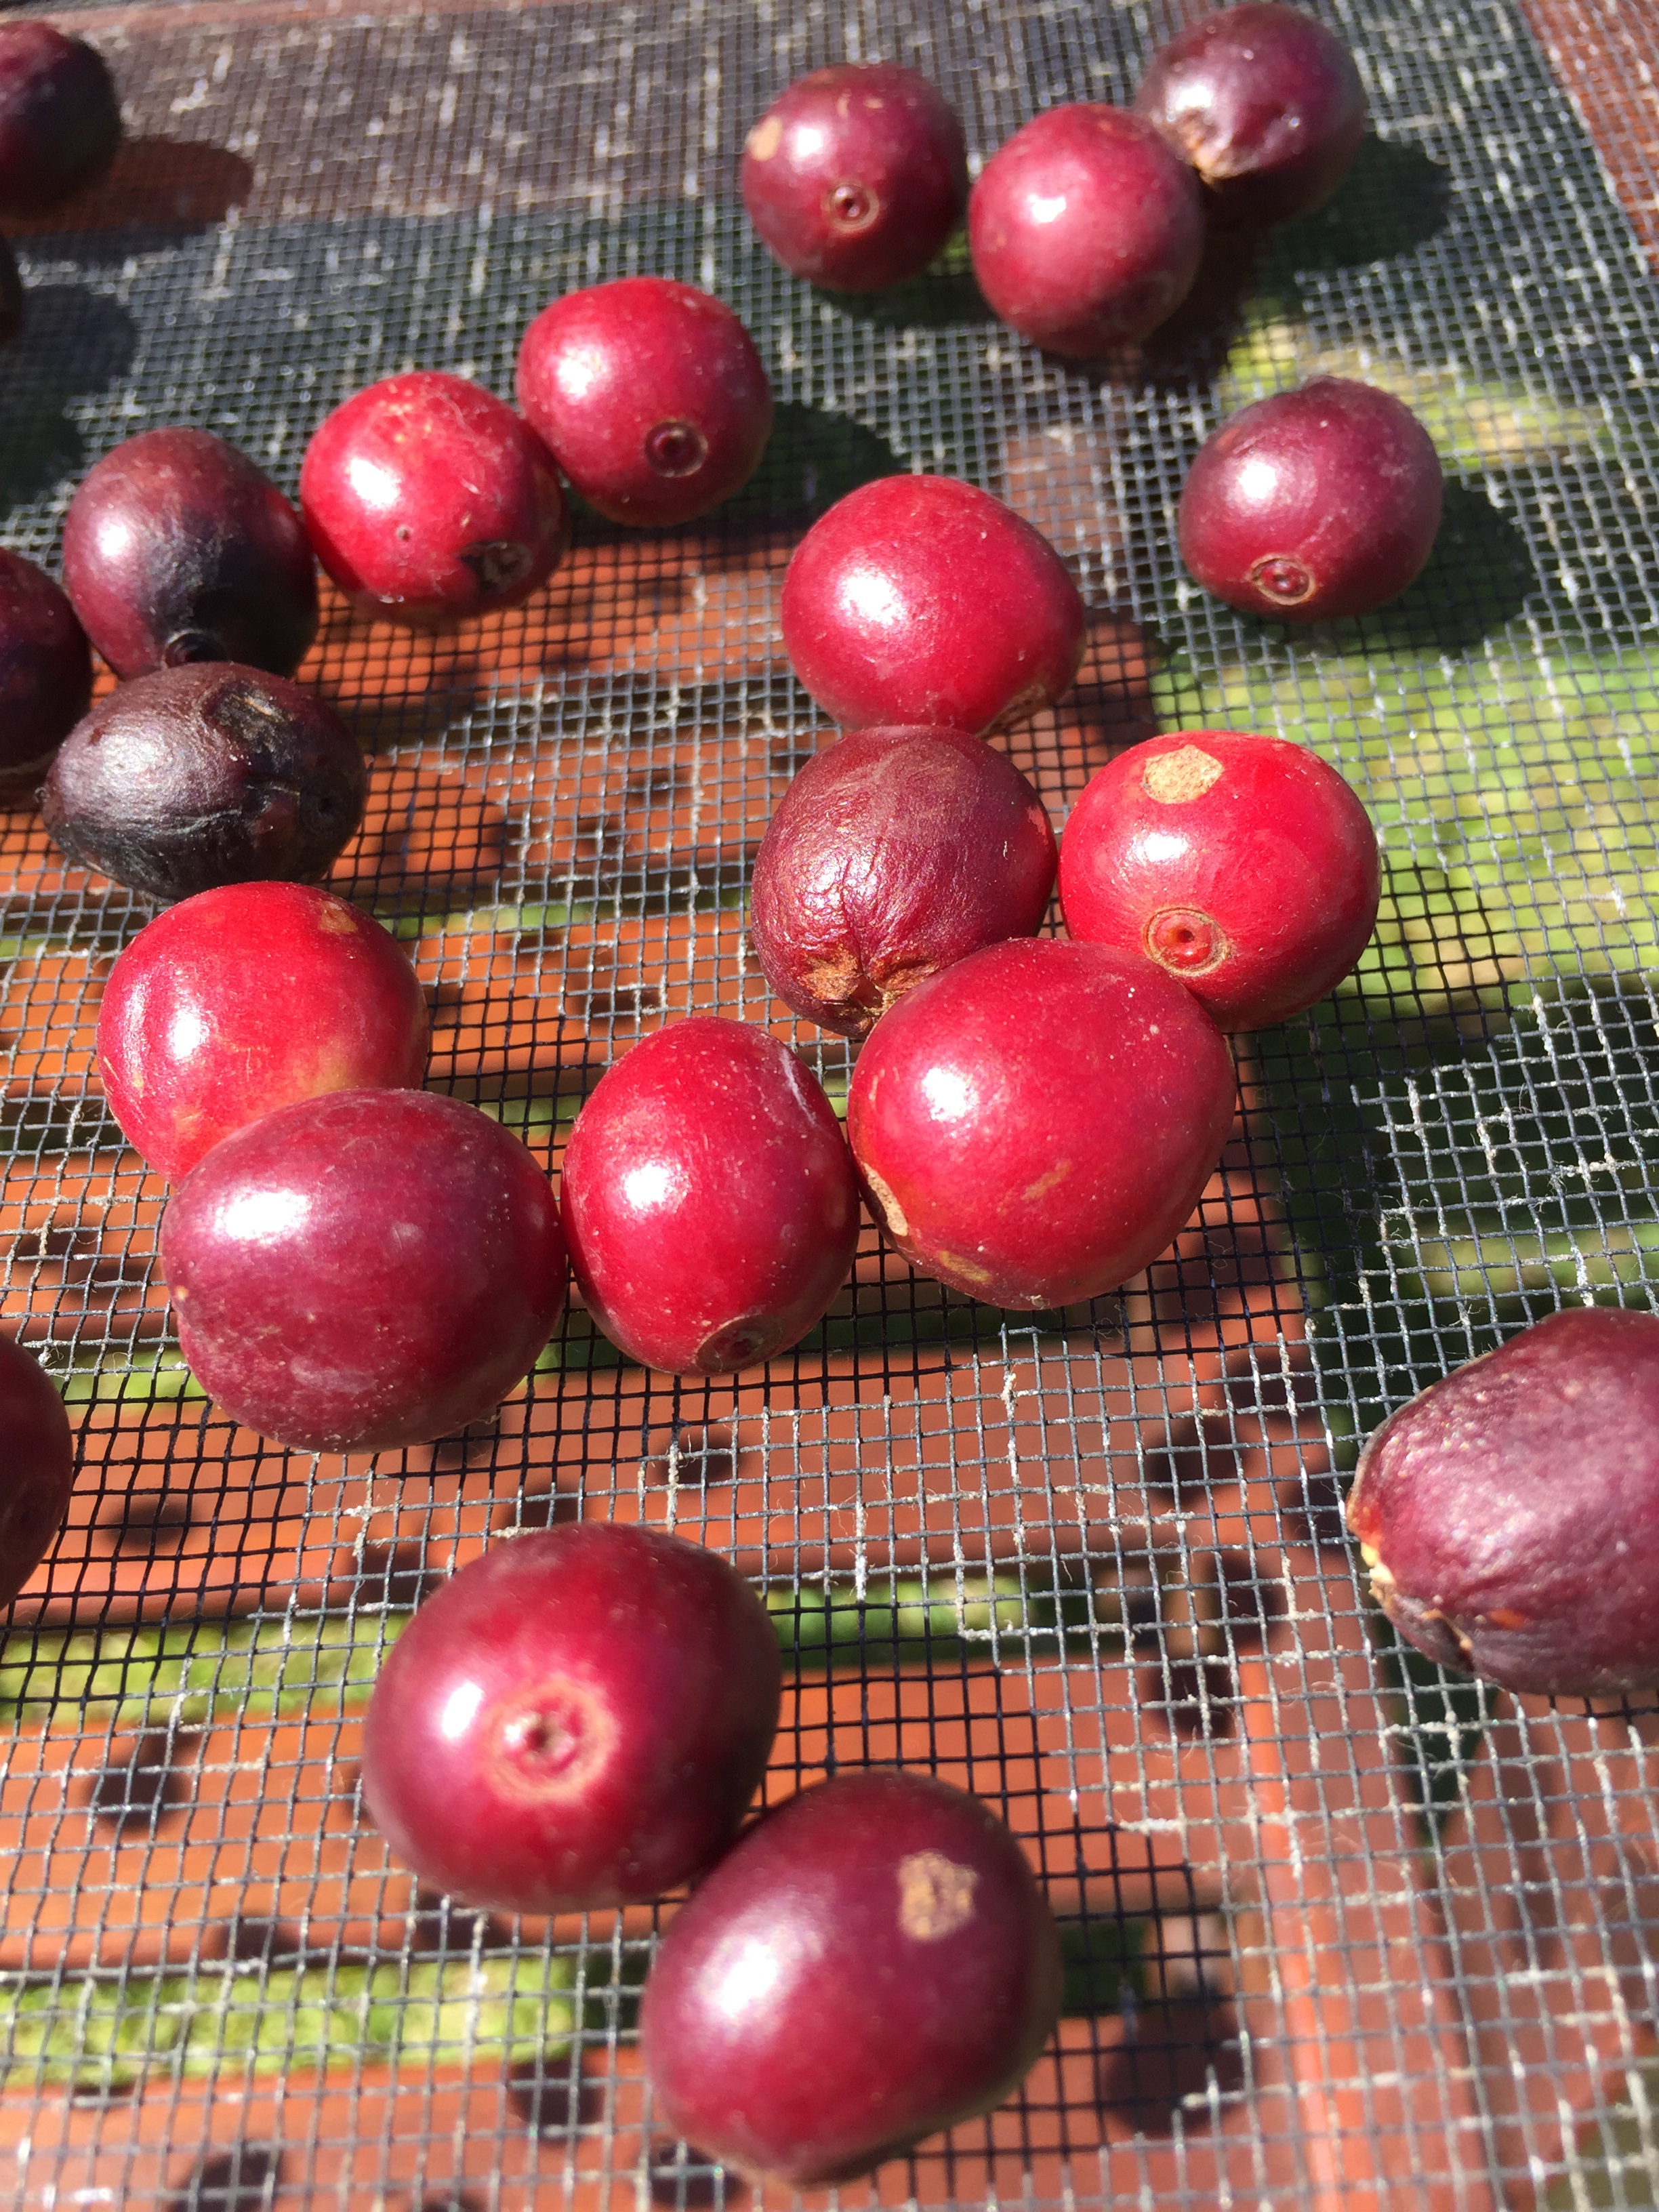
Part of the crop

Part of the crop

Results are in

In summary, the natural processed lot dried really well, however as I alluded to in Part Two of this series, the honey processing wasn’t quite as straightforward. I’ve broken things down a little further on each below.

Natural process

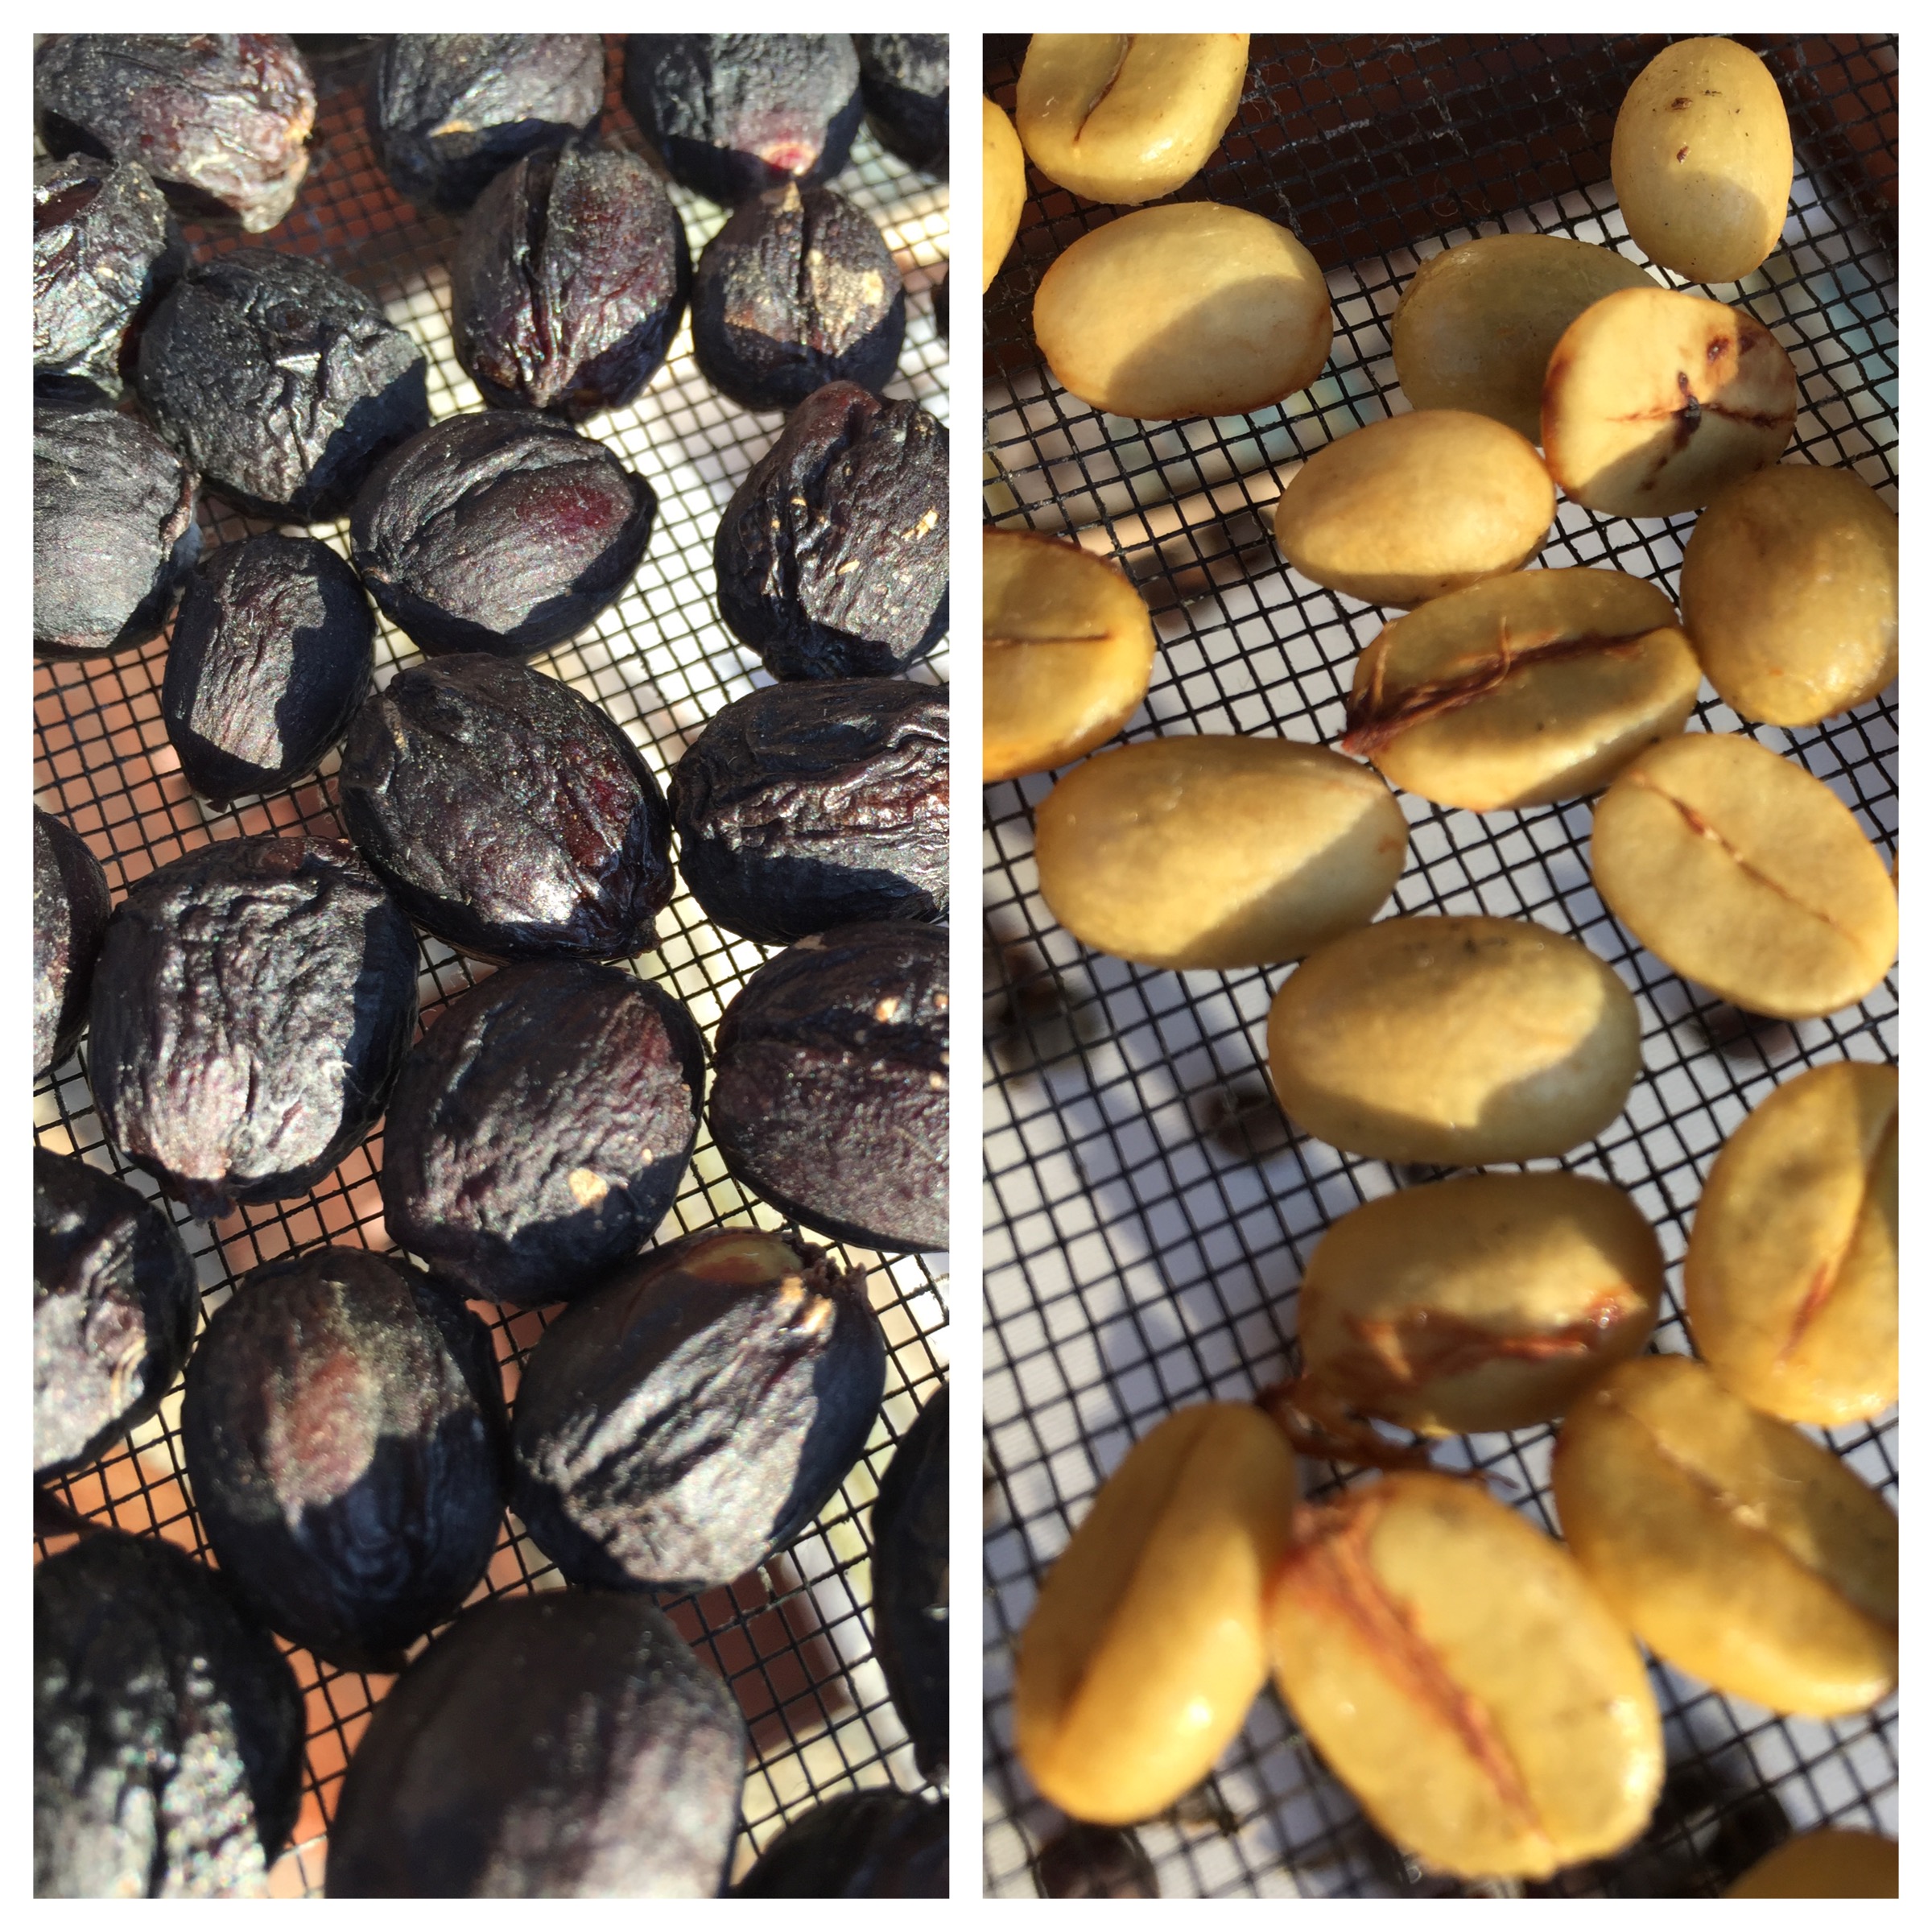
The naturals were a breeze to manage, and appeared to move fairly quickly in the early days of drying. It was fairly apparent early on some of the beans most likely commenced the process with less moisture content than others, as the darkening and progression from red to almost black which occurred within the first 7-10 days proceeded at different rates.

Once this first week or so had passed, the entire batch of naturals were mostly a uniform black colour, and the outer skins began to shrink and harden further. Looking back on some of the guidelines from the Part One post in this series — from Sweet Maria’s on climate suitability:

If a farm can dry coffee from ripe cherry to hard, dried pod in 20 days, it is probably well-suited to DP (dry processing) methods.

If I look at the naturals after 20 days, I think they would have been almost ready to go, and probably could have been removed from drying, hulled, and the bean then dried a little further at that point, resulting in a total drying time of around 30 days.
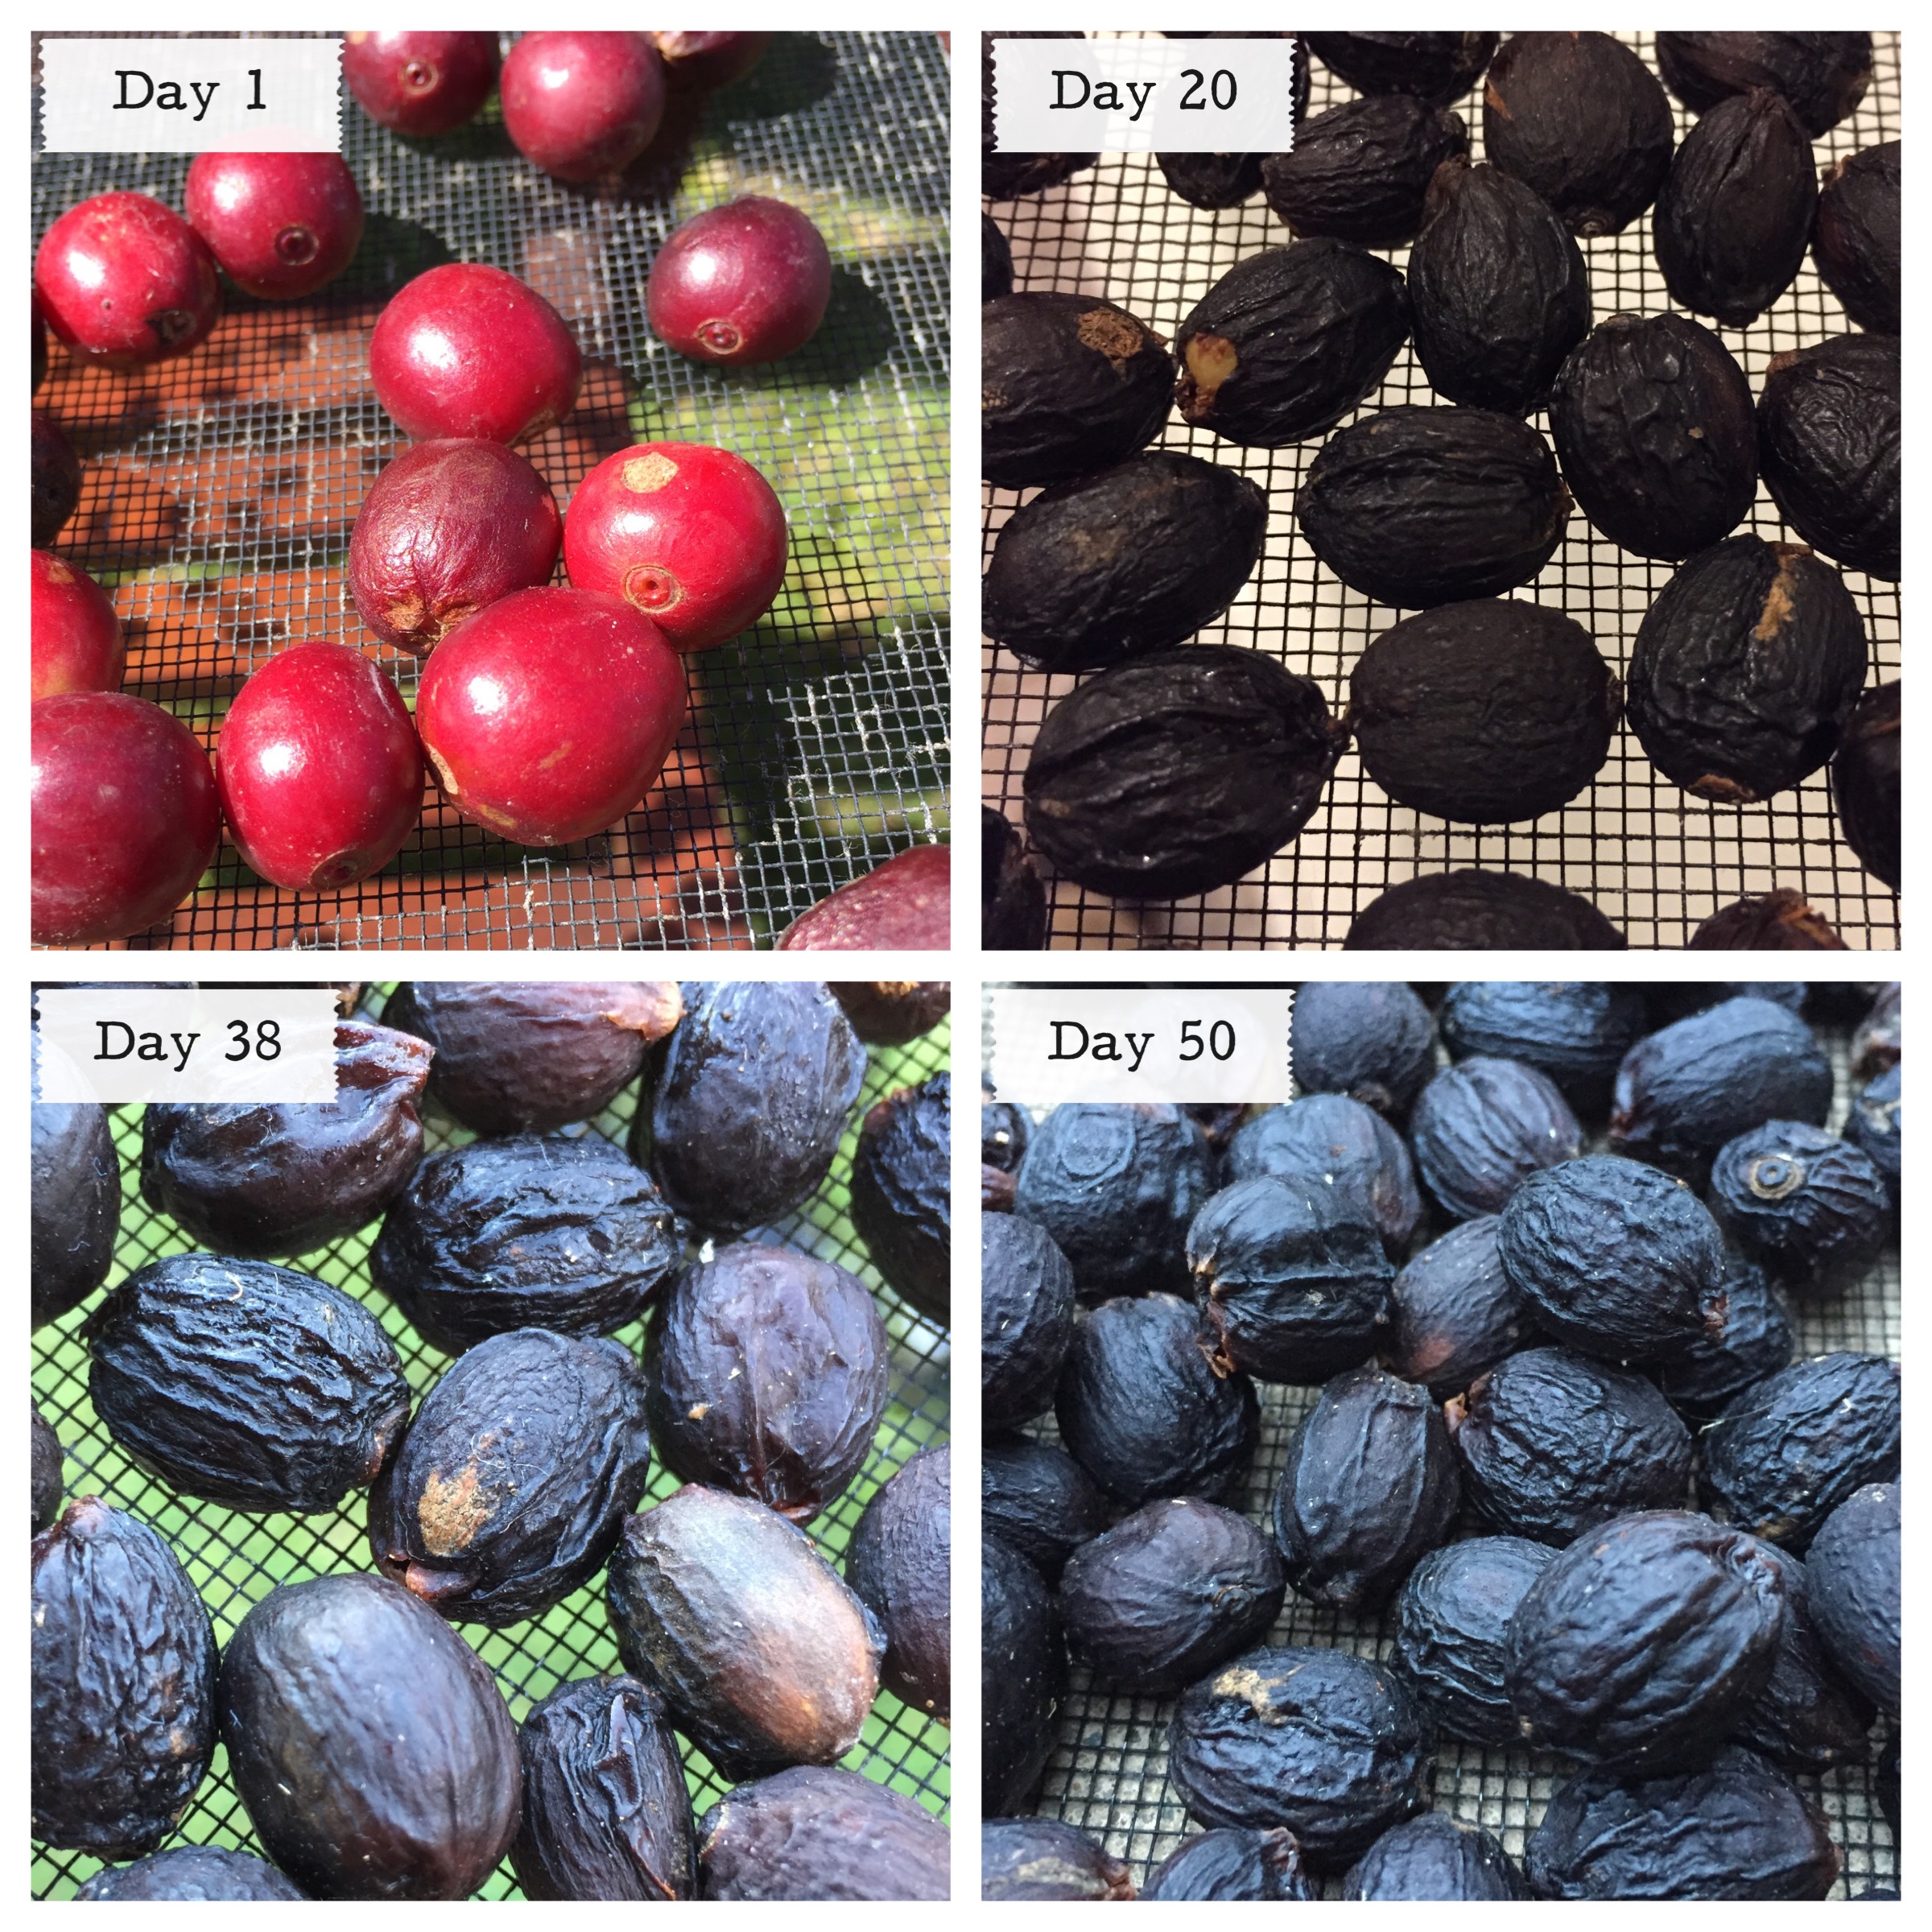
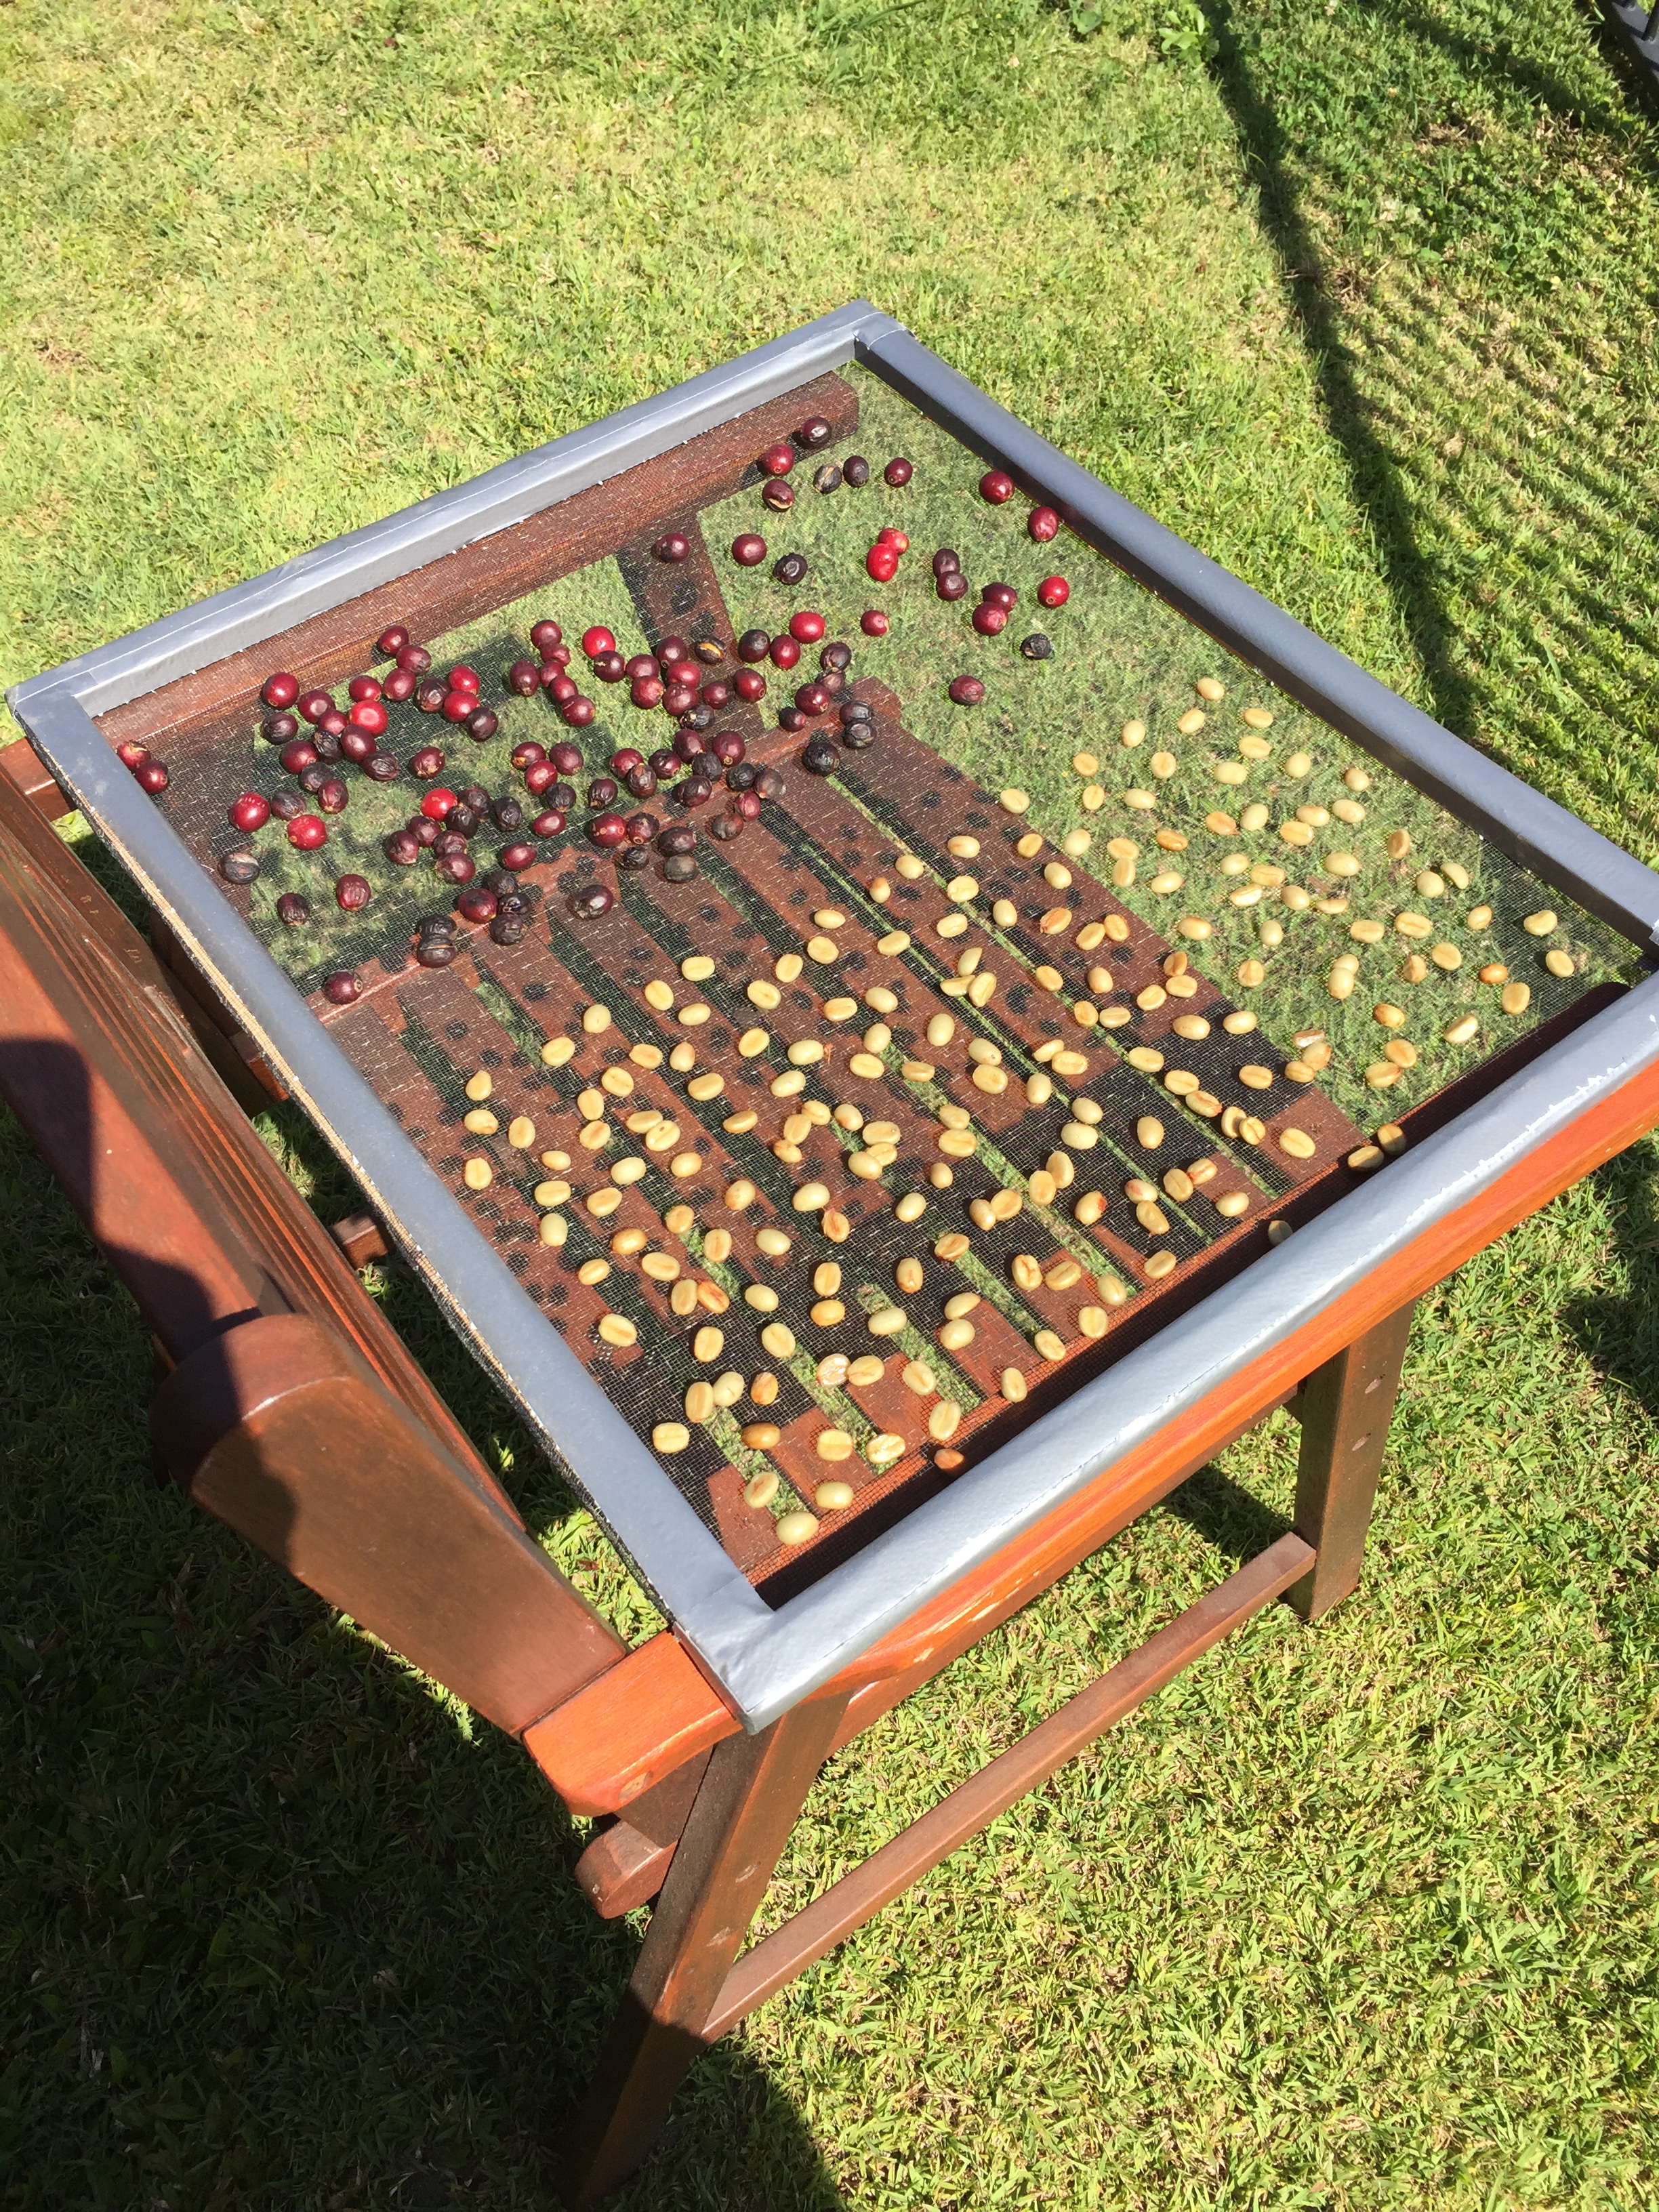
Natural processed batch across four time points.

Four time points: natural processing.

This is exactly what I should have done, however with a lot of my focus on the honey processed batch, it didn’t really occur to me to just pull the naturals from the drying bed and proceed with the next stage of processing. As I write this it sounds ridiculous not to have done this, however also in retrospect, I at least know what the longer end of the drying scale produces, and I’d rather have that knowledge in the bank and work on a shorter time period in future. Have I ever mentioned before I do these things to learn? I think I may have somewhere along the line.

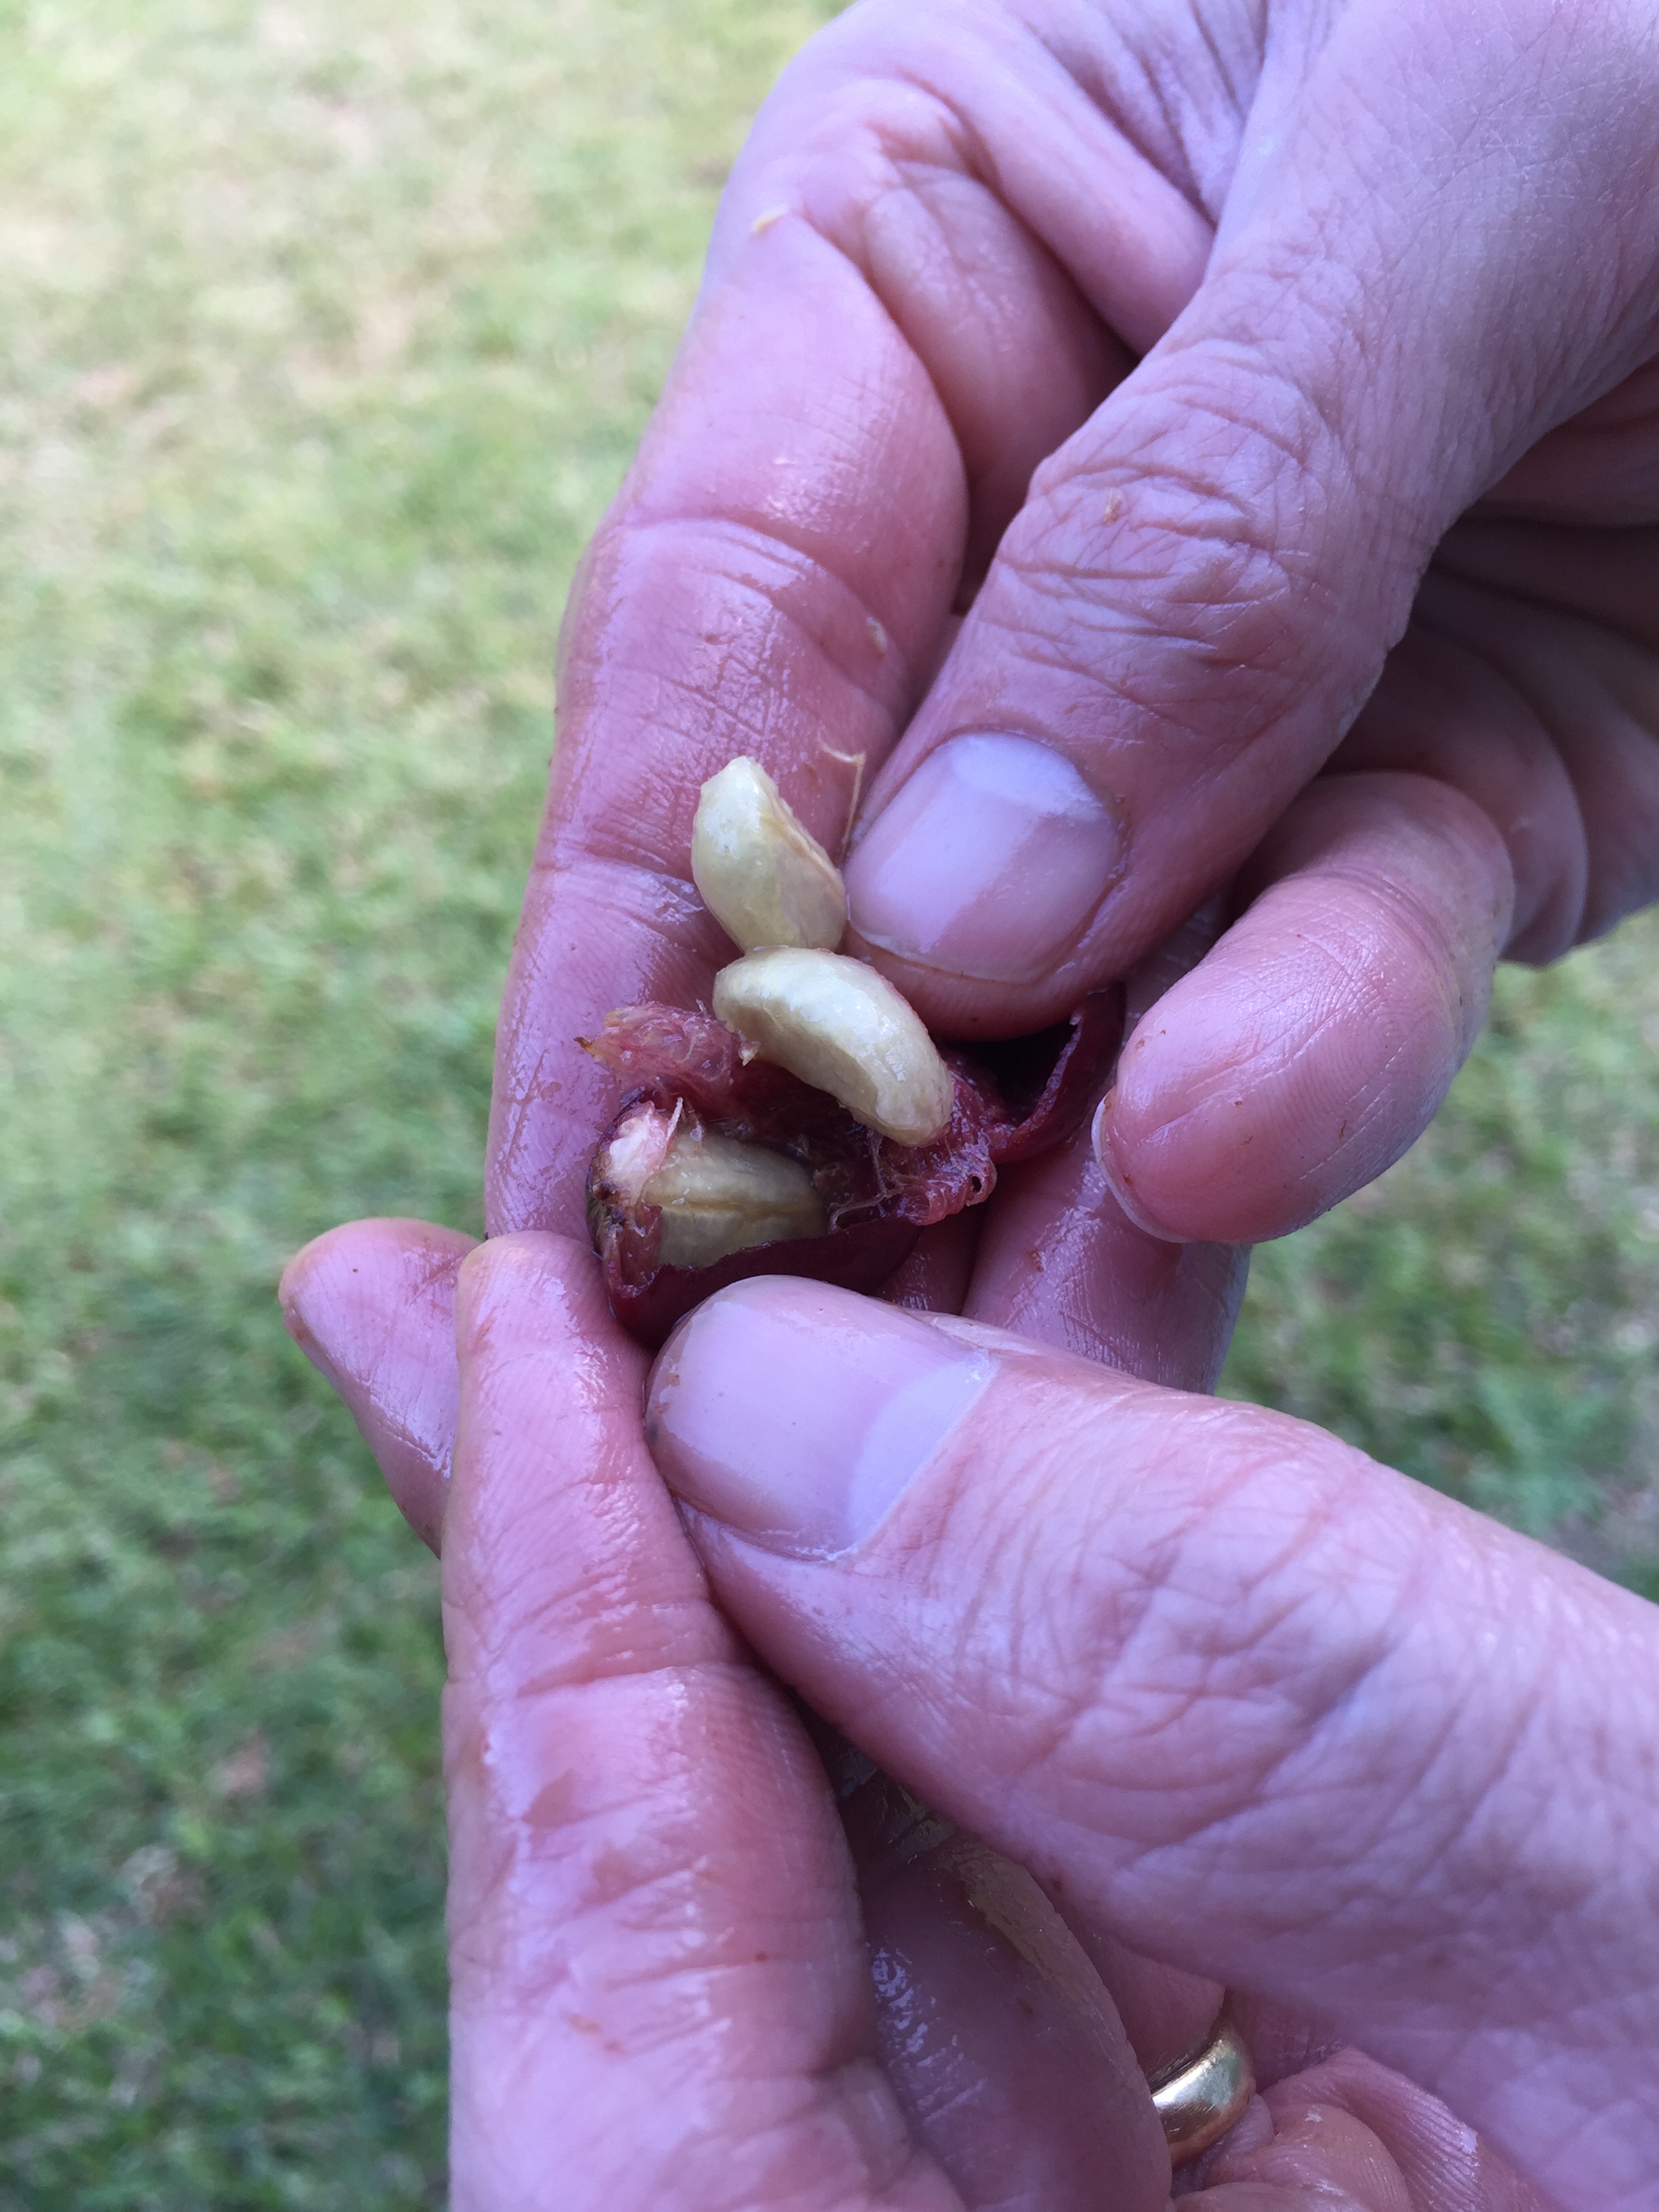
In any event, the naturally processed batch had dried well, and it was onto hulling – or removing the outer skin, pulp and parchment layer. This was a fairly straightforward process, however with anything more than a very small batch becomes very time intensive. Piercing the skin with my finger nail, opening the dried pulp and pulling away all of the layers together left the just the green been, with a little silver skin which often clings, and is blown off during roasting.

Hulled and ready for roasting

Hulled and ready for roasting

In comparison with the washed processing method (of the DIY kind), if we are talking total effort and time, I found the removal of these outer layers all at once to be easier than the separate steps of pulping followed by removal of the dry parchment post-drying.

Honey process

It was with the honey processed batch that things were held up a little. I’ve mentioned in Part Two about the sticky outer coating of mucilage on the beans — and when I say sticky, I mean really, really sticky.

I had assumed after a week or so this would begin to dry out, which did occur as a warm dry day progressed, however as each day drew to a close and the air temperature fell, the stickiness returned. I even tried bringing them inside at night (stopping short of tucking them in after turning down the bed and laying a chocolate on their pillow) for a number of days however this really had no effect.

At the time I simply pushed on, assuming perhaps after a few weeks I’d have a dry batch, however this wasn’t so. Of course my error here was assuming an outer dry layer correlated with drying of the inner bean. I’ve yet to work out an exact relationship between the two, however I’d they are in some way related.

At around day 16 or 17 the first signs of dark spots began to appear on the outer surface of some beans. I proceeded on the basis I would either end up with a batch of beautiful “black honey” processed beans, or a heap of mould. I had my hopes on the former, however fully expected the latter. Remember at this stage things were still quite sticky, so I thought I had a way to go before they might be ready. In reality, it took another 10-12 days before the black spots began to increase. After around 38 days, it had well and truly taken hold of many of the beans.

Four time points: honey processing

Four time points: honey processing

So, by that stage I was indeed left with what appeared to be a pile of mould. The evenness in appearance of a true black honey processing method was replaced by what definitely appeared to be groups of black spores enveloping each bean. It was time to cut my losses and proceed only with the naturally processed batch.

A few lessons

First, I’d pull up stumps earlier on both batches of beans if I’d had my time again. Waiting for the honey processed batch to dry further was probably an exercise in futility. In doing so, I inadvertently left the naturals a good deal longer than planned (at least a coupe of weeks longer).

Also, plan on life getting in the way a little. By the time I had really decided the drying time was probably done, it was another week to remove the hulls from the naturals, and a further two until roasting. Not the end of the world, however when most things are limited to weekends, it’s not hard to blow out a scheduled timeline by weeks at a time. That said, I’d rather have that happen than not try this at all.

After all was said and done, I did actually venture back into the shed and remove the parchment layer from a couple of beans in the mouldy honey processed batch. Surprisingly, the bean appearance was reasonably good, however by that time I had already decided to abandon them — probably the wisest choice given the amount of mould on those outer layers.

If you are considering processing your own coffee at home, my advice would be to stick with a fully washed process, or if you are looking to dabble in some dry methods, perhaps go with a straight “natural” process.

Also, having now tried both wet and dry processing methods, I can offer the perspective that in a backyard DIY situation there is a little more work at the “front end” of the washed processing, however after that first week of pulping and washing, there only remains the hulling — or removal of the parchment layer once the beans have dried out.

By comparison, in a natural processed batch, there really is minimal effort required at the front end of the process, and come the time when the dried cherry is pulped and hulled, all layers come away pretty easily, and all you have left is the bean — ready to roast. On balance, looking at the total effort involved with each, I’d come down in favour of the natural processing method. Remember, the issues I had with turning the coffee during the drying process were all related to the honey processed batch. The naturals? As simple as running your hand over them or giving the drying frame a bit of a shake.

Concluding the processing

Reading through what I have written above, you may get the impression getting the coffee this far was all a little too hard, and perhaps not worth the time overall.

Nothing could be further from the truth, and I will definitely be processing more coffee naturally in future. Honey processing? Probably not — I’ll leave that to the experts in Costa Rica, and many other countries now processing this way.

For future batches though I’ll probably begin by limiting the drying time to around 20 days or so and see how the roast and taste compares with the current batch of 50 days duration. From there it’s only a matter of altering the time frames for further experimentation. I’m definitely looking forward to pursuing this further in future.

The remainder of this post will focus on the naturally processed batch, given the outcome of the honey processed lot detailed above.

Roasting

Once processing was complete, it was time to turn to roasting. Something which would be a fairly delicate task given the size of the batch remaining.

Remember, I began with 210 grams of coffee cherries in the each group. After the drying, the Natural crop had reduced in weight to 100 grams, and after de-pulping: 46 grams — a fairly small batch to roast. However, roast we must — otherwise everything to this point becomes fairly irrelevant.
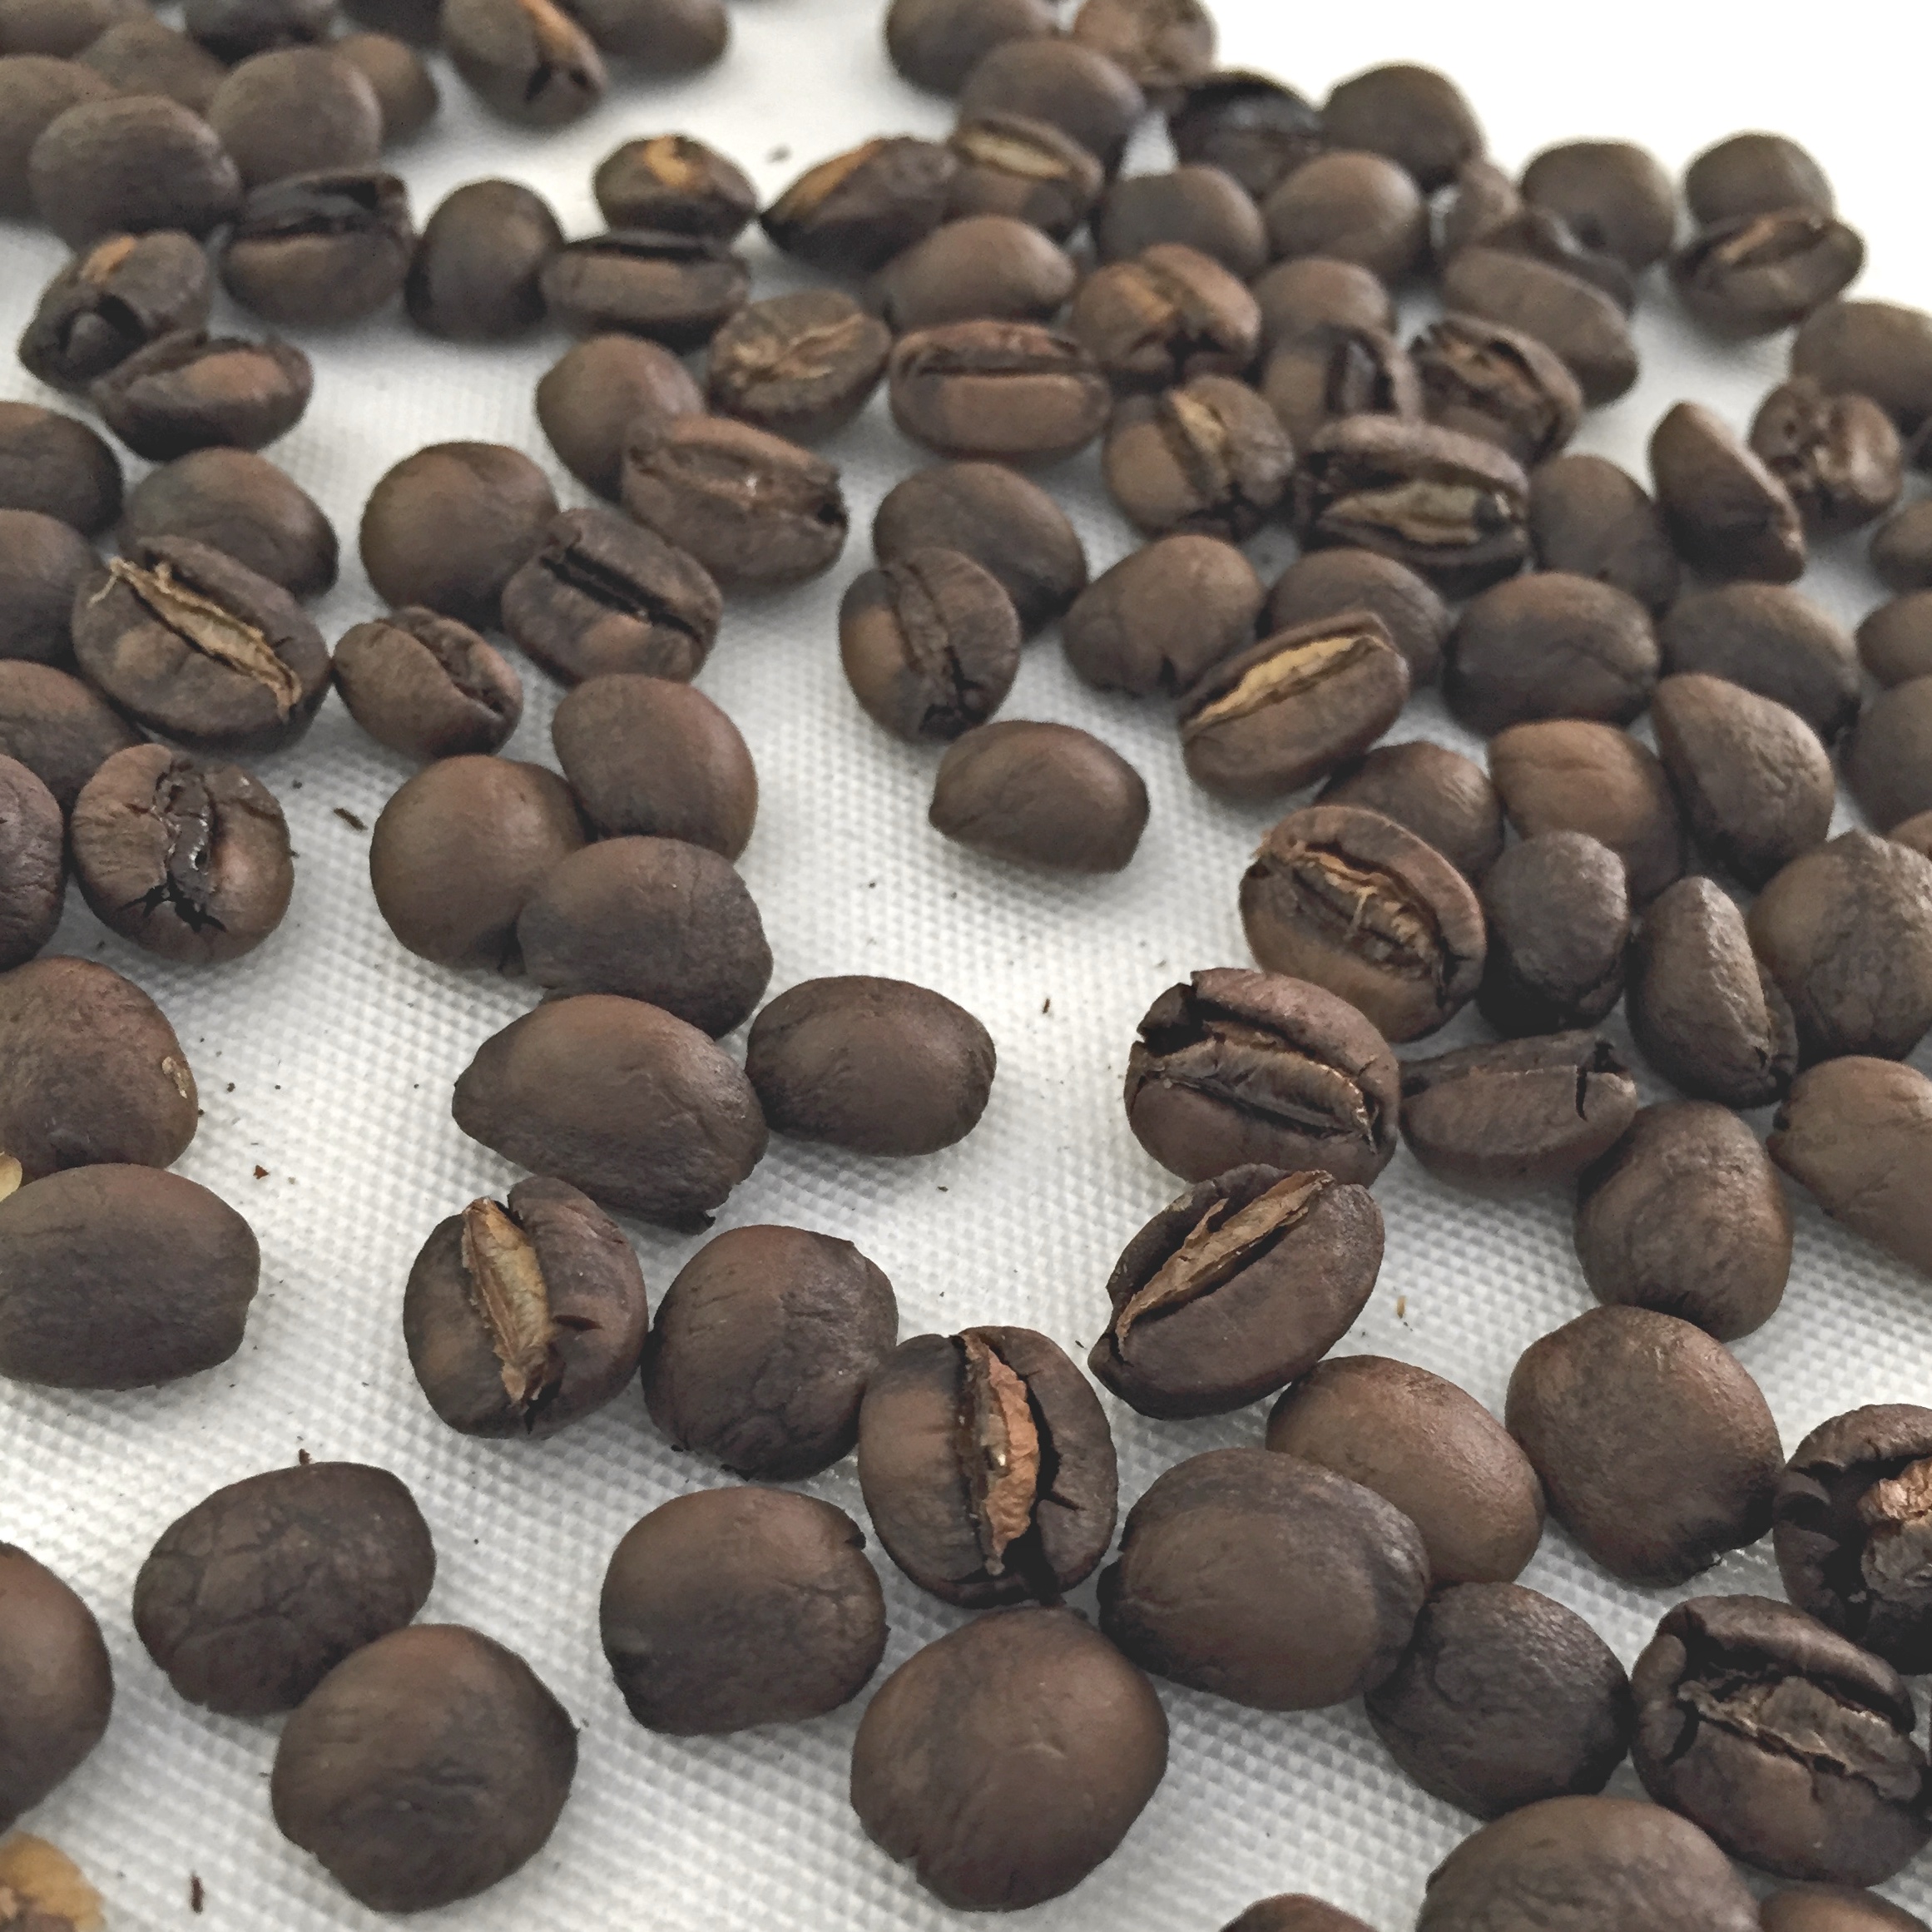
A successful roast

A successful roast of the naturally processed batch

The plan was to brew the resulting roast by filter, so a light to medium roast was in order. For those who may be interested, checking back on my roasting notes, the total roast time was 11 minutes, with a development of 19%.

Drinking

Having climbed the mountain, we were now at the summit, and the amount remaining to brew? A healthy 37.5 grams of roasted coffee, which had rested for seven days post roast and was now ready to go. Given I had a few tasters (family members) around the table, we had one shot at it, so with the hope my grind setting and brew recipe were somewhat close to the mark, away we went.

  • Coffee: Nine South Estate 2015 Natural
  • Region: Alstonville1 NSW, Australia
  • Grower: L & J Denison
  • Elevation: 140 m
  • Processing: Sun-dried Natural
  • Crop year: 2015

So how did it taste?

The result: shared with those who produced it

The result: shared with those who produced it

In all honesty, better than I expected. Sure, it wasn’t the pinnacle of fruity naturally processed greatness, however overall I would describe it as very well-balanced, with medium to light body, mild citrus acidity, with the predominant flavours woody spice and a hint of chocolate. Although not overpowering, there certainly some of those earthy flavours which can be apparent in naturally processed coffee, and these were also evident in the dry aroma after grinding.

A very enjoyable brew, for which I admit to being quite thankful for given the process leading up to actually tasting the stuff. My group of tasters around the table? In summary, I’d say there was general acknowledgement the whole process had been a success, given what was now being consumed. Mostly, the “actually that’s not too bad/pretty good” comments you expect when taste testing something you may be a little dubious about initially.

Of course it would have been sensible at this point to have on hand a sample of the same coffee processed by the fully washed method wouldn’t it? It’s probably a little late to think of that when pouring the brew into the cups. Another for the “in retrospect – this is what I will do next time” file.

In conclusion

I began this natural processing experiment in the knowledge at some point in the next few years I will need to be processing the fruit produced on the coffee tree now growing so well in my back yard.
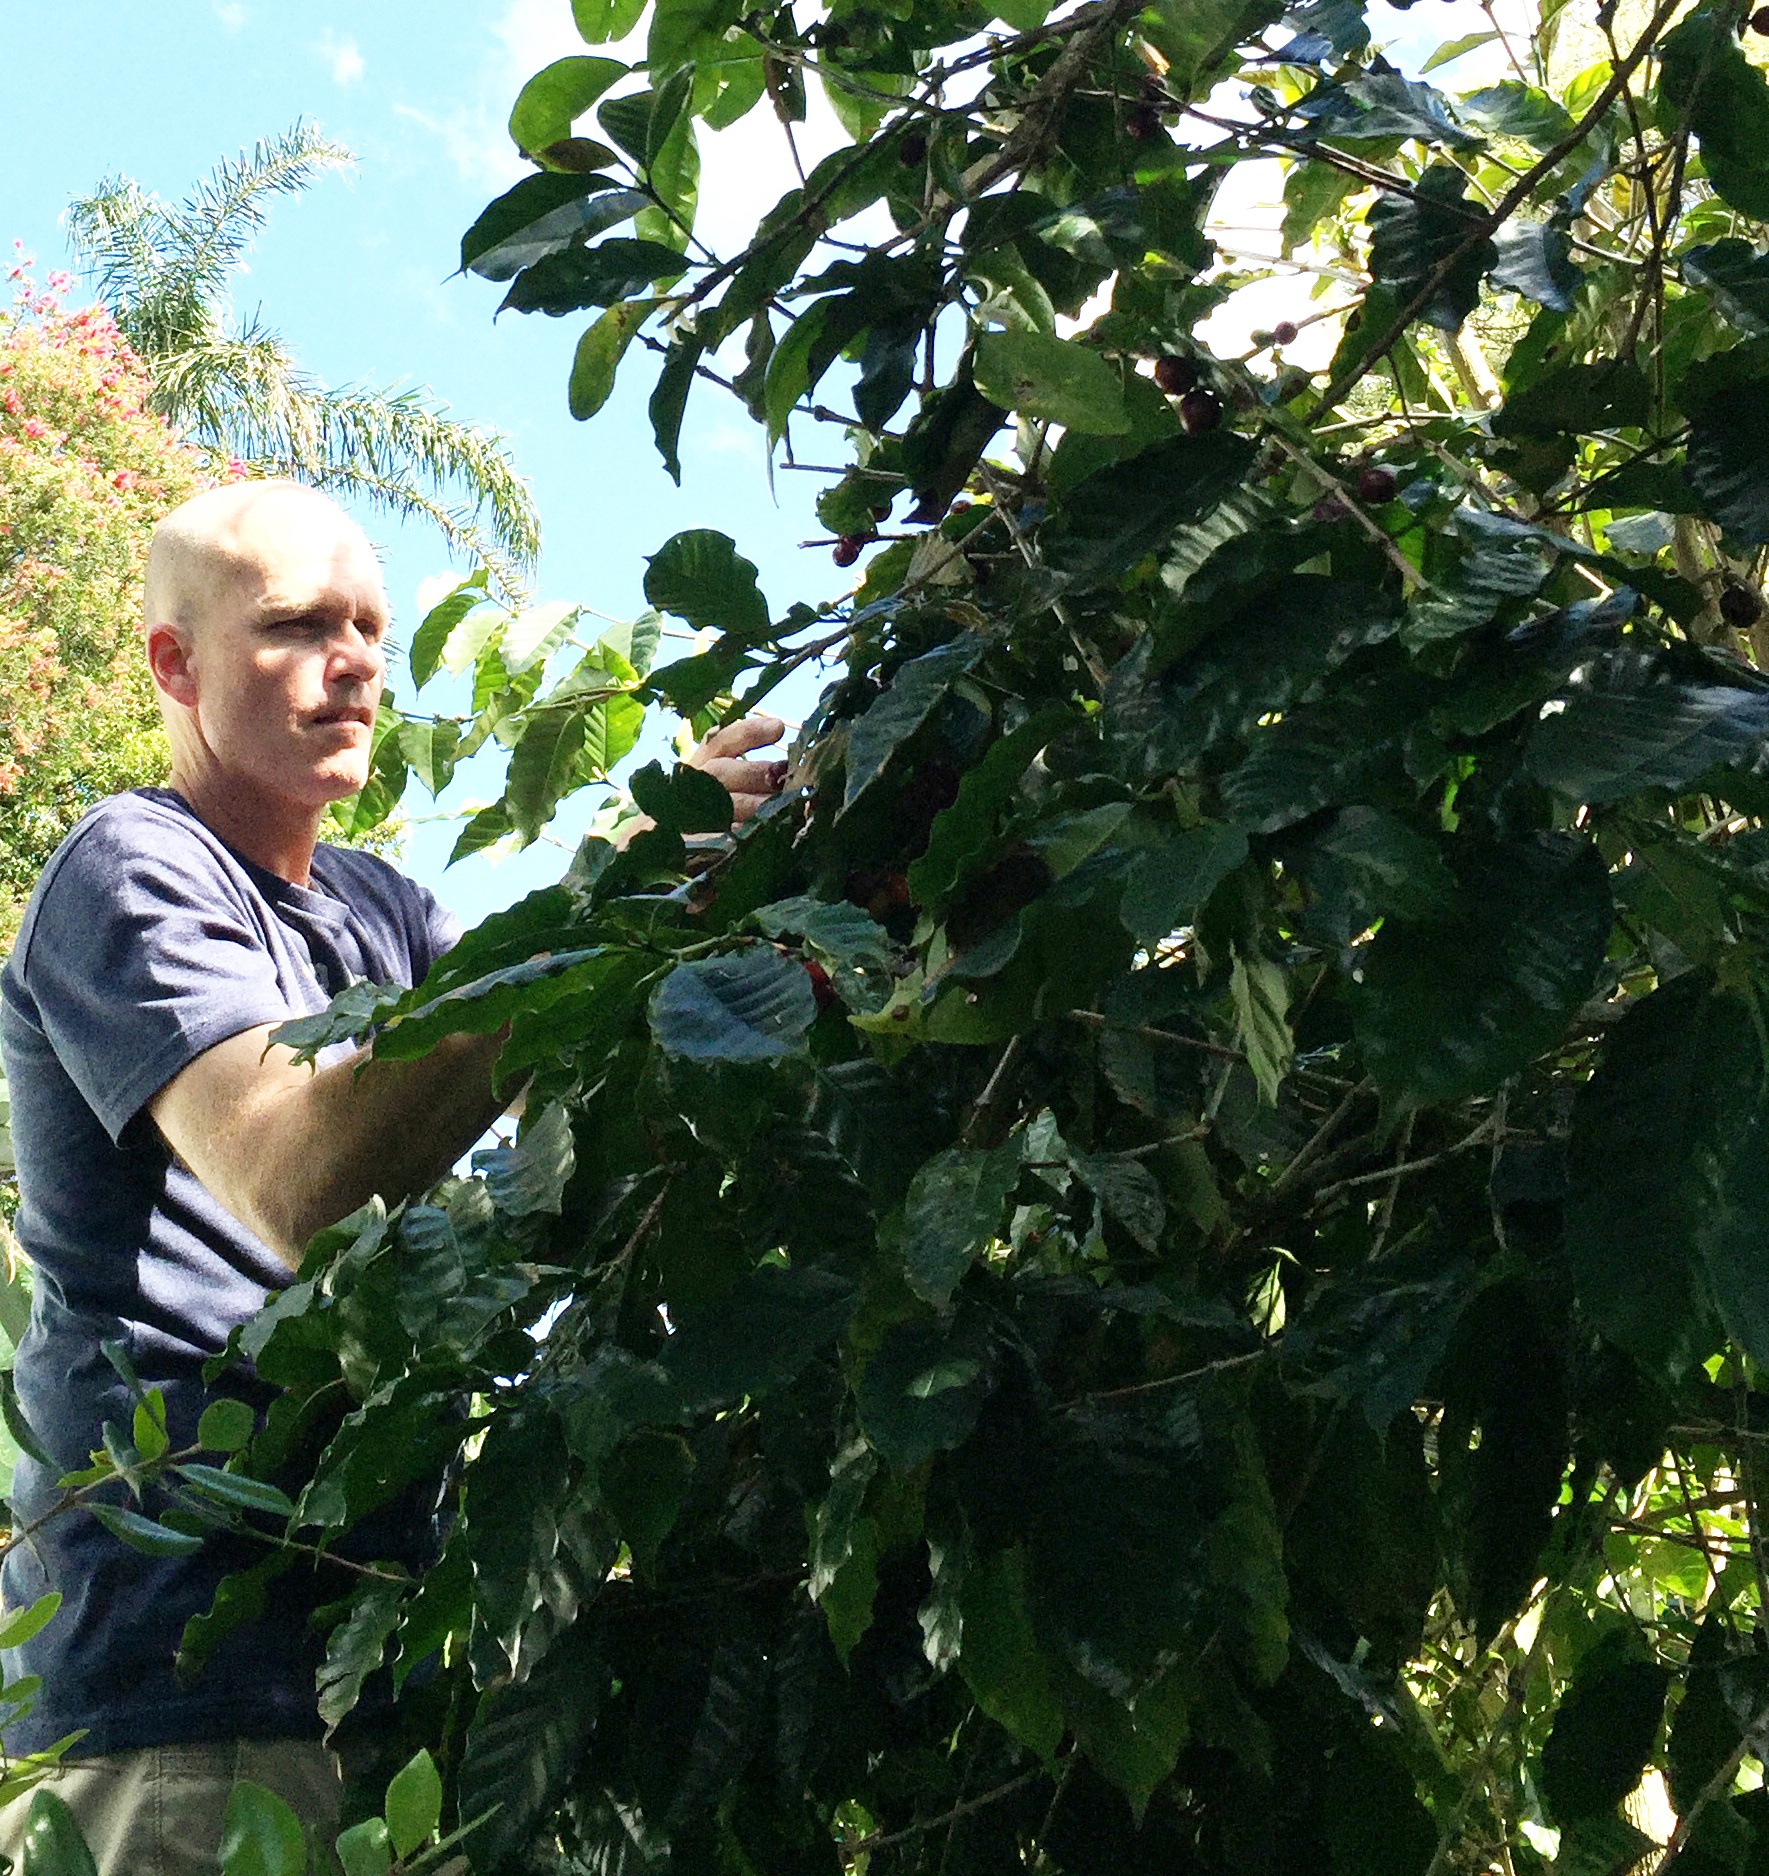
Where it all began

Where it all began

Having previously managed to process a batch using the wet or washed method successfully, I was keen to see how a naturally processed lot turned out in comparison. In summary, I’d say I have a way to go with both methods, with some experimentation still required as to the length of the drying time with my naturals; and more efficient methods associated with the wet processing. Of course the joy in all of this is the amount of taste testing required to assess the results from tweaks in my processes.

After completing my first foray into natural processing, I think I’ll leave the “honey” methods to the experts, having found this more difficult every step of the way, however I certainly plan to be using the power of the local sunshine for some more natural process drying in future.

I hope you’ve enjoyed reading this series of posts, and perhaps learned something from them — I know I certainly have. Signing off with a special message from the honey processed batch: ”thanks for sticking with me”.


  1. The town I grew up in before moving to Brisbane in 1990. ↩︎

Coffee: A Natural Processing Experiment Part 2 – Methods and a little madness

Welcome to the second instalment in a series of posts describing my use of dry processing methods to take a small batch of coffee cherries from the tree and into the cup. If you missed the initial post, you can find it here, along with a series of posts from a couple of years ago on washed processing methods which I have recently combined and republished.

Since publishing Part One some weeks ago, I’ve been crunching a few numbers (I do mean just a few: no complex algorithms or statistical modelling here), and hopefully can present something coherent about how this whole thing proceeded.

My expectations

To recap, I am experimenting with two dry processing methods: Natural processing, where after picking, the whole coffee cherry is simply laid out and sun-dried. Once the whole cherry has dried, depulping and hulling then follow. The second is Honey processing, where the flesh or pulp is removed from the cherry first, leaving the sticky mucilage layer on, with the beans then laid out and sun-dried.

At the outset, I planned to have the beans drying for three to four weeks or so, remove the pulp and mucilage from the naturals, and allow them to dry for a further week before roasting. The honey processed batch? Well, that was anyone’s guess, as I really had no idea how long it would take for the sticky mucilage to dry on the outside of the bean — particularly in a climate known for its humidity. Time would tell me, or so I hoped.

For that matter, I wasn’t even entirely sure as to how I would tell when the drying process had reached a stage where roasting would then be possible. I have mentioned the often quoted 12.5% moisture content in previous posts, however I do not have the necessary equipment to readily determine the exact moisture level.

Time and estimation would have to do.

Tools

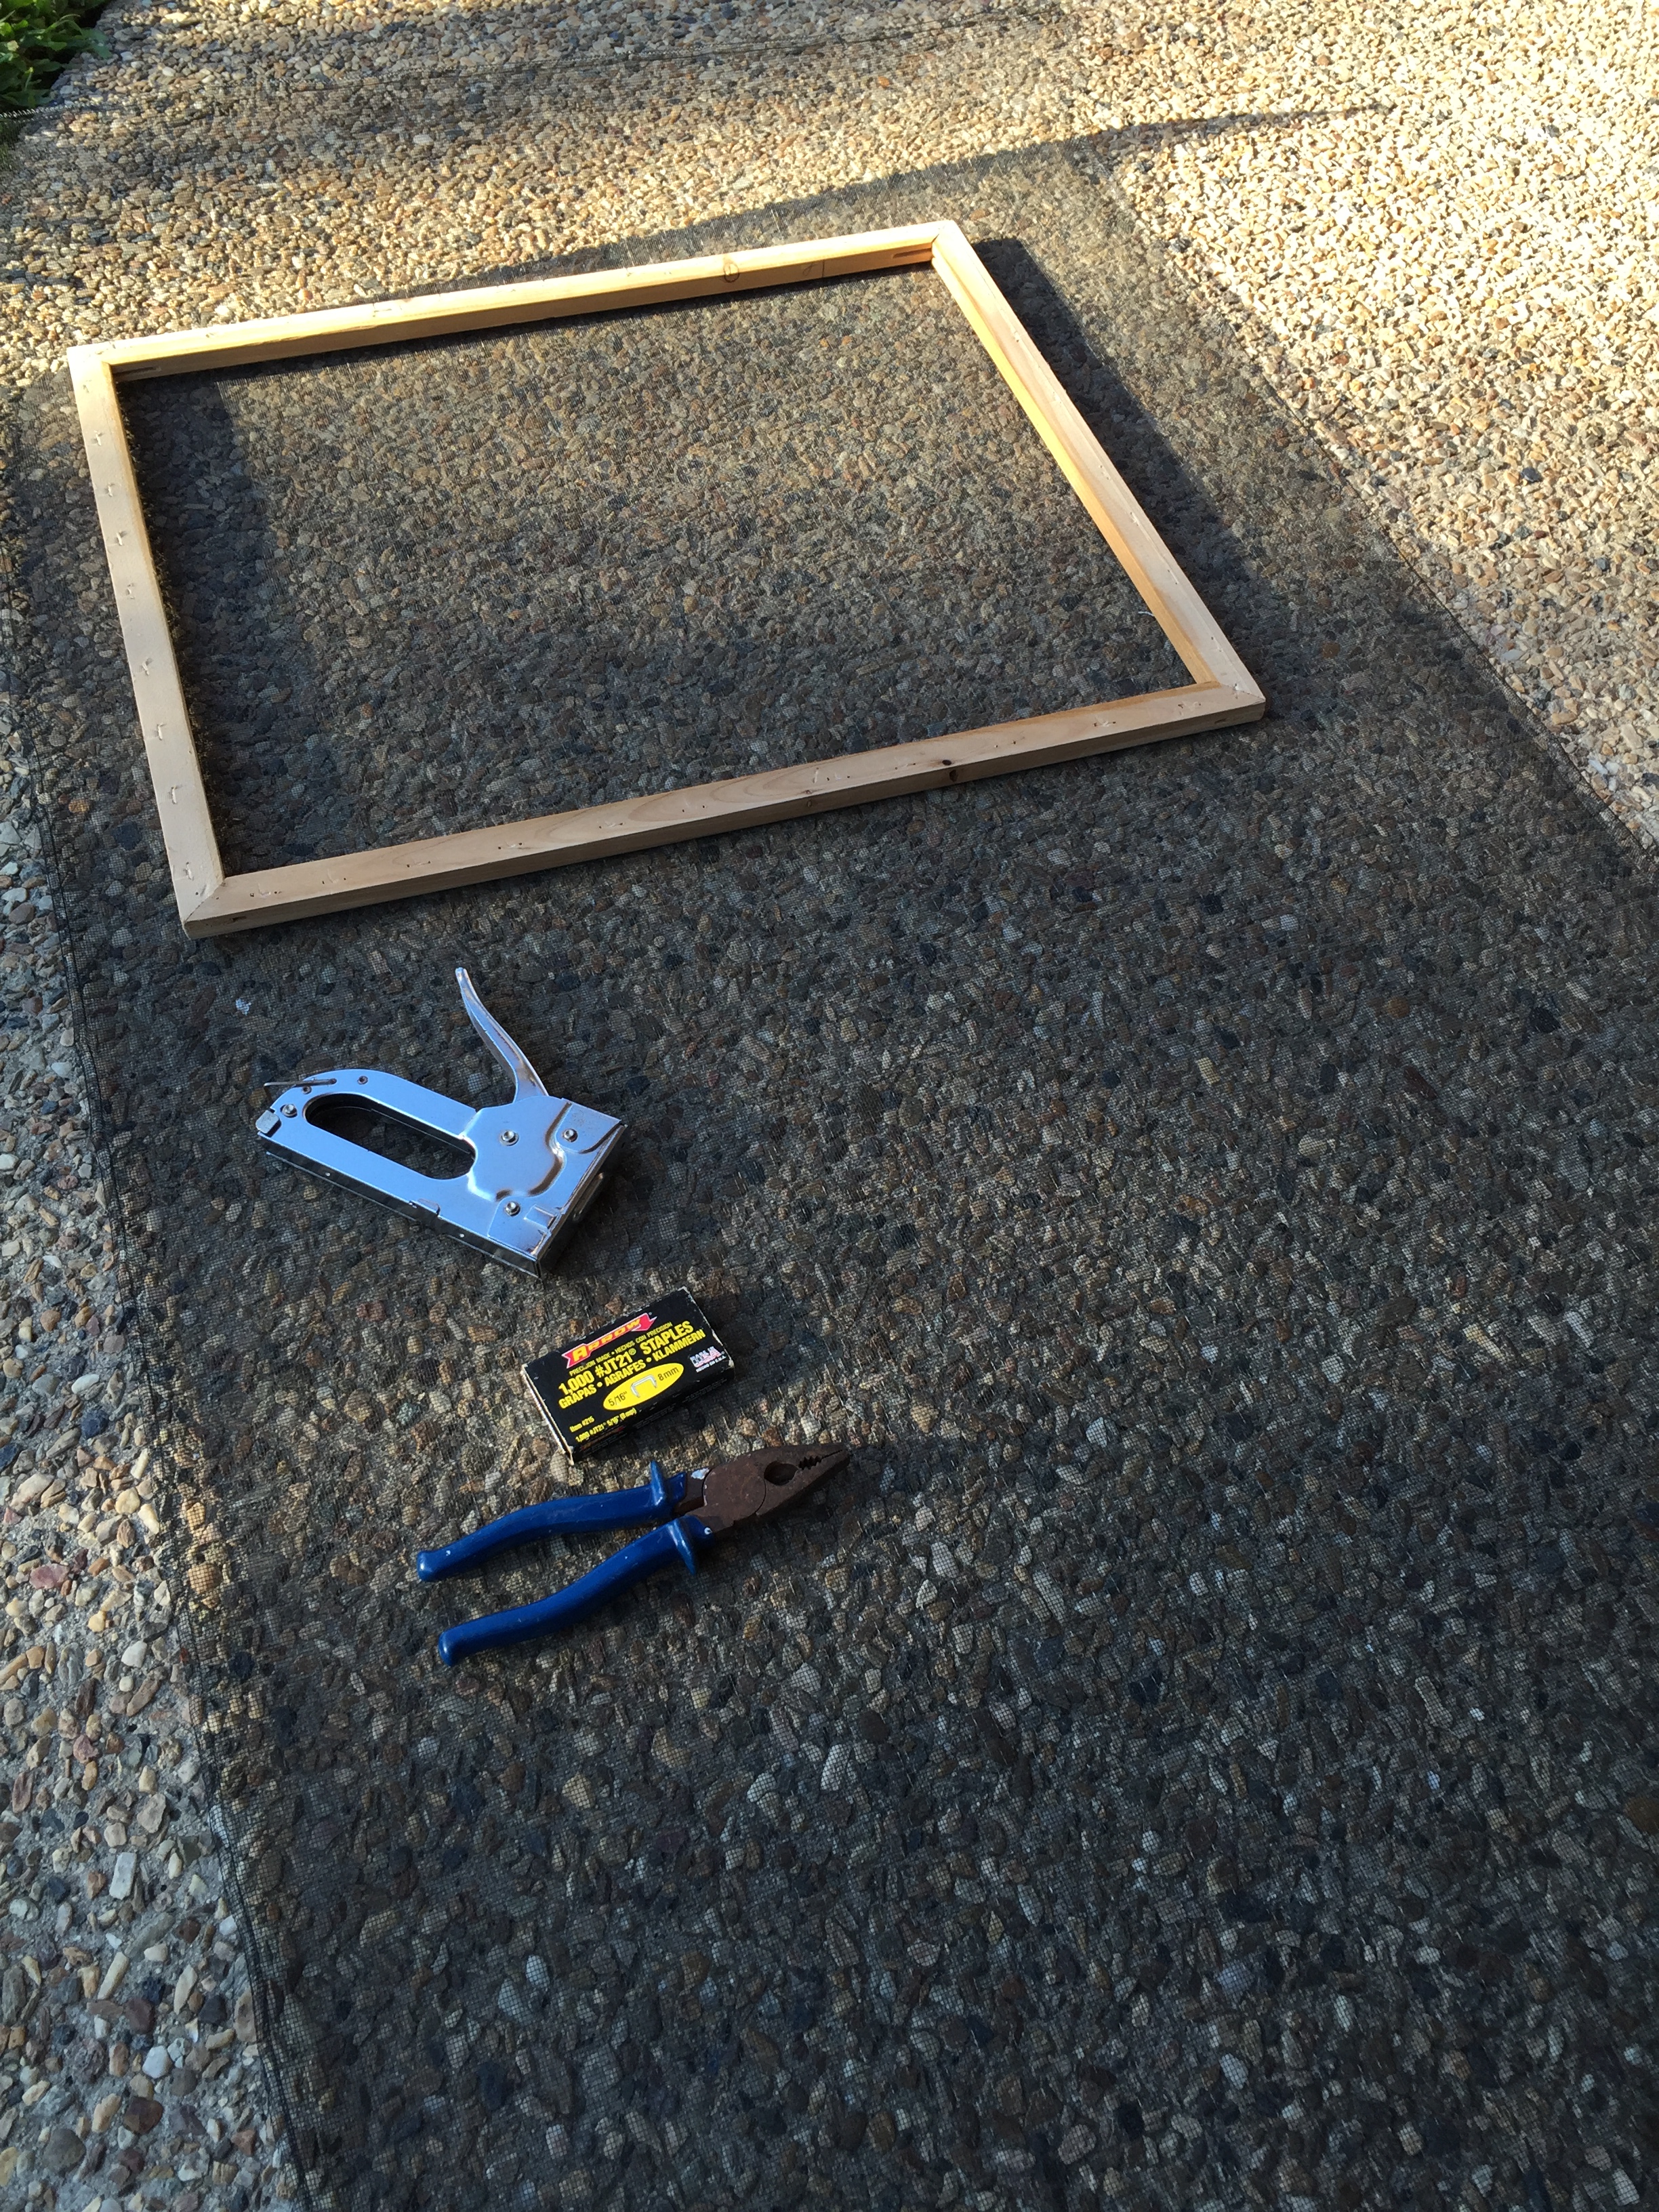
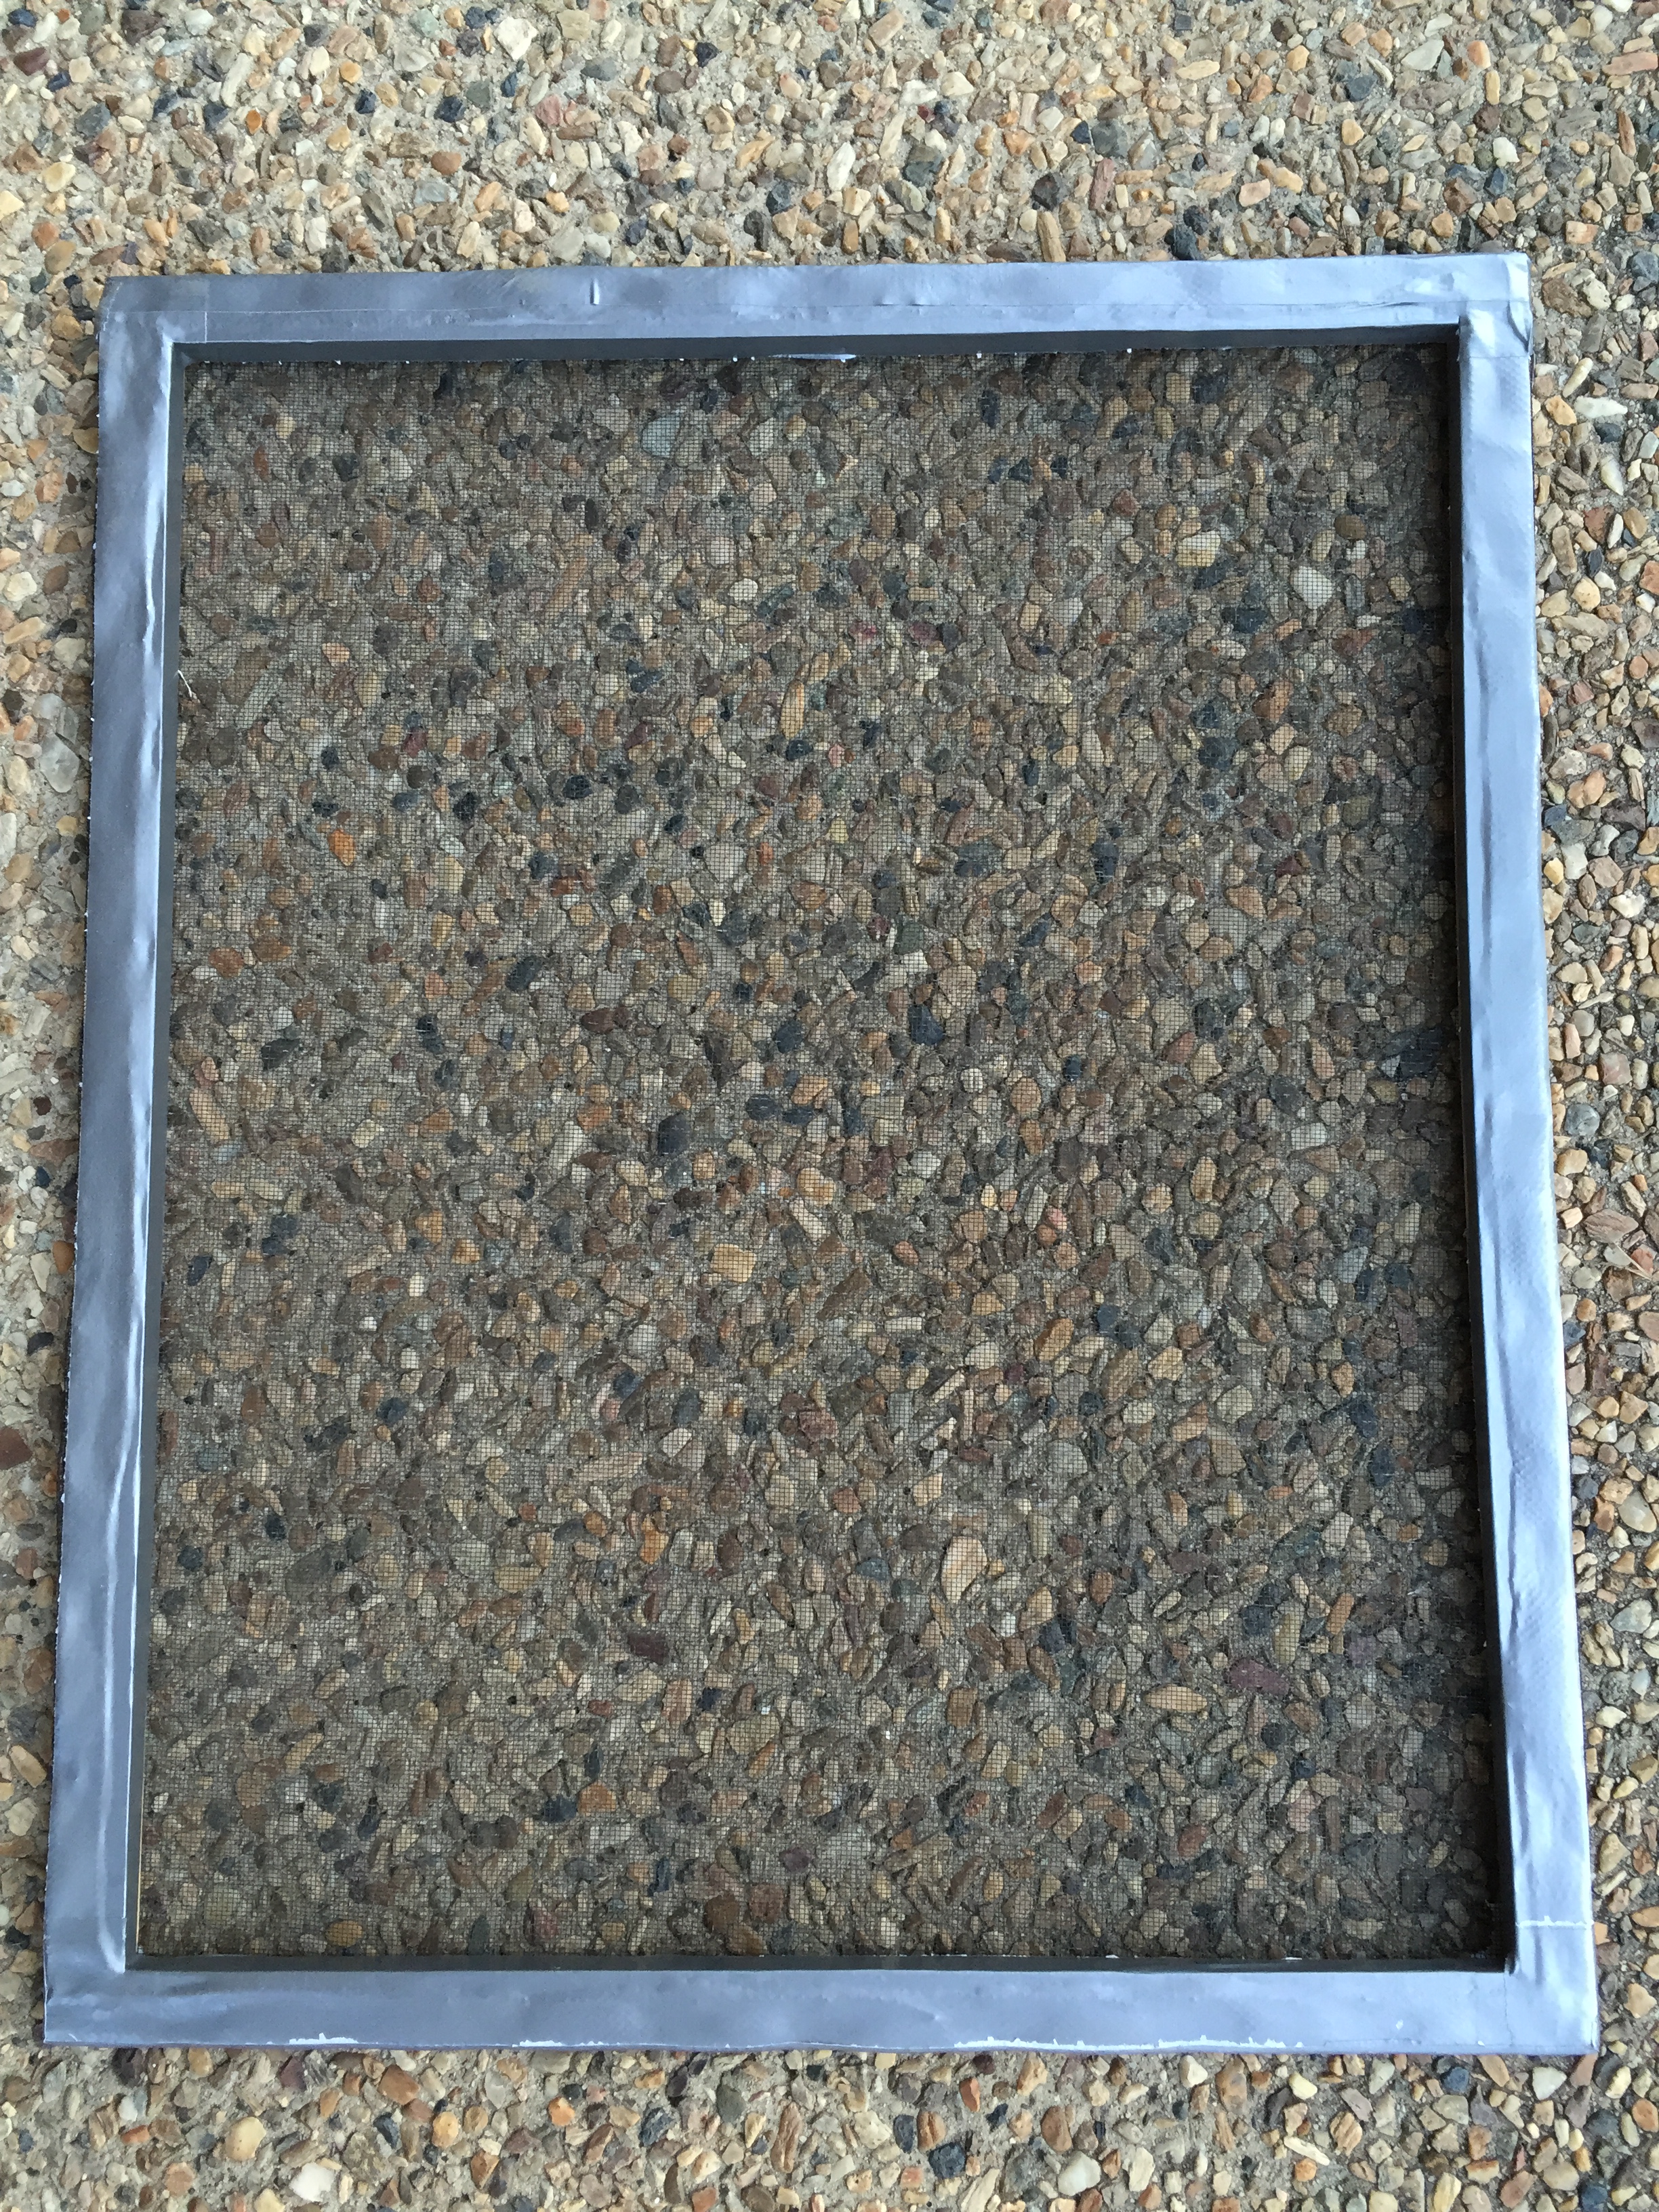
I say tools — however there was really only one: my custom-made raised drying bed. Sounds pretty fancy when described like that, however it consisted of a flyscreen-covered picture frame sitting across the arms of an outdoor chair. Fairly rudimentary, however not a great deal of complexity is needed to ensure adequate ventilation and airflow.

IMG_4915 IMG_4923

Other than that, it was simply my iPhone for recording photos and data, Day One app as I’ve mentioned in a previous post, and a couple of bowls for both beans and debris when depulping the honey processed lot and eventually the same for the naturals after drying.

Methods

Before we get too much further not things, I probably should mention upon beginning this whole process, I had 420 grams of coffee cherries by weight at my disposal.

IMG_4919

These were split into the two groups evenly, with 210 g into each of the natural and honey processed groups respectively. Of course this reduced quite significantly in the honey group once the pulp was removed, however I did not check the actual weight again.

Initial processing

As you can imagine, the naturals required zero processing to prepare for drying, with the exception being to check for any bad fruit.

For the honey group, this amounted to depulping or removing the skin and outer flesh by hand, leaving the sticky mucilage covering the parchment layer on the outside of the seed or “bean”. Not an overly onerous task, however at any great scale would require significant time and effort — or machinery.

IMG_4929 IMG_4930

Once complete, out on the drying rack they went, with a Day Zero photo taken, and we were under way.

Drying

Over the course of the drying period I followed the same routine to ensure the beans were regularly turned, and also covered from any dew which formed in the evenings:

  • at around 6 am each morning the chair and drying rack were placed out in my back yard in a position of full sun;IMG_4934
  • a photo of each batch was taken and uploaded to Day One with additional humidity data from the Bureau of Meteorology (courtesy of the Pocket Weather Australia iOS app);
  • any additional comments were added to the entry;
  • upon returning home from work, both batches were manually turned, with the drying rack placed back under cover of the patio roof, ready to repeat the process each day until completion.

It was during this process a little bit of madness set in. As I have mentioned on numerous occasions, the mucilage remaining on the honey processed batch was quite sticky. If you’ve ever had to move and turn numerous small sticky objects you’ll invariably understand the ensuing challenge.

By hand, well… the beans simply stuck to my hand. By a plastic IMG_5086paint scraper… the beans simply clumped and stuck to that. Eventually, I resorted to simply turning them by one by one. Wait…what? Yes, that’s right, flipping over each little bean and placing it softly down again on its little bed for the night, only to have it face the searing sun again the next day.

One. At. A. Time. Like I said — madness.

Despite this insanity, the routine worked well over the weeks this IMG_4995whole process took, with the exception of a few days where I was either home late or in a rush, and didn’t stop to turn them or record data and photos. In any event, each night they were in and the following day back out. During some stormy weather for a few days during the middle of the drying period they were also left under cover during the day. Better safe than sorry.

Final processing

Once the drying process was complete, we end up with essentially the reverse to how we started. The naturals required depulping, and for the honey group, only removal of the final parchment layer to expose the bean inside.

Just to be sure I planned to then leave the beans a further week before roasting.

The data

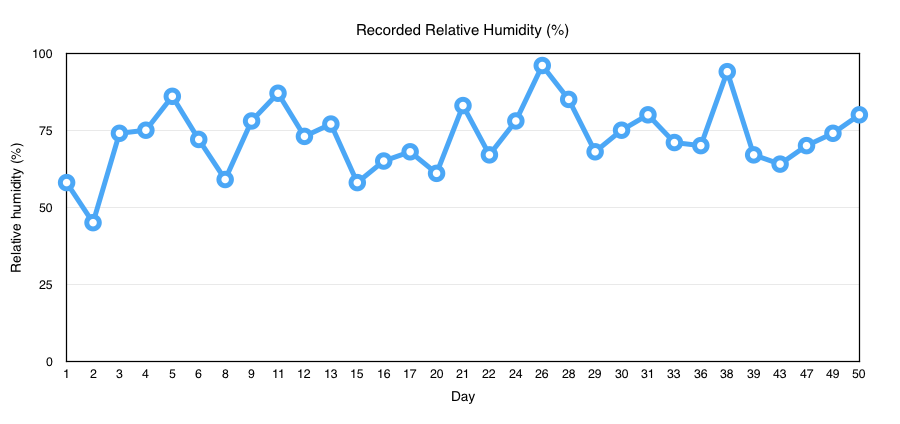
The result of the data recording in Day One was a 64 page PDF export containing basic data such as day, date and time; weather information (temperature and description); a photo record of the bean appearance, and any additional comments I made for the day’s entry, which importantly included a record of the relative humidity at the time — a known enemy of natural processing.

Although there were 64 entries, these were made on 32 individual days, with two entries per day the result of taking separate photo of each of the natural and honey groups each day. Although it might have been nice to upload two photos on the one entry, that was not a feature available to me at the time, however it is now, with a fantastic recent update to Day One.

Drying progress one week in.

Drying progress one week in.

Further to this point, although the entries were made on 32 individual days, with a few days missed here and there for various reasons, the entire process spanned 50 days in all — perhaps a little long, however we will get into that later. Typically around the time I begin entering data into a spreadsheet is when I also realise a few additional data points or variables collected may have assisted the overall analysis a little — this time was no different. Upon adding the temperature data, it soon became apparent the numbers probably didn’t quite reflect the actual temperature during the day, when those little beans took one for the team, and spent many hours in reasonably hot sun.

When entering the numbers I found myself thinking it had been a very mild October compared with how I remember it feeling day-to-day. It wasn’t long before I realised this was largely due to the fact that the times I had available to snap the photo and add the Day One entry, were either before or after work. Of course both these times occurred when the temperature had either yet to rise, or was already falling — really, must an occupation get in the way of everything — particularly hard-core science?

Thankfully, gathering additional data retrospectively is what we have the Internet for. The Bureau of Meteorology kindly helped out with mean, maximum and minimum temperatures, and a few other pieces of information such as rainfall and average sunshine over the course of the drying period. Would all of this additional data make any difference to how I conducted the drying? Absolutely not, however I think it does provide you with some idea of the conditions at the time, and perhaps whether or not it might be something you’d try yourself relative to how things turned out.

So, those numbers:

  • Drying period 50 days through October/November (Southern Hemisphere Spring);
  • October mean temperature range 16.3 – 27.1 degrees celsius (actual temperatures 12.9 – 33.8 degrees celsius);
  • November mean temperature range 19.8 – 29.2 degrees celsius (actual temperatures 16.1 – 33.4 degrees celsius);
  • mean hours per day of sunshine: October 9.1 hours; November 9.2 hours;
  • Total rainfall: October 55.8 mm; November 74.2 mm

What good is recorded data without a few charts, so I have included daily temperature and humidity recordings below, along with my own bean turning degree of difficulty score — which I understand is quite complex, however if you look hard enough I think it tells a story.

Screen Shot 2016-03-13 at 6.29.10 AM

Screen Shot 2016-03-13 at 6.29.29 AM

Screen Shot 2016-03-13 at 6.29.56 AM

Next: results and a few lessons

This post has started to become a little lengthy, so I have split off a closer look at the results and outcome for next time.

I’ve said it before and I’ll say it again here: the absolute best thing about writing this blog (beyond the knowledge that a few people actually read it), is what I learn along the way. Not simply from the research and dodgy backyard experiments that ensue, but how the act of writing makes me think a little more on the results, and what I might do differently or look into further next time. You know, that realisation you sometimes get: “well now that I say it out loud I’m not sure if it really is such a great idea”.

I hope you’ll join me for a few more realisations in the next post.


Coffee: A Natural Processing Experiment Part 1- Processing Methods

Regular readers will be aware I do a little coffee roasting at home, the majority of which occurs with green coffee beans bought online. A couple of years ago I published a five-part series on the techniques involved with washed processing of coffee, taking a very small batch through the processing stages from cherry off the tree and into the cup.

Back in November last year I republished these in a single post, in the knowledge I would be running through a similar experiment using natural processing methods. Around the same time I also put together a short piece about the app Day One, and how I planned to use it to monitor my progress.

One of my main aims in writing here is to push myself along in learning a little more about the specific details of my interests — in this case, coffee processing. To that end, it will help to look at some background information before I get started.

Coffee processing — what are the options?

Although the following is not a detailed explanation of each, it should serve as a general indication of the differences between the various processing options available after coffee is harvested from the tree. The three more popular methods at the current time are natural (dry), washed (wet) and honey processing. I will also briefly describe the semi-washed or wet-hulled method, and a semi-dry method: pulped natural processing.

The information that follows is a put together from the following sources, all of which I’d recommend for more detailed information and accompanying images:

Cafe ImportsCoffee Processes

D.R. WakefieldThe difference between semi-washed and fully washed methods

Perfect Daily GrindIndonesian Wet Hulled Coffee: Your One-Stop Guide

Origin Coffee RoastersBlack. Red. White. A Guide to Costa Rica’s Honey Process

Cafe BrittHoney Processed Coffee: What makes it so special?

Seattle CoffeeworksWhat on Earth is Honey Process?

James HoffmannThe World Atlas of Coffee (Book)

The article on the Seattle Coffeeworks blog is particularly useful to view the “anatomy” of a coffee bean, and provides a little more detail in describing each of the layers, which might be helpful in gaining a better understanding of some of the terms described below.

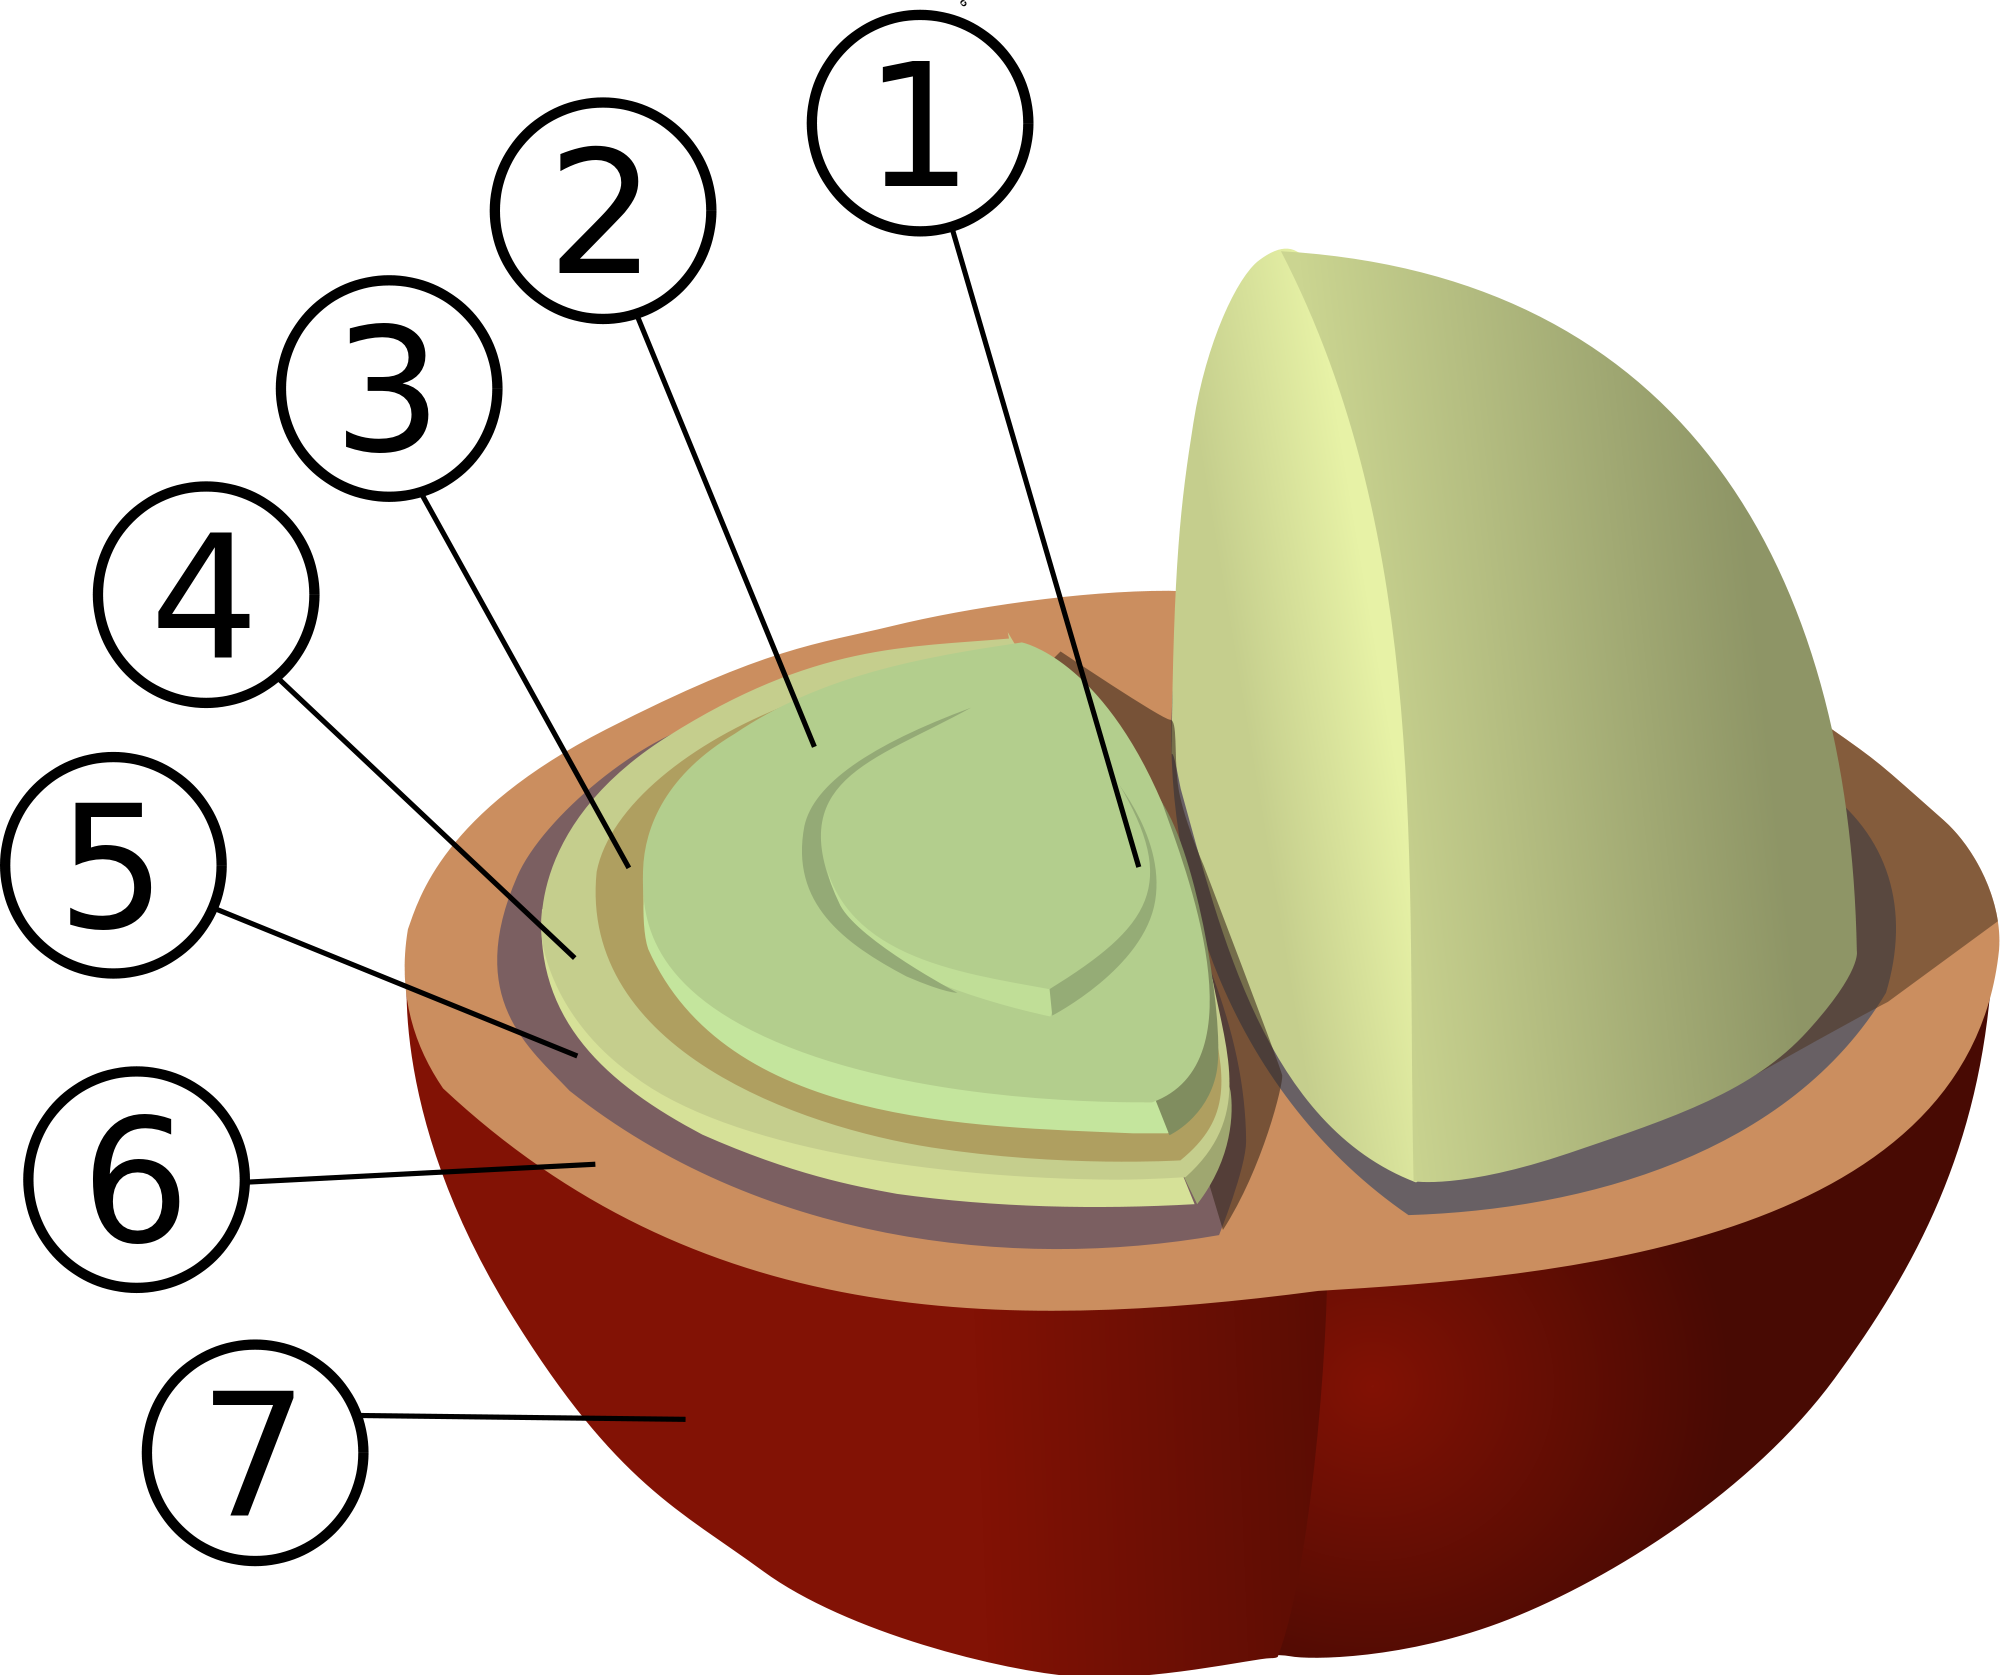
For reference, the following schematic diagram names each layer in the entire coffee cherry:

  1. 2000px-Coffee_Bean_Structure.svgCentre cut
  2. Bean or seed (endosperm)
  3. Silver skin (epidermis)
  4. Parchment (hull, endocarp)
  5. Pectin layer (mucilage)
  6. Pulp or flesh (mesocarp)
  7. Outer skin (pericarp, exocarp)


Wet processing methods

Fully washed

Described in its simplest form, wet processed or washed coffee involves extracting and fermenting the bean from the flesh of the pulp, followed by drying, or more specifically:

  1. The external fruit pulp (exocarp and part of the mesocarp) is removed by mechanical de-pulping machines;
  2. The remaining mesocarp or “mucilage” is insoluble in water and clings to the parchment layer strongly, needing removal by fermentation and washing, or friction in mucilage removal machines;
  3. The beans may then be taken through a second washing to remove any remaining debris;
  4. Drying is then undertaken on patios or raised drying beds.

(Note: this method is what I have described in my five-part series of posts linked to above; the above stages are all completed by hand rather than machine when done on a small-scale)

Wet-hulled or semi-washed

Typically a method used in countries such as Indonesia, where humidity is high, and rainfall abundant. Wet-hulling (giling-basah) is a traditional processing method used in these countries, and was developed due to the particular climate and conditions:

  1. After harvesting, the pulp is removed, leaving the mucilage and parchment covering the bean;
  2. Beans are fermented in concrete tanks or plastic rice bags overnight (this process assist with breaking down the pectin in the mucilage for easier removal);
  3. The beans are then washed to remove the mucilage (or sold to a larger processing mill to continue the processing);
  4. After mucilage removal, remaining is the wet parchment, hence this coffee may also be called “wet parchment coffee”;
  5. Sun drying occurs for 2-3 days, reducing the moisture content to 20-24% (wet processed coffees are dried to a moisture content of 11-12%, rendering the parchment brittle for easier removal);
  6. The parchment is then removed using machinery specifically designed for wet parchment coffee (greater friction is required);
  7. Further drying occurs in the sun by day, with the coffee stored in bags overnight to continue the fermentation until the moisture content is reduced to the desired level.

An interesting point to note here is a point about wet-hulled green coffee being recognisable by its “dark-green and patchy colour” which may also be described as blue. I’ve certainly noticed this in the green coffee I have purchased which was processed in Sumatra, and it is very bluish in colour — quite noticeable compared with green coffee from other regions around the world.

I’d highly recommend reading the original article on Perfect Daily Grind, as it goes into considerable detail around the origins of why the processing is used, possible defects, and advice for getting the most out of these types of coffees (including roasting).

Semi-dry processing methods

Although not typically a category you often see listed individually, semi-dry processing does use significantly less water than the washed or semi-washed methods described above.

Pulped natural

Pulped natural processing is apparently a common method used in, but not unique to Brazil — and you will certainly see this description on coffee originating from other countries. The actual stages are similar to the washed process described above, however the mucilage is removed with a pressure washing apparatus (taking care of steps 2 and 3 above), which removes the need for fermentation.

Without requiring large tanks and significant water for fermentation, the pulped natural method doesn’t quite fit in the wet processing category, however it is not fully dry either — therefore ending up in its own semi-dry category.

I must also point out that up until this point, I had not really looked closely at the subtle differences between pulped natural and honey methods of processing, however they are distinctly different, given the mucilage is removed in the former, however remains on in the latter (described further below).

Although consistency is apparently increased with pulped natural processing, as the risk of too much or too little fermentation is eliminated, thinking goes that this consistency possibly comes at the expense of flavour. Pulped natural coffees commonly tend to have lower levels of acidity in their flavour profile.

Dry processing methods

Natural

Natural processing is probably the most common of the dry methods, and involves leaving the coffee cherry intact, sun drying, then removing all outer layers from the bean:

  1. early_cherry_natural_processThe coffee is harvested, and in some cases drying has already been allowed to commence on the tree;
  2. The pulp or flesh is left on, and the cherry is dried intact, with drying completed on raised beds or patios until the desired 11-12% moisture level is achieved;
  3. The entire hull (dried pulp and parchment layer) is then removed mechanically;
  4. The remaining seed or green coffee bean is then ready for export.

As you can see, this method is the simplest in the form of steps or intervention required, however I am certainly not suggesting it is necessarily easy to do well.

Honey

Honey processed coffees are a further subgroup of those classed as naturally processed, containing additional sub-groups based on specific criteria. This method originated and became popular in Costa Rica, progressively spreading to other countries in recent years.

The term honey is believed to have derived from the stickiness of the mucilage on the outside of the bean, which has a honey-like texture. Believe me – its sticky alright. Here is a short video demonstrating this to some degree, as producer Graciano Cruz of Los Lajones Estate talks about the honey processing method.

Farmers may separate their crop after harvesting, with the aim of developing different flavour profiles based on varying the amount of mucilage left on the bean and altering drying times. These discrete groups provide the various classes of honey processed coffees:

  1. White honey — all mucilage removed from the coffee seed; sun-dried uncovered
  2. Yellow (or golden) honey — approximately 50-75% mucilage removed; gains a yellow colour; dried in minimal shade over 7-10 days;
  3. Red honey — approximately 25-50% mucilage removed; longer drying time and perhaps combined with cloud/shade cover; dried over 14-21 days;
  4. Black honey — no mucilage removed; 100% of the sticky outer coating remains over the seed; covered to elongate drying time up to 30 days.
3_honey_coffee_colour

Adapted from Cafe Britt, showing (L to R) yellow, red, and black honey colouration after drying.

A point to note on the above list: most articles on honey processing will point to variations that occur from mill to mill or between individual producers. For example, I have seen descriptions indicating black honey processing involves drying the beans covered, with a relatively quick drying time — yet others suggest the drying time is longer. The percentages above are also approximations based on different articles I have read on the subject.

Why use dry or semi-dry processing methods?

For me personally, the answer is a simple: because I am interested and would like to see how things turn out. On a larger, professional scale, the reasons are obviously very different, and in a competitive marketplace, are a little more involved.

Perhaps to oversimplify things a little here, the answer seems to come down to two main aspects: flavour and environment (in which I include both climate, and the producer’s location and built environment — that is, access to technology and logistics around production etc).

When we talk of flavour (obviously quite important in the coffee game), Timothy Hill, of Counter Culture coffee summarises the flavour thinking in relation to natural processing:

With the natural processing, you’re letting the fruit and the nutrients from the skin and the sugars go into the seed through the drying process

In general, there seems to be the philosophy whereby natural coffees are a truer reflection of the flavour of the coffee cherry itself. This is not to say washed coffee holds none of these inherent characteristics, however from a consumer’s perspective, it is not often the two can be directly compared. In saying that, more producers seem to be showcasing different processing methods of similar or same harvest lots side by side.

As far as the other factors I have mentioned in relation to climate, technology, environment and overall capacity of the producer, Hill also goes on to note:

…the setup cost is extremely low—you don’t have to have a pulper, concrete, the machinery, electricity to run it — if you’re running a pretty large-sized farm. The labor and how to do it right is really tough. So it definitely is easy to take on; it’s really hard to do well.

And from Sweet Maria’s on climate suitability:

Natural coffees are perhaps the original method to process coffee. If the first coffee grown as commercial crop, for trading, was in Yemen, the climate is well-suited to dry processing. The western parts of Ethiopia such as Harar are traditional dry-processing areas. Older coffee-growing areas of Brazil as well as newer ones (Cerrado) have distinct seasons ideally suited to dry process method. If a farm can dry coffee from ripe cherry to hard, dried pod in 20 days, it is probably well-suited to DP (dry processing) methods.

Compared to washed processing, the natural method is clearly better suited to areas where water might be a scarcer resource, given its considerable utilisation in the various stages of the wet processing method. It then flows on, that drier (read less humid) climates would also be well suited to natural processing, which they appear to be.

Clearly in my humble backyard experiment, set up and ongoing costs are not a consideration at any scale, however with the coffee tree in my backyard now over a metre tall, there will be a time in future when processing considerations come into play. Although my time and effort required to process any coffee I produce will be a consideration, I suspect the local climate will perhaps dictate which method might be best overall.

The Experiment

Although I have called this series of posts a natural processing experiment – I use that term fairly casually. The plan is to outline in basic terms the methods I’ve used; data collected; recount how things turned out; and perhaps consider what I may do in future. What you won’t see are the usual scientific journal headings under which these components reside, nor a formal write-up with p-values, correlations, effect sizes or the like.

In simple terms, what you’ll read about is how I had a crack at it, followed by a tale of what happened.

Considering my natural processing options from those listed above, some thought was given to whether the methods used would be readily reproducible; easy enough to accomplish in terms of equipment, technique and time; and amenable to some type of tracking. Finally, it would be nice to utilise more than one type of processing and perhaps compare the two outcomes.

Of course there were some limitations in what I planned to do — climate for one. Many articles mention humidity as an “enemy” of natural processing, with Indonesian producers having adapted their methods to account for this, as I’ve described in the wet-hulled processing above. Although I have no real control over this, the drying period occurring in late spring provided some hope of finishing this phase before the full brunt of Brisbane summer humidity arrived.

Also, I have no real means of measuring the moisture content of the beans, with devices capable of this more expensive than what I’d be prepared to outlay at the current point in time. It is also beyond the scope of what I wanted to do, however would have provided decent points of reference for both data monitoring and as an indicator of when the process might be done. To that end, based on what I had read to date: “that seems long enough” would have to do.

In the end, I decided to try natural processing (entire cherry intact and sun-dried), along with a sample of the honey processing method, most closely aligned with what I have described as “black honey” above (pulp removed, with the entire mucilage remaining on the outside of the bean). In retrospect, the black honey method may not have been the wisest choice in a humid drying environment, however trying to remove some of the mucilage first and to what degree, did not easily satisfy my “ease of use” criteria — whereas removing the pulp and simply leaving them did.

IMG_4931

So things were now underway. A small lot of coffee cherries halved into even smaller batches, one natural and the other honey processed. Hopefully I have done a reasonable job above in explaining the basic differences between methods to provide you with some understanding of each — no doubt many of you will already be fairly familiar, however I though it would be a good starting off point.

Future post(s) will report back on progress and ultimately the outcome of my own little experimentation into natural processing methods — hopefully you’ll check back in and see how things went.


Third Wave Wichteln 2015

2016-01-18 tww_logo

Image courtesy Third Wave Wichteln

Scrolling through the thirdwavewichteln hashtag on Instagram and Tumblr or in the Facebook group of the same name, I see packages of specialty coffee continuing to finally reach their intended destinations around the globe.

Bon(n) voyage!

Bon(n) voyage!

It is the second time I have participated in the Wichteln, and my parcel containing a bag of Washed Ethiopia Dumerso roasted locally by Coffee Supreme made its way successfully (confirmed via the social media pages noted above) to Bonn, Germany. I may have also thrown in a bag of the same coffee (this time Natural Process) roasted by yours truly — something I wouldn’t probably describe as a “bonus” necessarily, in the hope the recipient might enjoy comparing the two. Thankfully, Facebook tells me both were well received.

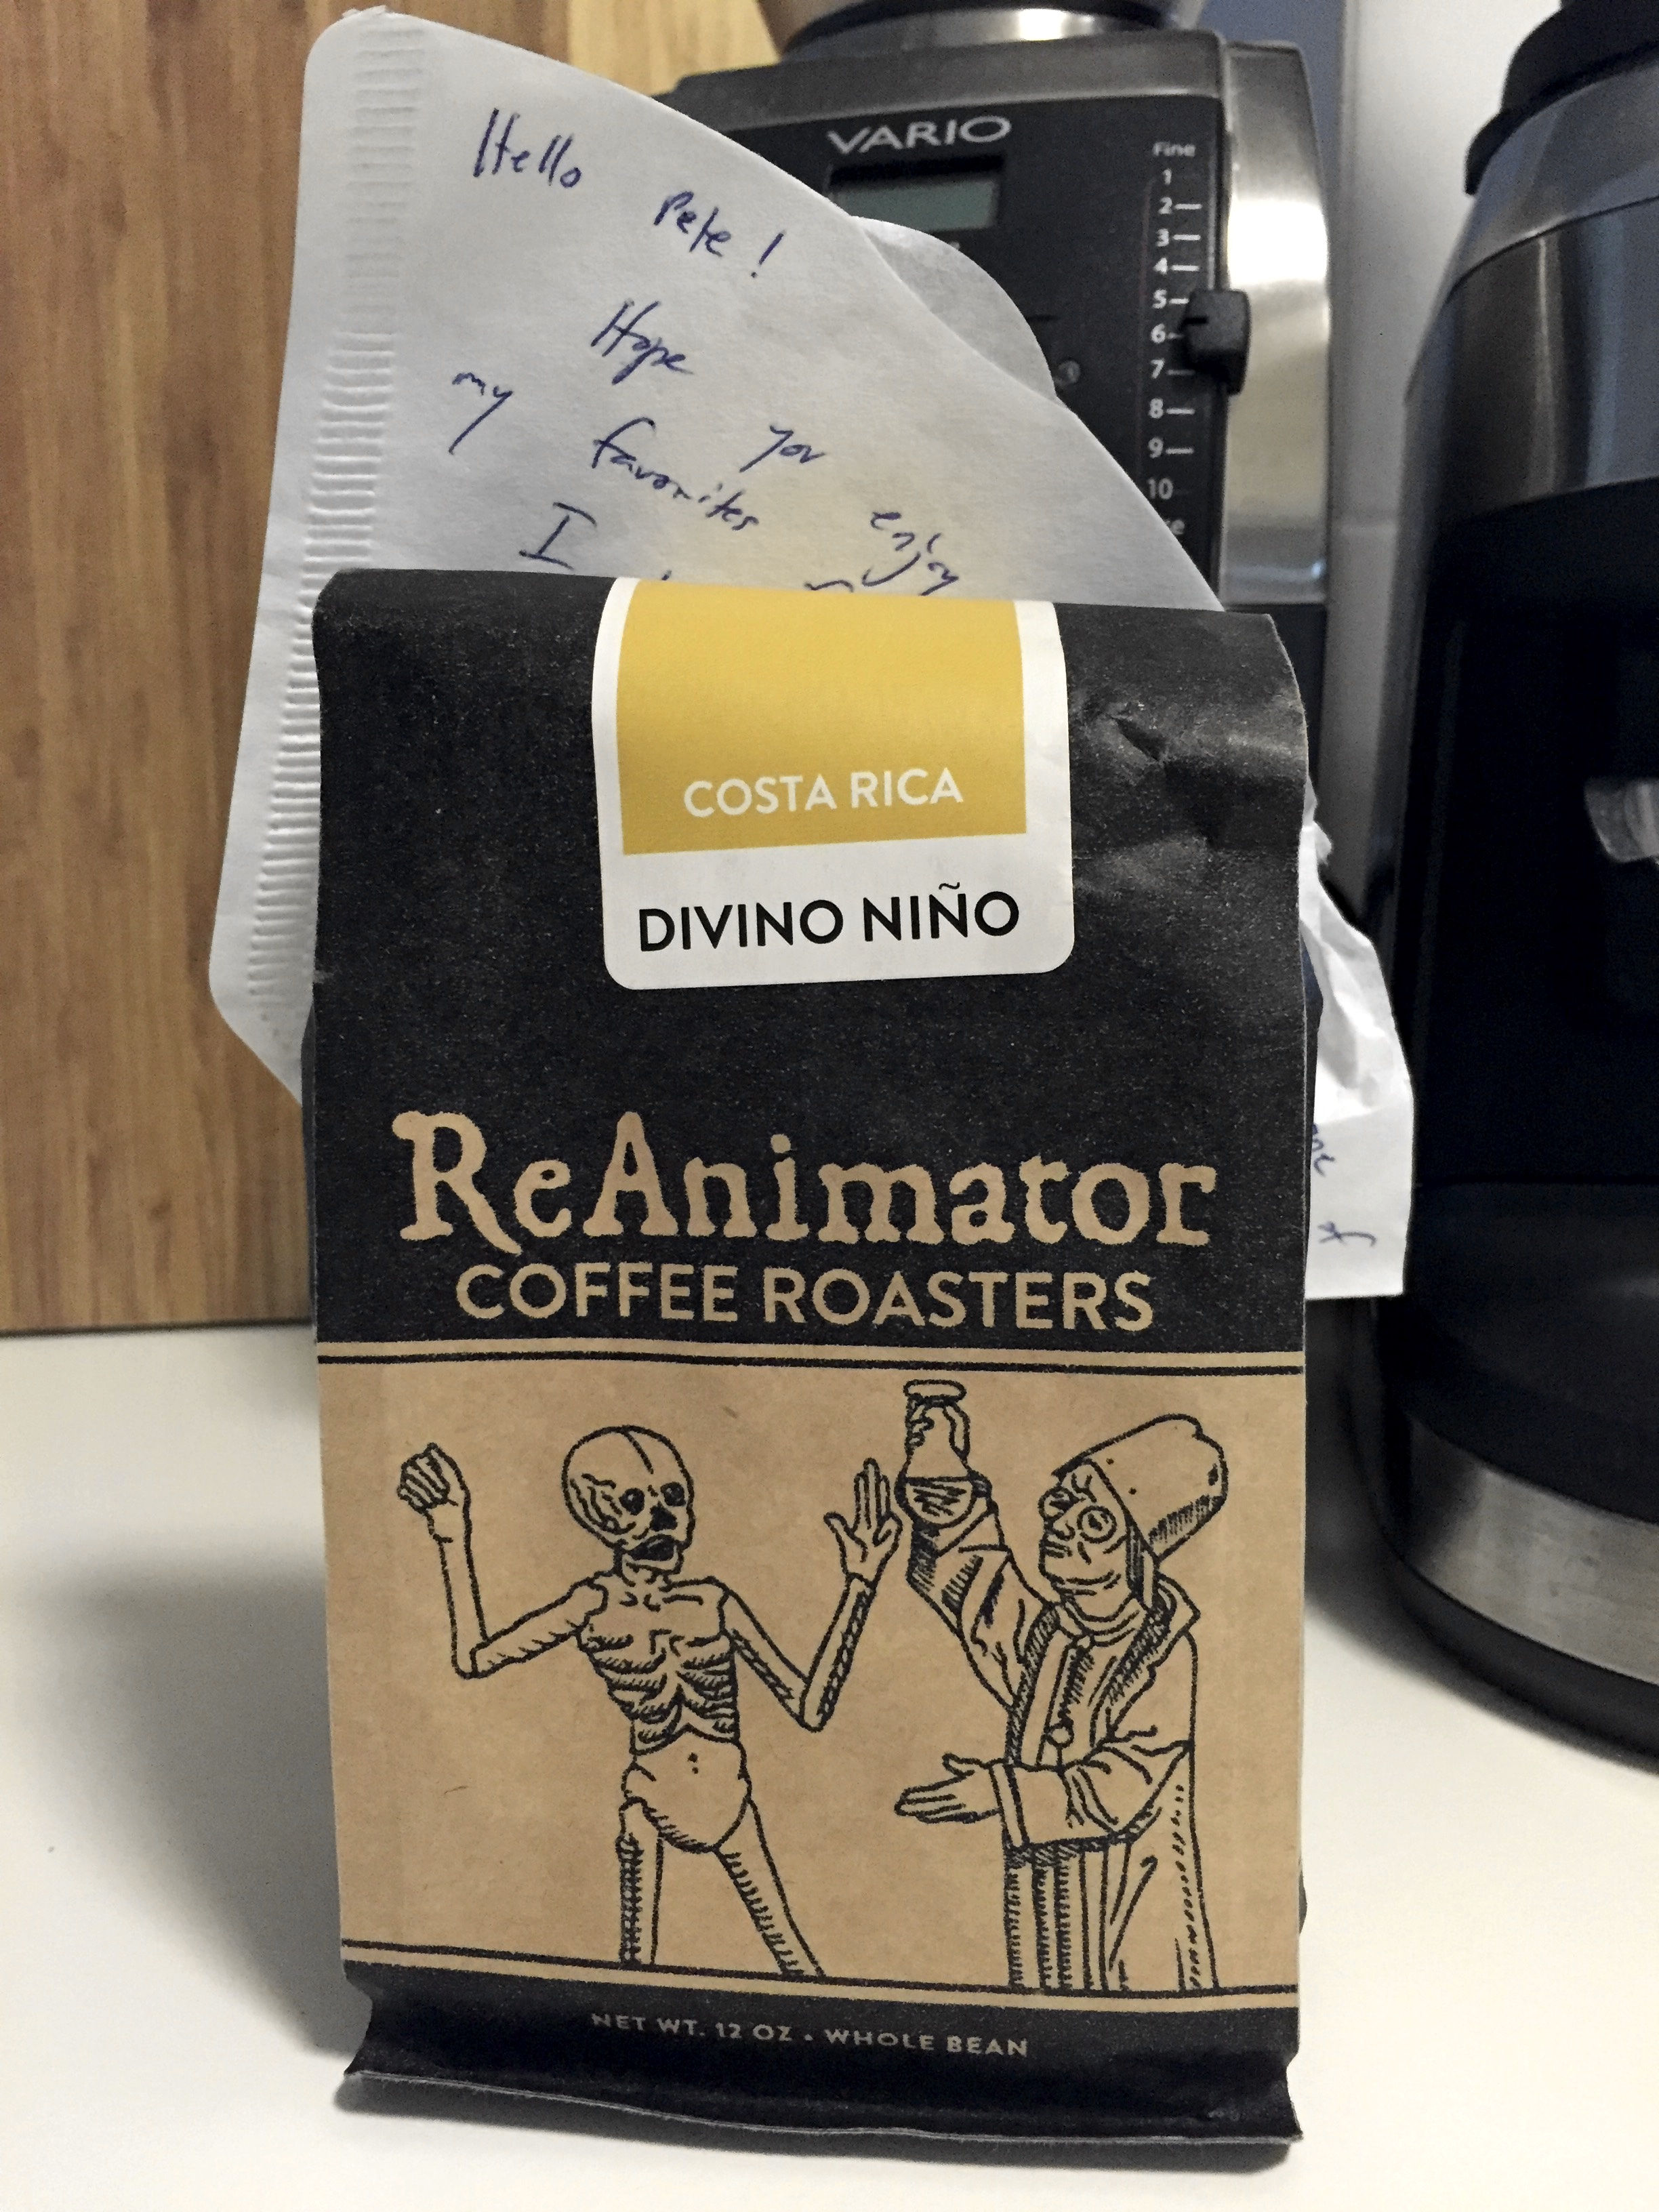
2016-01-18 tww_reanimato frontIn return, I was lucky enough to receive some superb Costa Rican coffee: Divino Niño, from ReAnimator Coffee Roasters in Philadelphia, USA — a little more on this below.

If you have not heard about Third Wave Wichteln, it is a global specialty coffee exchange which occurs each year in December/January, where, at random (after signing up) you are matched with a recipient to send your coffee to, and your name given to another (different) member to receive some in return.

I think most of us know the principle — from Wikipedia:

Secret Santa is a Western Christmas tradition in which members of a group or community are randomly assigned a person to whom they anonymously give a gift … and is known as “Wichteln” in Germany. “Wichteln” is what a “Wichtel”, a wight, does, a good deed.

I wrote a few thoughts down about the nature of the online communities many of us are involved in after last year’s exchange .

Unfortunately for some, the programme does not quite reach a 100% completion rate (now with over 2000 members around the world taking part). Through the vagaries of international postage, customs, and also perhaps a little misunderstanding in some cases about what constitutes an appropriate coffee to send, the Facebook feed is also home to a few criticisms of the programme.

Just a couple of things on this point. There have been some calls within the Facebook group for the organisers to provide the email addresses of the assigned sender to those still waiting, where it appears the coffee is lost or indefinitely held up somewhere.

To their credit, the organisers have repeatedly confirmed they will not take this course of action, citing a priority on members privacy, and reaffirming the programme is based on trust. I applaud them for this stance and strongly agree on both points.

In my view (and yes — easy for me to say having received great coffee each year so far), entering into a programme such as this must be based on giving (isn’t that in keeping with the spirit of the season in the first place?), with an expectation you are more than likely to receive in return.

Whether by global exchange or within your office, we’ve all been the recipient of the random joke. You know, you carefully decide on an appropriate gift for the random pool, and then find yourself on the receiving end of the completely useless novelty shop item meant to give everyone a good laugh. Very unfortunate, but it happens — and bear in mind that was the giver’s intention. In the case of the Wichteln here, I’m sure the coffee was sent with the utmost of good intentions, and for some reason beyond the control of the gift giver, simply never arrives — again unfortunate but hardly the fault of those involved.

I say again — treat the Wichteln as a programme of giving and you really can’t go wrong. Stock up over the holiday season on your favourites, or from roasters you have not tried before and get stuck into enjoying those coffees. If your package from across the world drives? What a bonus, otherwise forget about it and it will be a nice surprise when it does land on your doorstep.

Oh… the coffee itself?

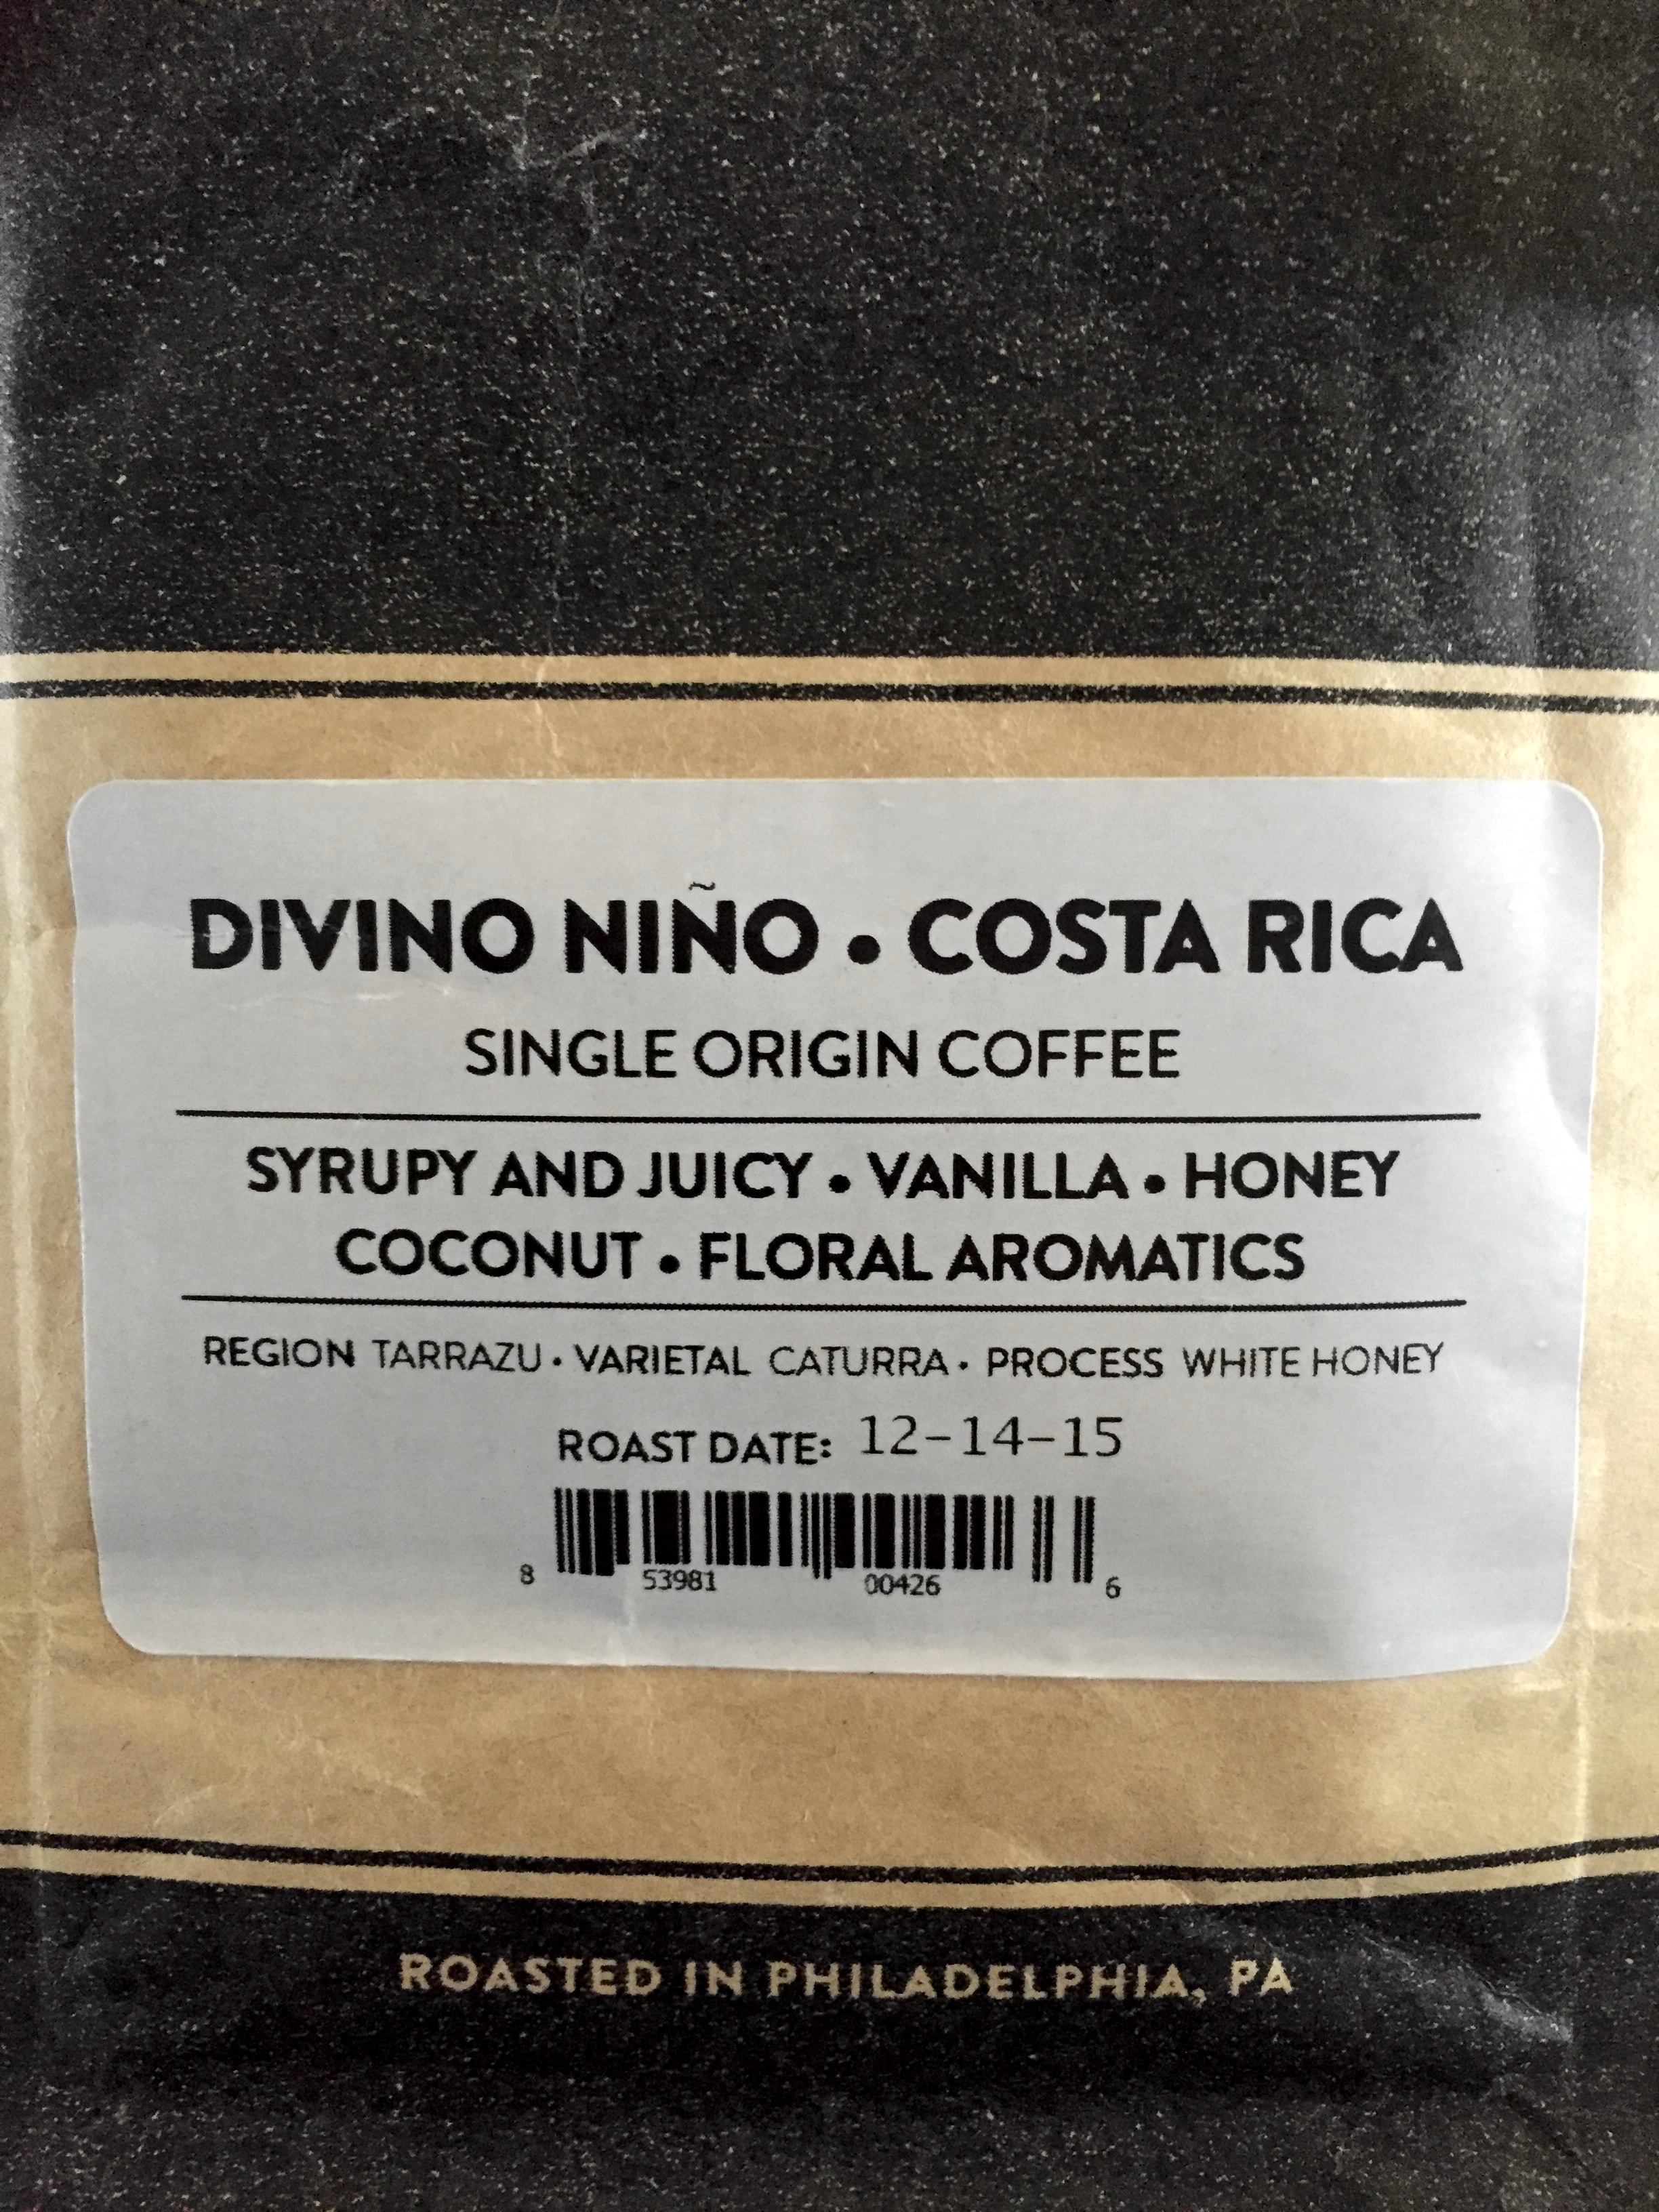
2016-01-18 tww_reanimator_backAn absolute delight, with some handy advice on brewing parameters from the ReAnimator barista and trainer via Twitter who sent me the coffee as well (thanks again Greg!). Yes — it really isn’t hard to connect with those whom you have sent to, or received from, once the exchange is complete.

2016-01-18 tww_iced_filterThe Divino Niño certainly lived up to its promise, a sweet, juicy brew, perfect through the V60, in the Aeropress, and on a particularly hot Brisbane summer day, an iced filter which possibly even outshone the other two. I most definitely consider myself a very fortunate recipient.

If getting involved in something like this is of interest to you, visit the website, where there are some specific, yet straightforward instructions on the type of coffee to send and how to send it.

I’ll certainly be signing up again next December and will be looking forward to sending some coffee to a lucky recipient across the globe — and I’m pretty sure I’ll receive something special in return.


What’s Brewing: Ethiopia Dumerso Natural Process

IMG_5204This particular coffee from the Yirgacheffe region in Ethiopia originally came into my possession in September of this year, part of an order from Ministry Grounds, my usual green bean supplier. The coffee was quick to position itself atop the heap as one of the best of the year for me.

With an eye towards the 2015 “Christmas Roast” festive blend, I quickly added another kilogram to the next order in November.

The Region

The Dumerso mill is located within the Yirgacheffe region of the Gedeo Zone in southern central Ethiopia, bordered on the south by Kochere, west by the Oromia Zone, north by Wenago, east by Bule, and southeast by Gedeb (courtesy Wikipedia).

Local roaster Coffee Supreme also tells us:

The Dumerso municipality has around 700 smallholders contributing their coffee, each bringing with them the unique characteristics of the areas heirloom seed stock

The Coffee

Courtesy Ministry Grounds:

The Natural process involves the ripe cherries being delivered to the mill where they are sorted and graded, then placed onto raised drying beds in thin layers and carefully turned every 2-3 hours. 6-8weeks later, depending on weather and temperature, the beans are then de-hulled ready for export

  • Ethiopia Yirgacheffe Dumerso Gr 1
  • Region: Yirgacheffe, Southern Ethiopia
  • Varietal: Heirloom – Ethiopian
  • Altitude: 1800-2000 metres
  • Processing: Natural, Sundried (Kebel Dumerso Mill)
  • Tasting notes: A beautiful, balanced and natural coffee; sweet with dominant notes of strawberry and other berries; creamy body and a tropical finish.

The Brew

I mentioned in the introduction this coffee quickly became one of the standouts for the year, mainly due to its great performance across virtually all of the brewing methods I prepared it with.

IMG_5328Upon opening the bag, and of course after grinding, the aroma was akin to plunging head first into a bowl of mixed berries, of which the majority were strawberries. This of course followed through into the taste as well. Given the 2 kilograms of green beans I had at my disposal, I was able to tailor the roasts for both filter and espresso brewing.

As espresso1, there was a fantastic combination of ripe berry flavours and raisins, with just a little chocolate. Also evident was a smooth creamy mouthfeel, medium body and long finish. Used as a base for a latte or flat white, similar flavours were again on show, with the overall combination somewhat reminiscent of a cherry ripe bar.

When roasted a little lighter and filter brewed with the V602, you guessed it — predominantly strawberry, this time a little lighter and brighter, with a hint of jasmine and a little citrus to the finish. Again, that creamy-smooth, velvety mouthfeel.

Lastly, amidst the afternoon office kitchen rush, the Aeropress3 again saved the day, providing enough of a pause to allow my enjoyment of a similar flavour profile. Although not quite as bright as the V60, that smooth creamy mouthfeel, strawberry, and jasmine on the finish again made for a very enjoyable cup.

The Finish

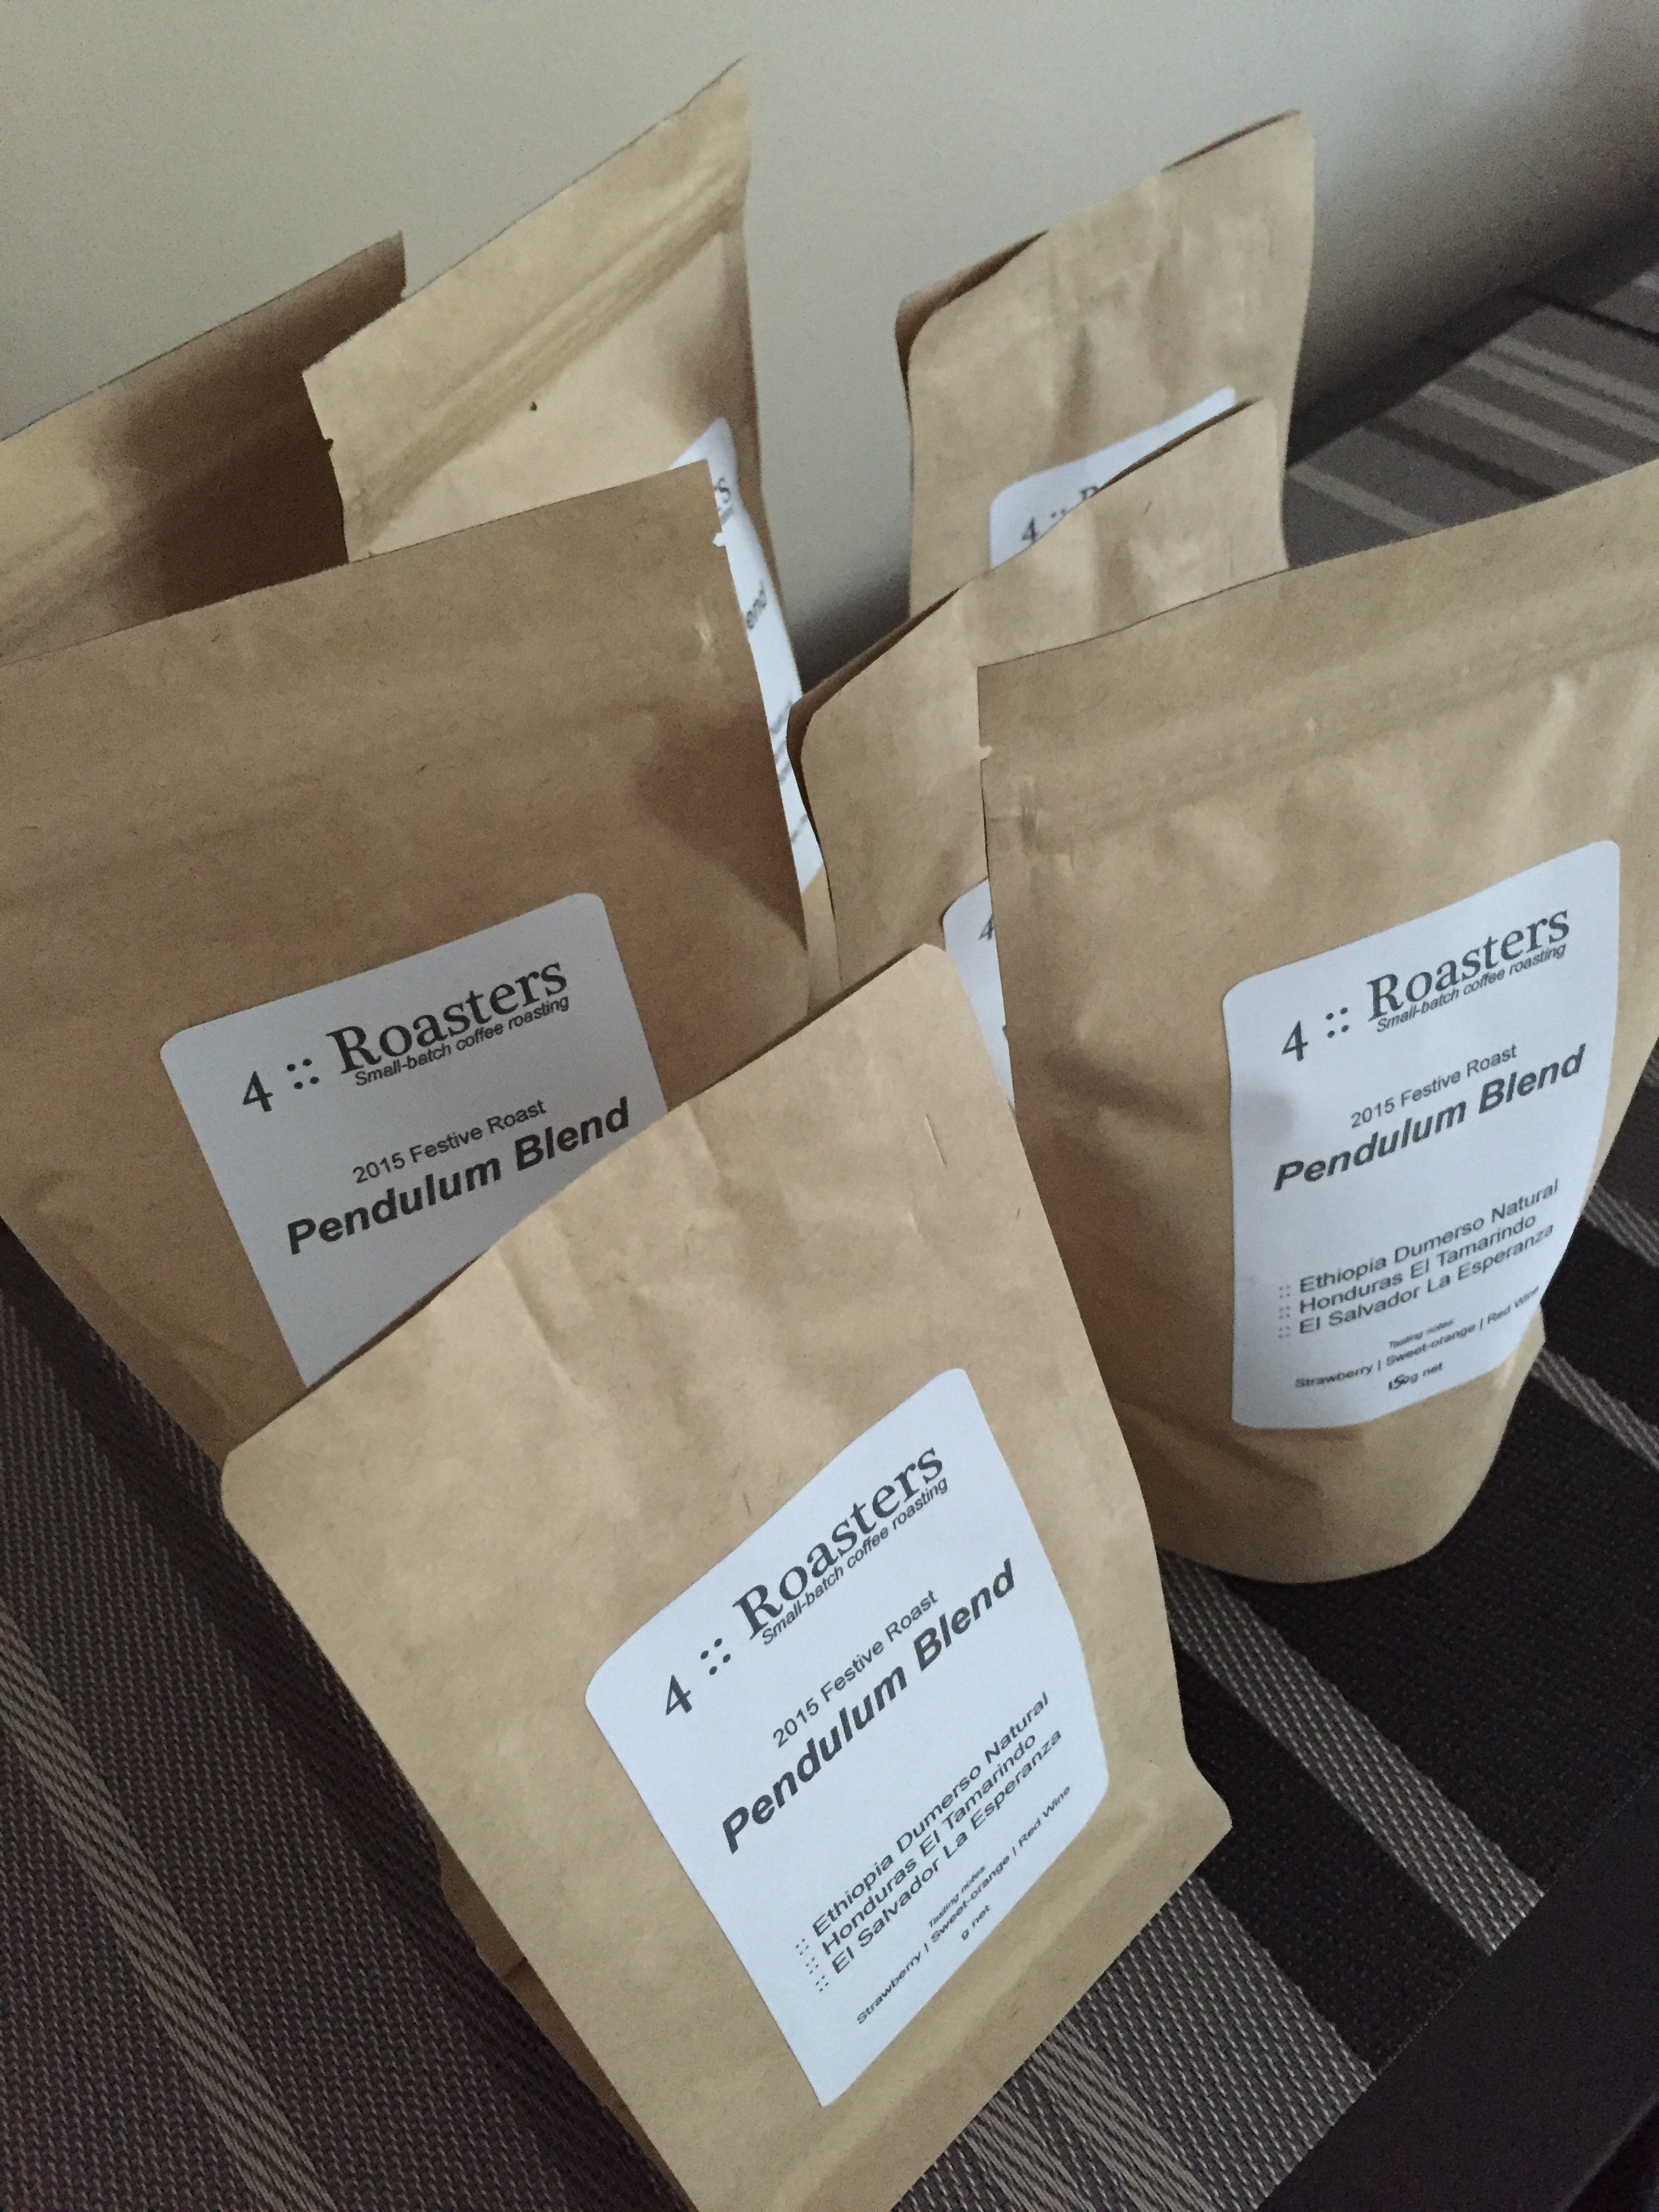
IMG_5341So all in all this coffee was certainly one of the best for the year, and as a result contributed 60% of the “Christmas Roast” festive blend overall volume, in combination with a washed coffee from Honduras (El Tamarindo Horizontes) and a honey processed offering from El Salvador (La Esperanza).

Overall I was fairly pleased with how the blend turned out, a main aim being to keep the great Ethiopian berry flavours of the Dumerso at the forefront, whether brewing with an espresso base of through a filter.

I think you can probably tell I enjoyed this one, and it was nice to end the year on a high note from a coffee perspective.

Having now turned over into 2016 (and a happy new year to all), things have kicked off pretty well with my Third Wave Wichteln coffee arriving a couple of days ago — a beauty from ReAnimator Coffee in Philadelphia, kindly sent over as part of the exchange by Greg, a barista and trainer with ReAnimator.

IMG_5283Speaking of the Wichteln, you might be able to guess which coffee I sent to Bonn, Germany to fulfil my part of the exchange. It was indeed the Yirgacheffe Dumerso, however this time the washed process coffee, roasted of course by the professionals at Coffee Supreme. Hopefully the recipient will enjoy it, and also (fingers crossed) the additional bag of my home roasted Dumerso Natural thrown in as well.

I’ll leave it there, except to say I hope your journey (coffee or otherwise) into 2016 begins well and continues — lets say for at least twelve months or so. Now I’m off to brew!


  1. Dose 21.6 grams; yield 44 grams; time 27 seconds ↩︎
  2. Dose 19 grams; water 330 grams; brew time 3:15 ↩︎
  3. Inverted; dose 16 grams; water 200 grams; bloom 30s; brew 30s; flip and plunge 30s. ↩︎