Welcome to the second instalment in a series of posts describing my use of dry processing methods to take a small batch of coffee cherries from the tree and into the cup. If you missed the initial post, you can find it here, along with a series of posts from a couple of years ago on washed processing methods which I have recently combined and republished.
Since publishing Part One some weeks ago, I’ve been crunching a few numbers (I do mean just a few: no complex algorithms or statistical modelling here), and hopefully can present something coherent about how this whole thing proceeded.
My expectations
To recap, I am experimenting with two dry processing methods: Natural processing, where after picking, the whole coffee cherry is simply laid out and sun-dried. Once the whole cherry has dried, depulping and hulling then follow. The second is Honey processing, where the flesh or pulp is removed from the cherry first, leaving the sticky mucilage layer on, with the beans then laid out and sun-dried.
At the outset, I planned to have the beans drying for three to four weeks or so, remove the pulp and mucilage from the naturals, and allow them to dry for a further week before roasting. The honey processed batch? Well, that was anyone’s guess, as I really had no idea how long it would take for the sticky mucilage to dry on the outside of the bean — particularly in a climate known for its humidity. Time would tell me, or so I hoped.
For that matter, I wasn’t even entirely sure as to how I would tell when the drying process had reached a stage where roasting would then be possible. I have mentioned the often quoted 12.5% moisture content in previous posts, however I do not have the necessary equipment to readily determine the exact moisture level.
Time and estimation would have to do.
Tools
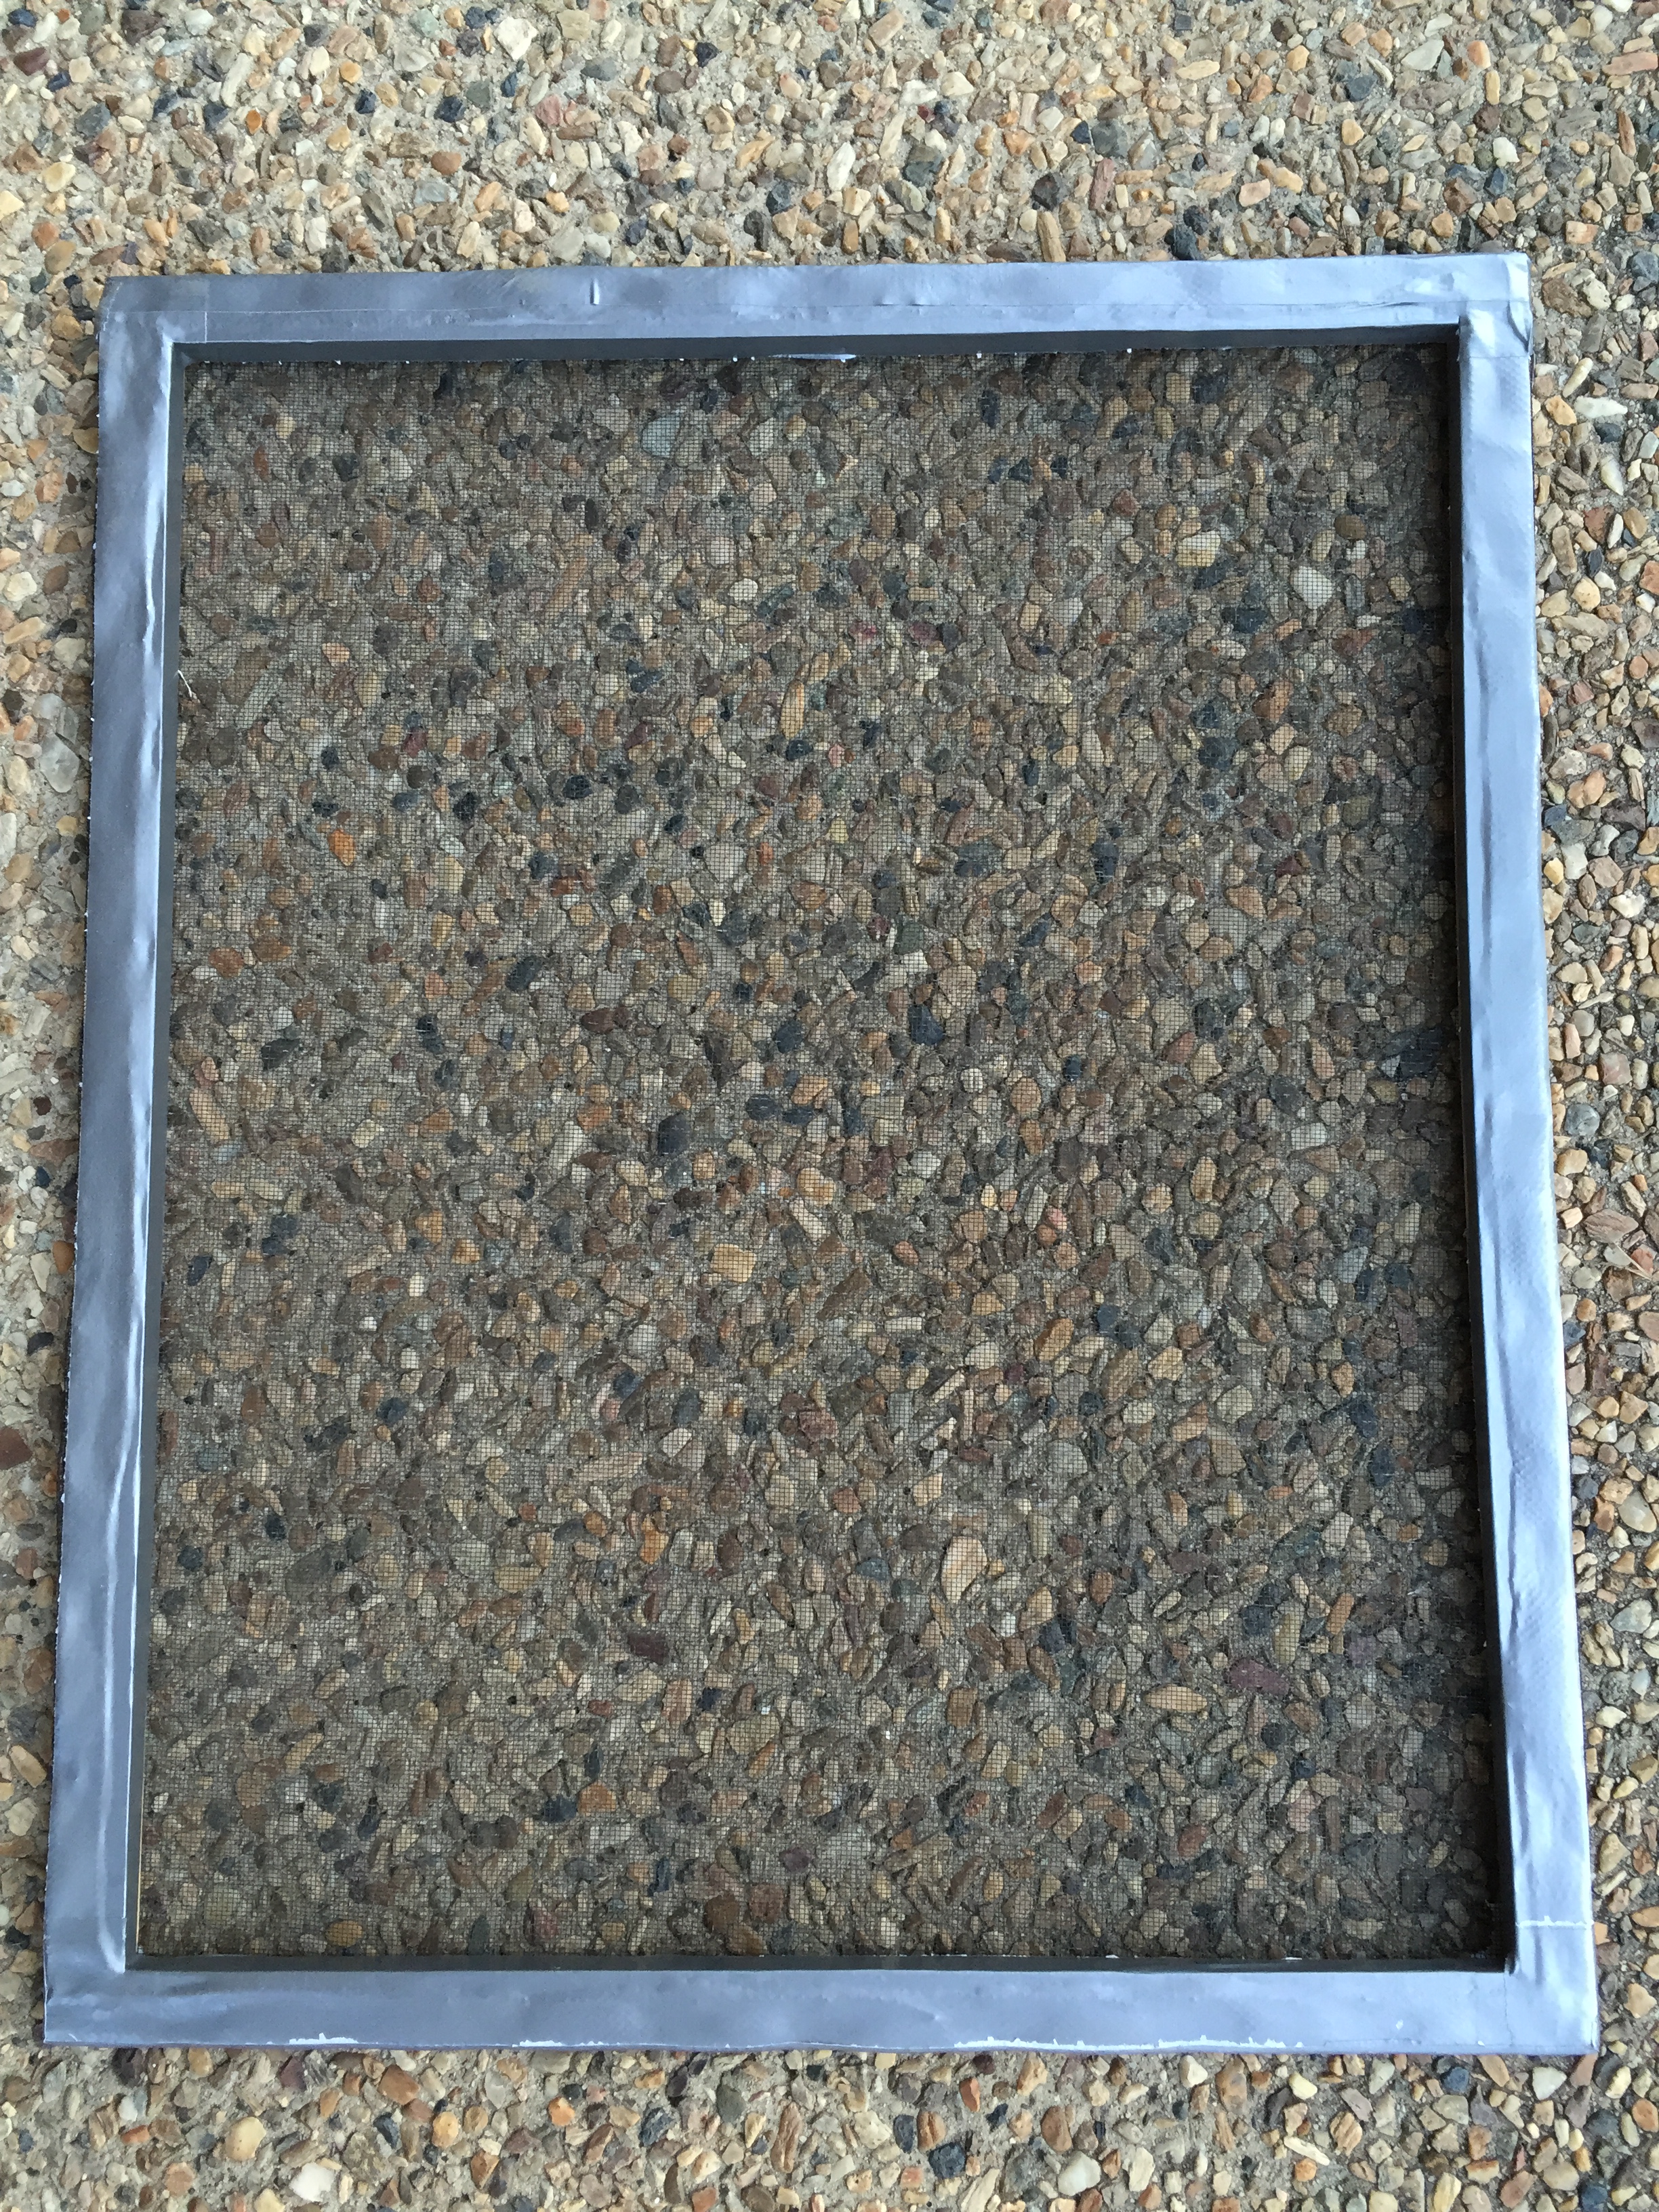
I say tools — however there was really only one: my custom-made raised drying bed. Sounds pretty fancy when described like that, however it consisted of a flyscreen-covered picture frame sitting across the arms of an outdoor chair. Fairly rudimentary, however not a great deal of complexity is needed to ensure adequate ventilation and airflow.
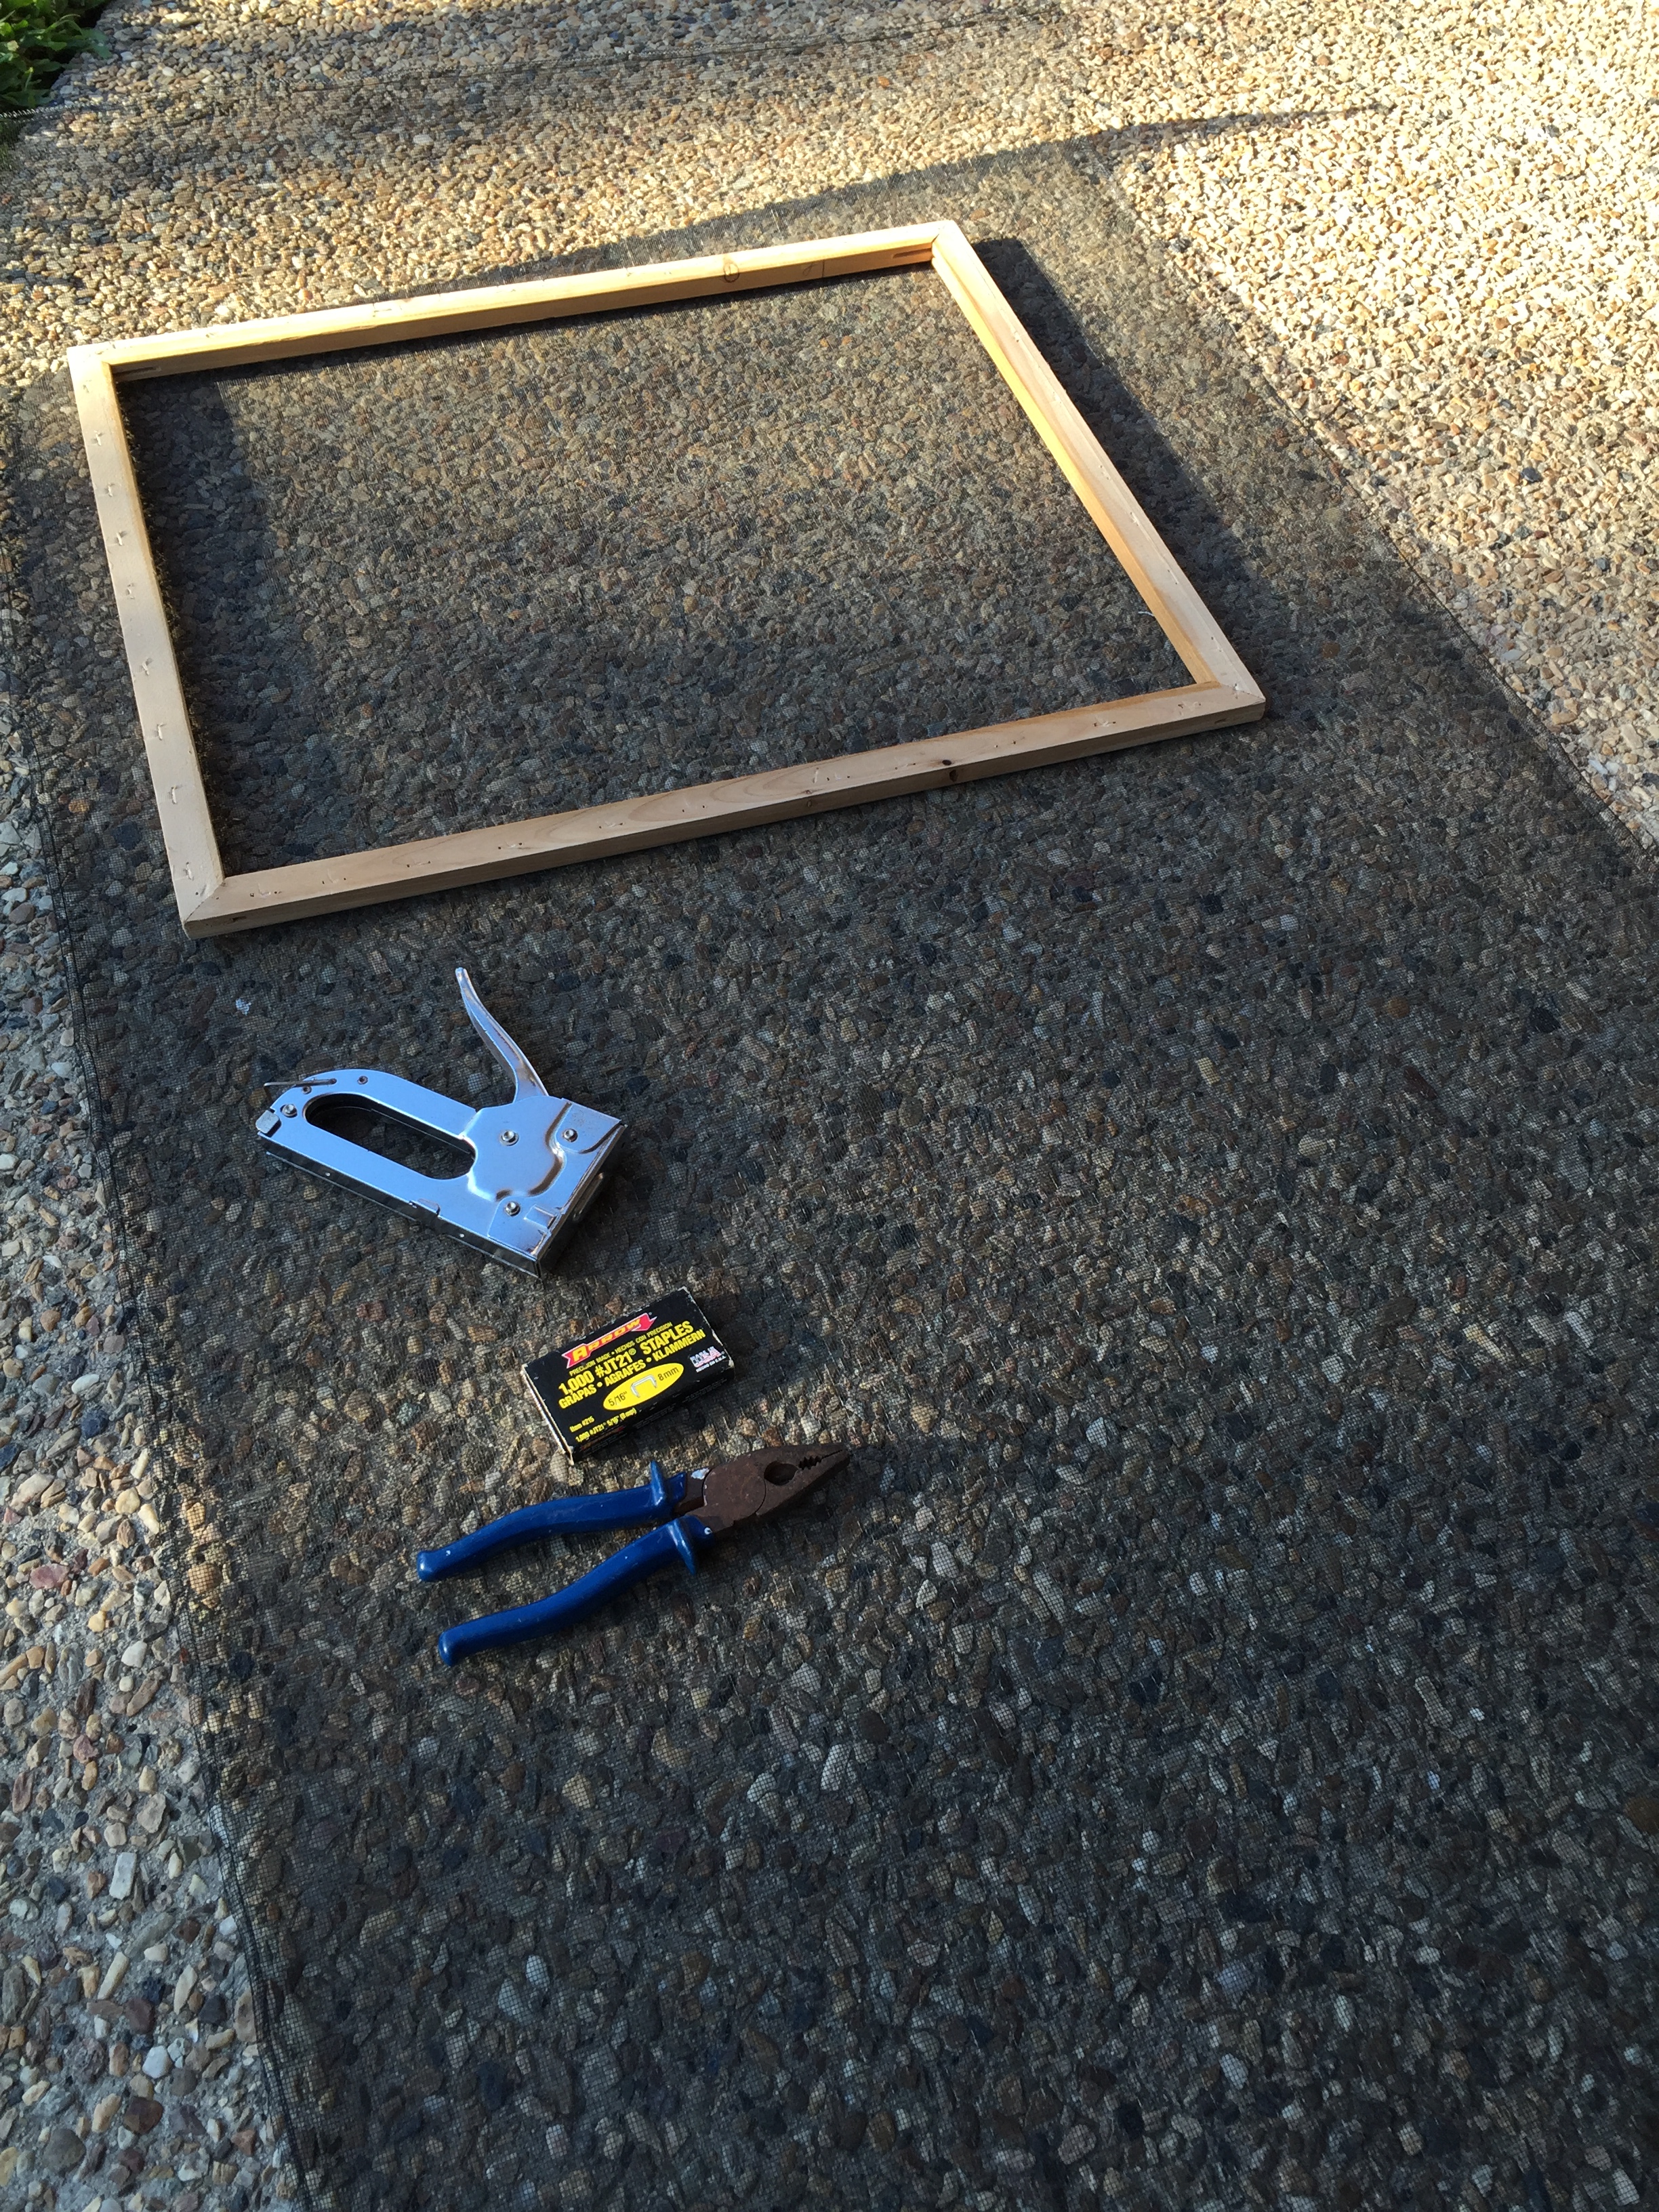
Other than that, it was simply my iPhone for recording photos and data, Day One app as I’ve mentioned in a previous post, and a couple of bowls for both beans and debris when depulping the honey processed lot and eventually the same for the naturals after drying.
Methods
Before we get too much further not things, I probably should mention upon beginning this whole process, I had 420 grams of coffee cherries by weight at my disposal.
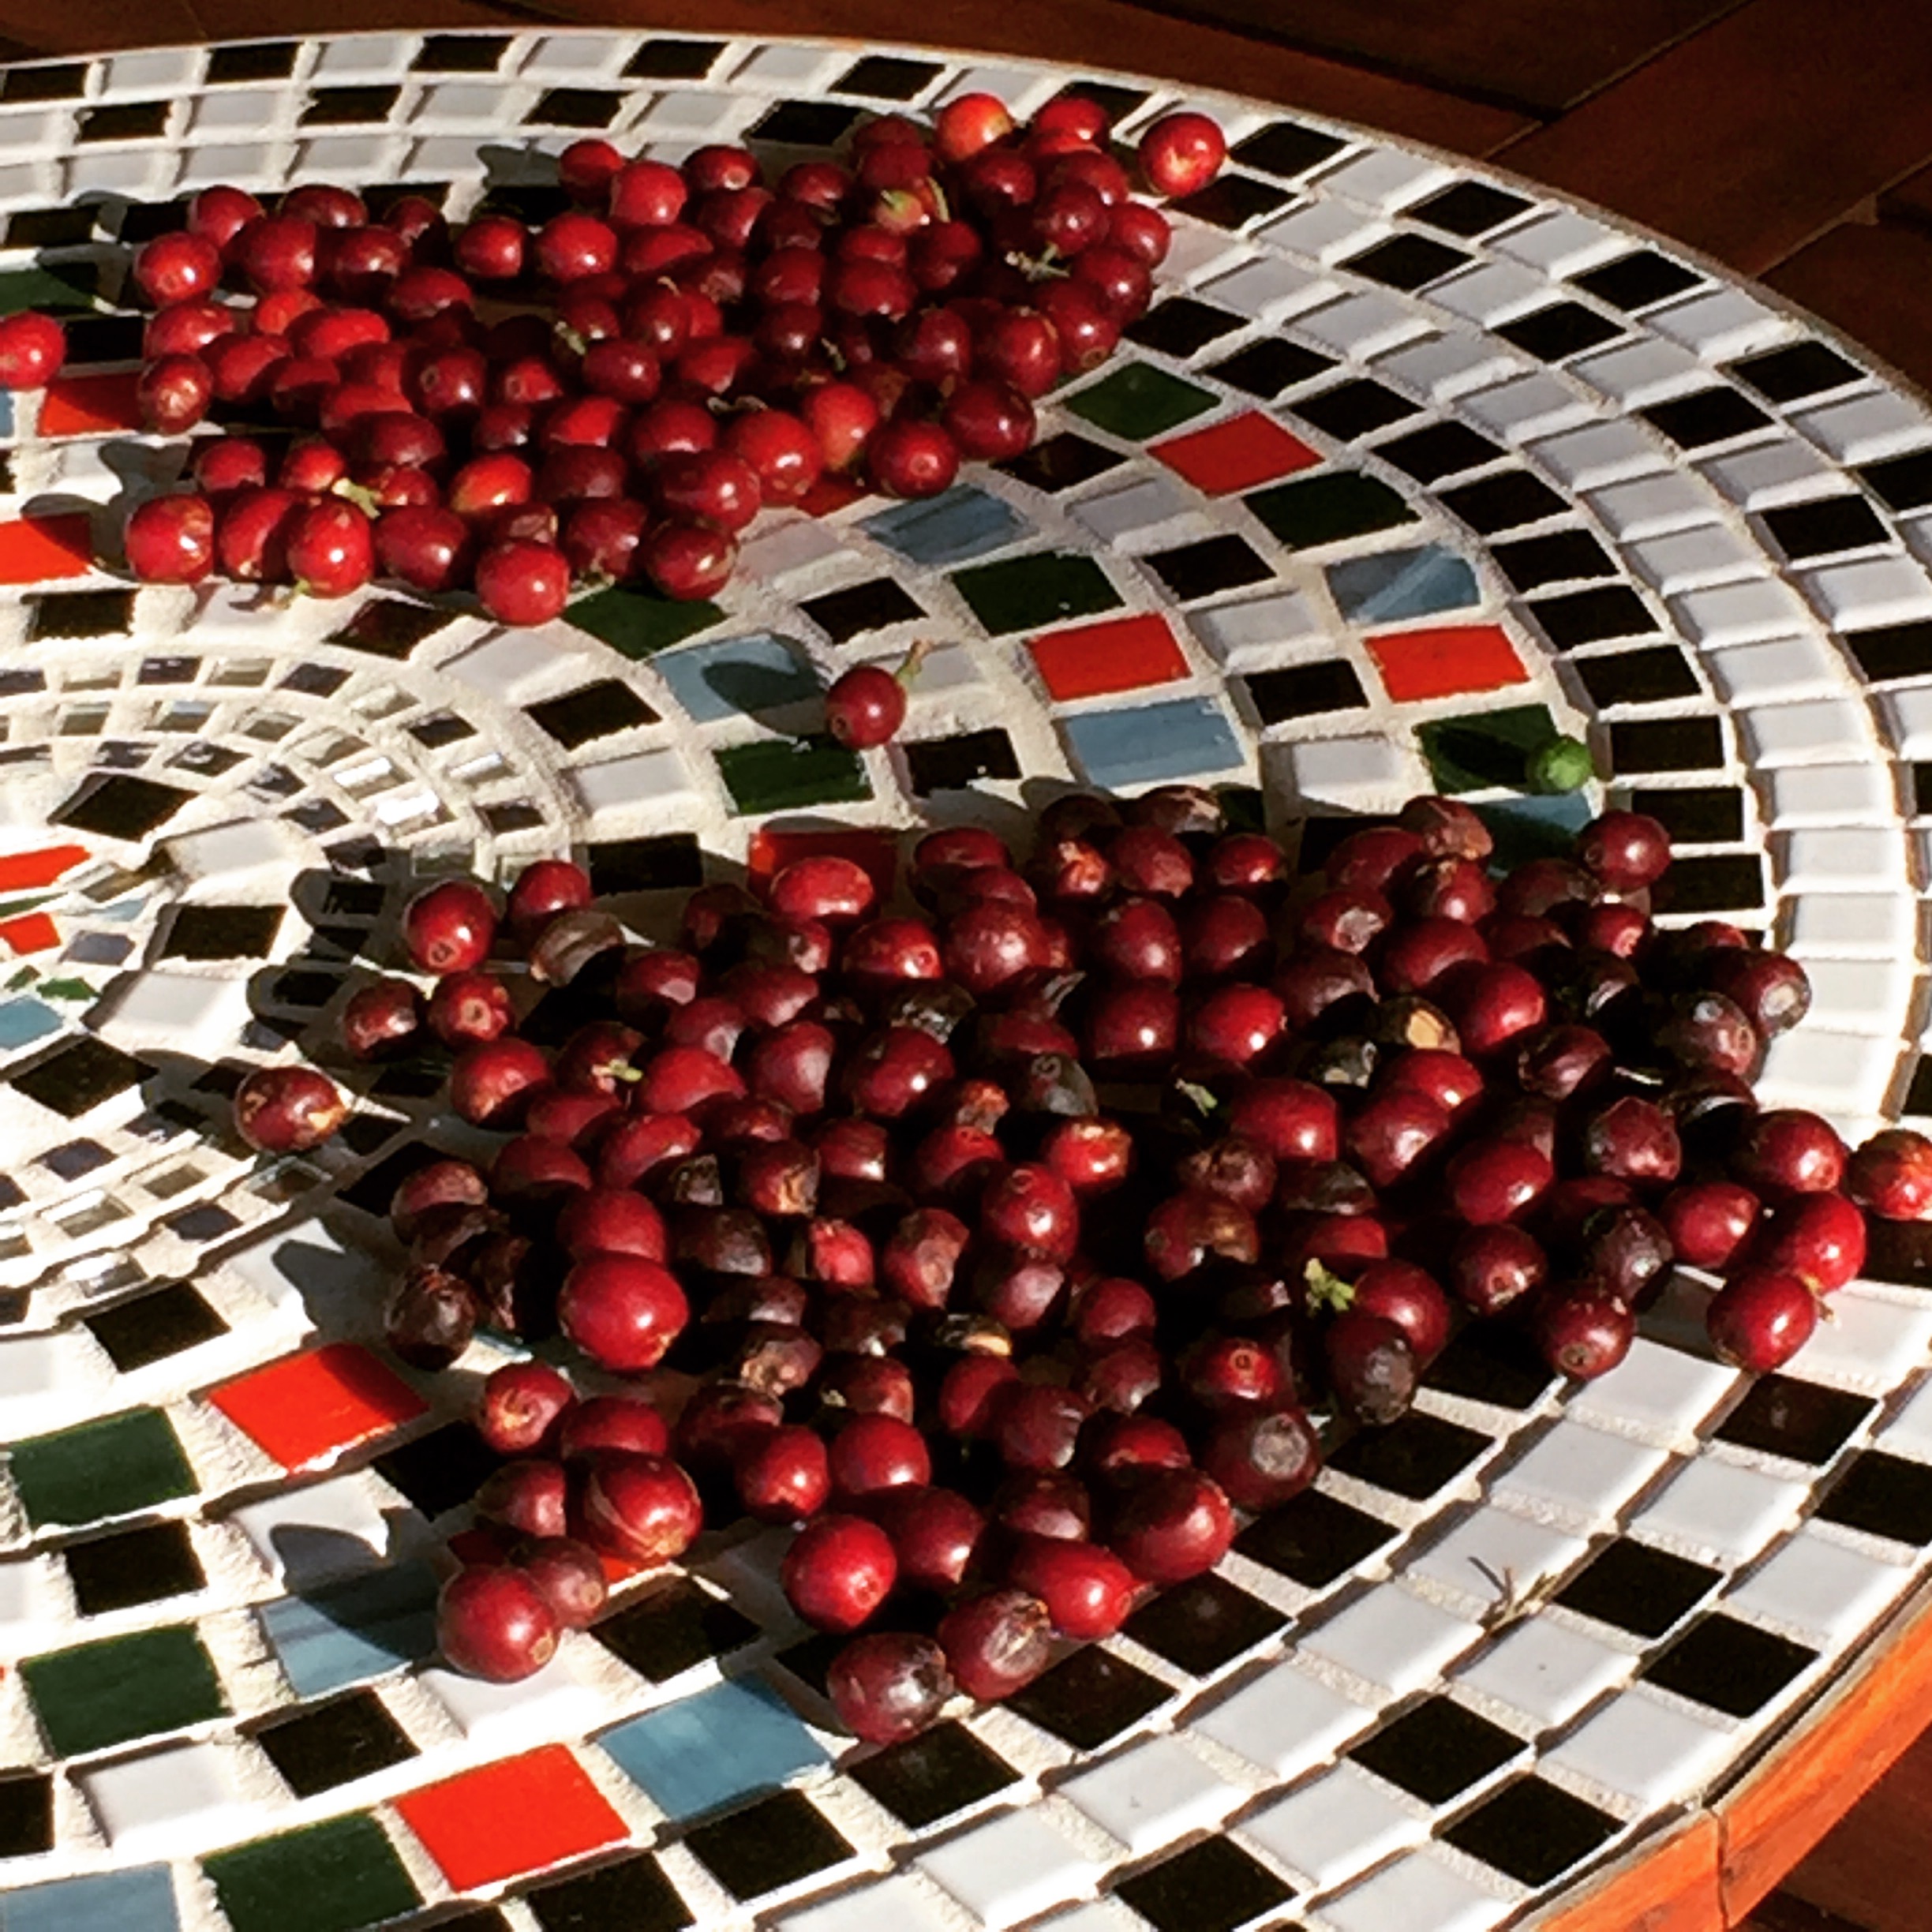
These were split into the two groups evenly, with 210 g into each of the natural and honey processed groups respectively. Of course this reduced quite significantly in the honey group once the pulp was removed, however I did not check the actual weight again.
Initial processing
As you can imagine, the naturals required zero processing to prepare for drying, with the exception being to check for any bad fruit.
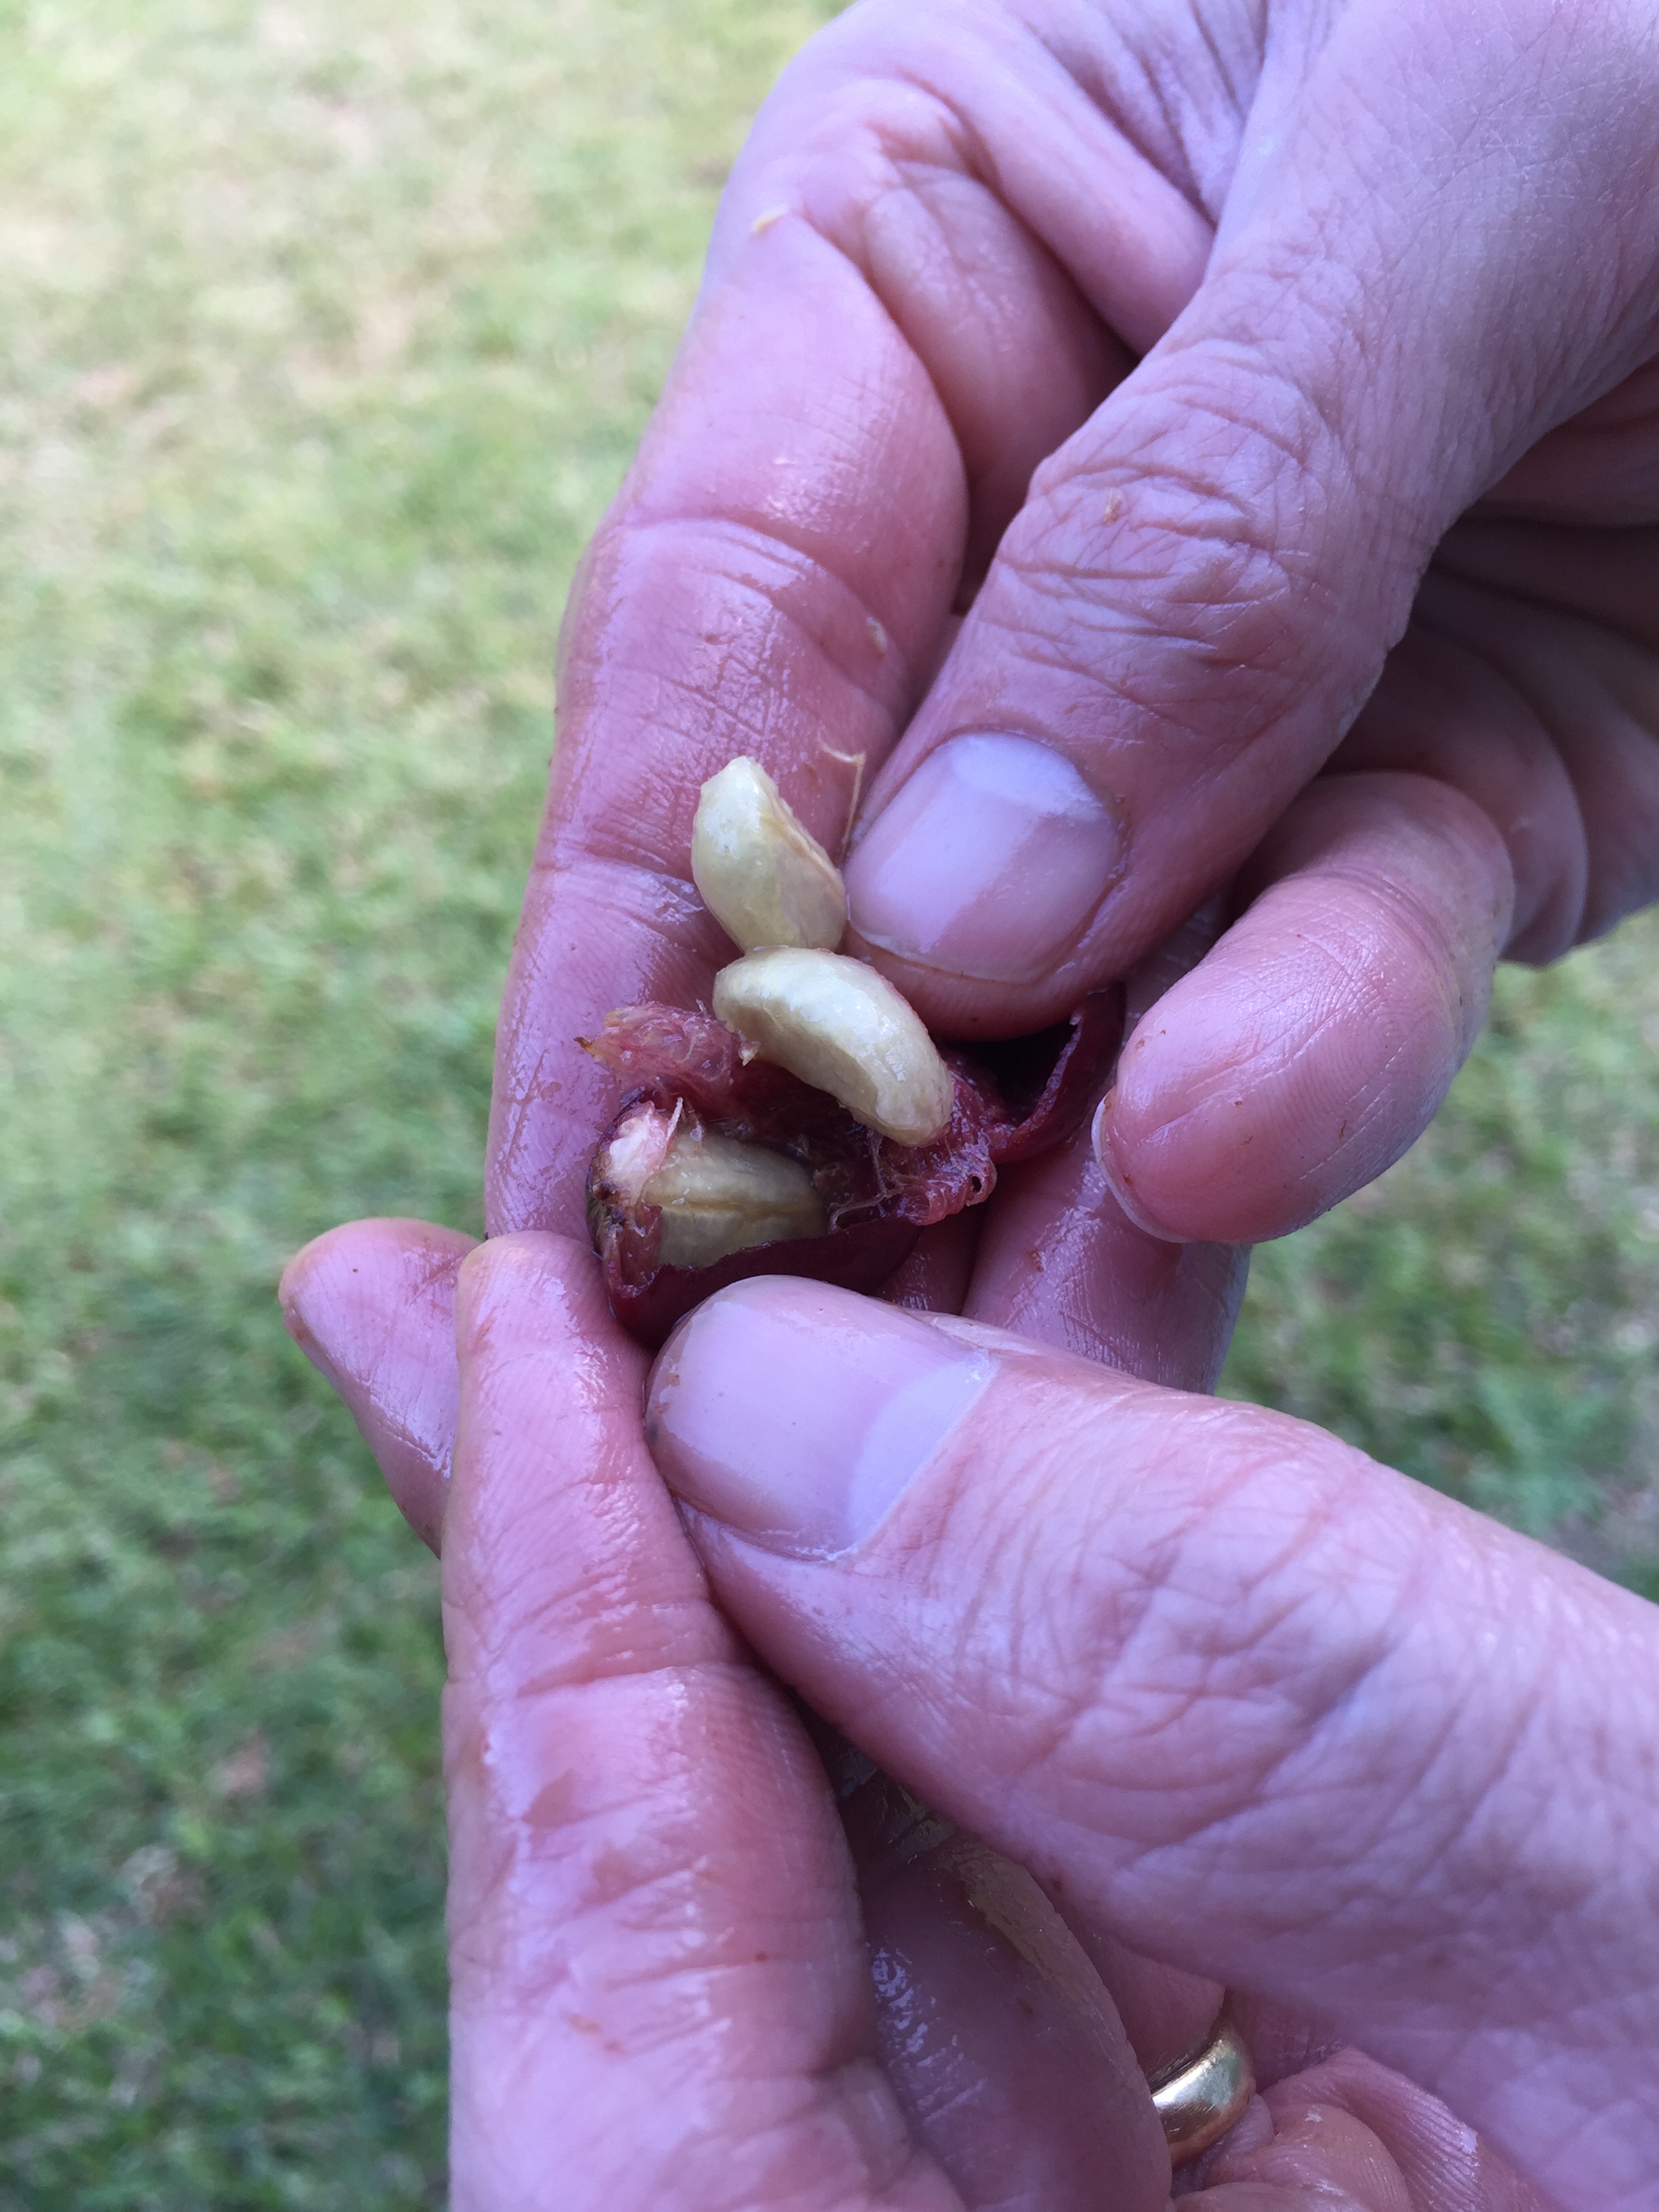
For the honey group, this amounted to depulping or removing the skin and outer flesh by hand, leaving the sticky mucilage covering the parchment layer on the outside of the seed or “bean”. Not an overly onerous task, however at any great scale would require significant time and effort — or machinery.
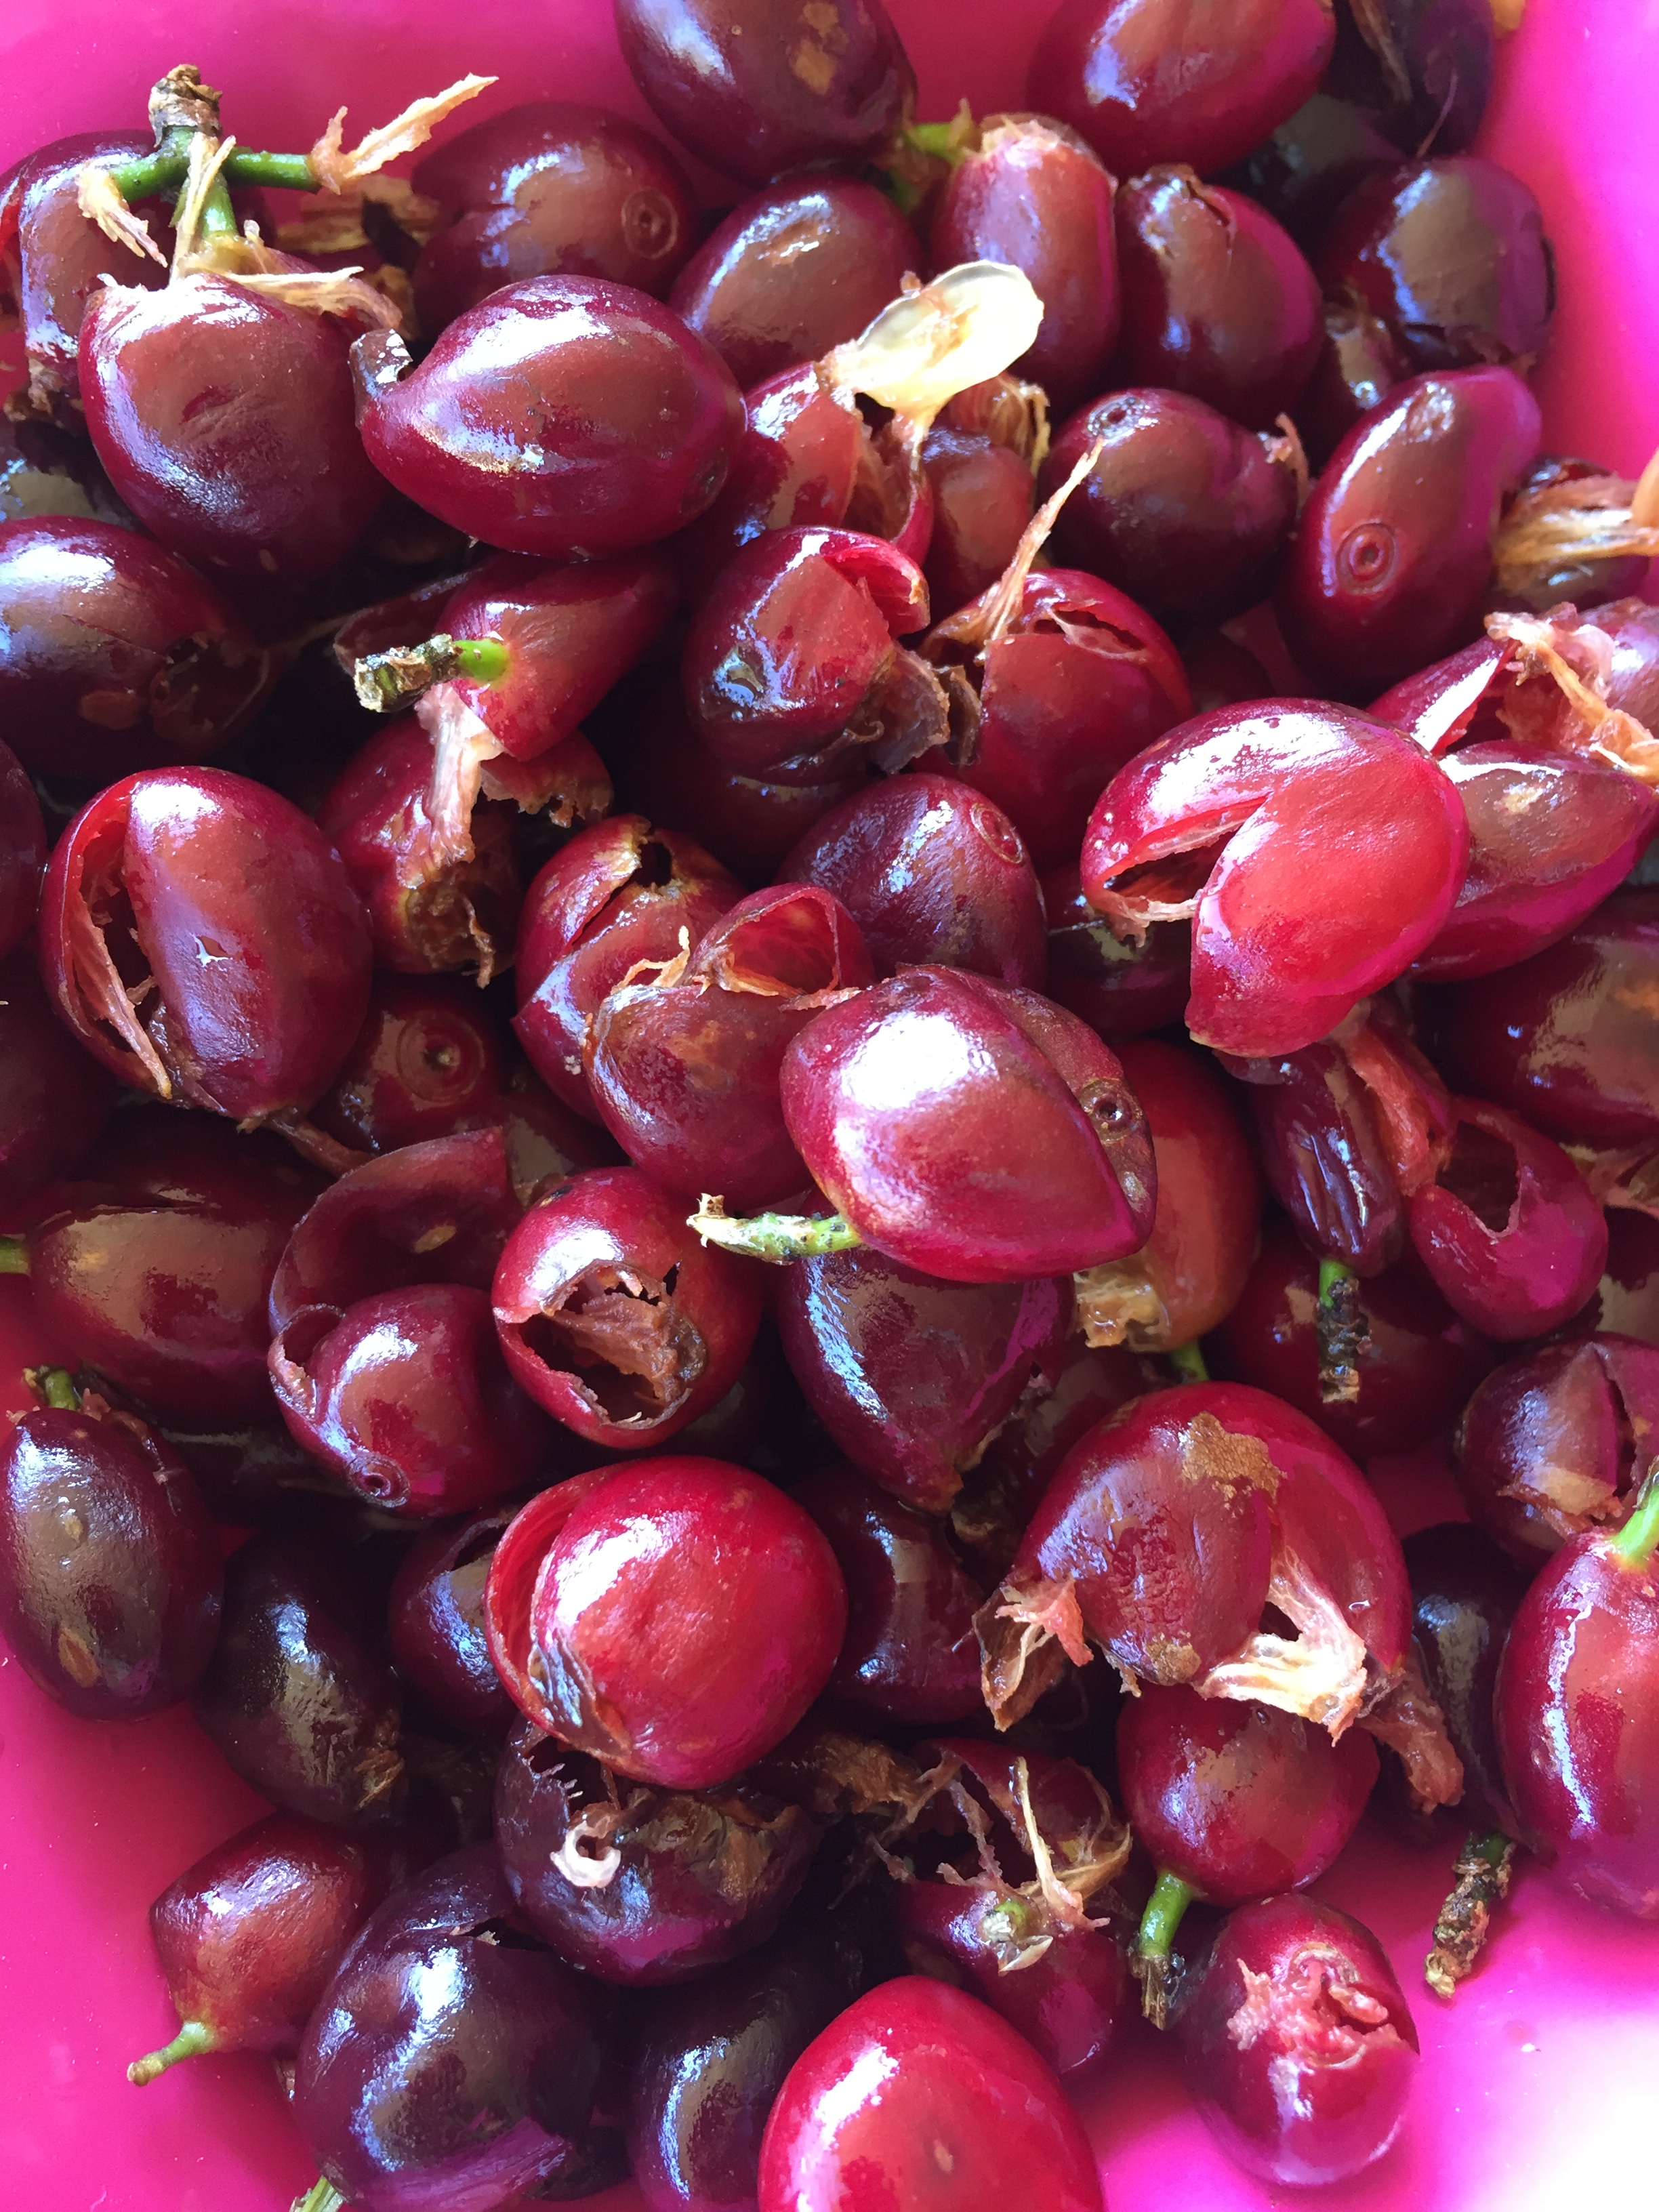
Once complete, out on the drying rack they went, with a Day Zero photo taken, and we were under way.
Drying
Over the course of the drying period I followed the same routine to ensure the beans were regularly turned, and also covered from any dew which formed in the evenings:
- at around 6 am each morning the chair and drying rack were placed out in my back yard in a position of full sun;

- a photo of each batch was taken and uploaded to Day One with additional humidity data from the Bureau of Meteorology (courtesy of the Pocket Weather Australia iOS app);
- any additional comments were added to the entry;
- upon returning home from work, both batches were manually turned, with the drying rack placed back under cover of the patio roof, ready to repeat the process each day until completion.

It was during this process a little bit of madness set in. As I have mentioned on numerous occasions, the mucilage remaining on the honey processed batch was quite sticky. If you’ve ever had to move and turn numerous small sticky objects you’ll invariably understand the ensuing challenge.
By hand, well… the beans simply stuck to my hand. By a plastic  paint scraper… the beans simply clumped and stuck to that. Eventually, I resorted to simply turning them by one by one. Wait…what? Yes, that’s right, flipping over each little bean and placing it softly down again on its little bed for the night, only to have it face the searing sun again the next day.
One. At. A. Time. Like I said — madness.
Despite this insanity, the routine worked well over the weeks this  whole process took, with the exception of a few days where I was either home late or in a rush, and didn’t stop to turn them or record data and photos. In any event, each night they were in and the following day back out. During some stormy weather for a few days during the middle of the drying period they were also left under cover during the day. Better safe than sorry.
Final processing
Once the drying process was complete, we end up with essentially the reverse to how we started. The naturals required depulping, and for the honey group, only removal of the final parchment layer to expose the bean inside.
Just to be sure I planned to then leave the beans a further week before roasting.
The data
The result of the data recording in Day One was a 64 page PDF export containing basic data such as day, date and time; weather information (temperature and description); a photo record of the bean appearance, and any additional comments I made for the day’s entry, which importantly included a record of the relative humidity at the time — a known enemy of natural processing.
Although there were 64 entries, these were made on 32 individual days, with two entries per day the result of taking separate photo of each of the natural and honey groups each day. Although it might have been nice to upload two photos on the one entry, that was not a feature available to me at the time, however it is now, with a fantastic recent update to Day One.
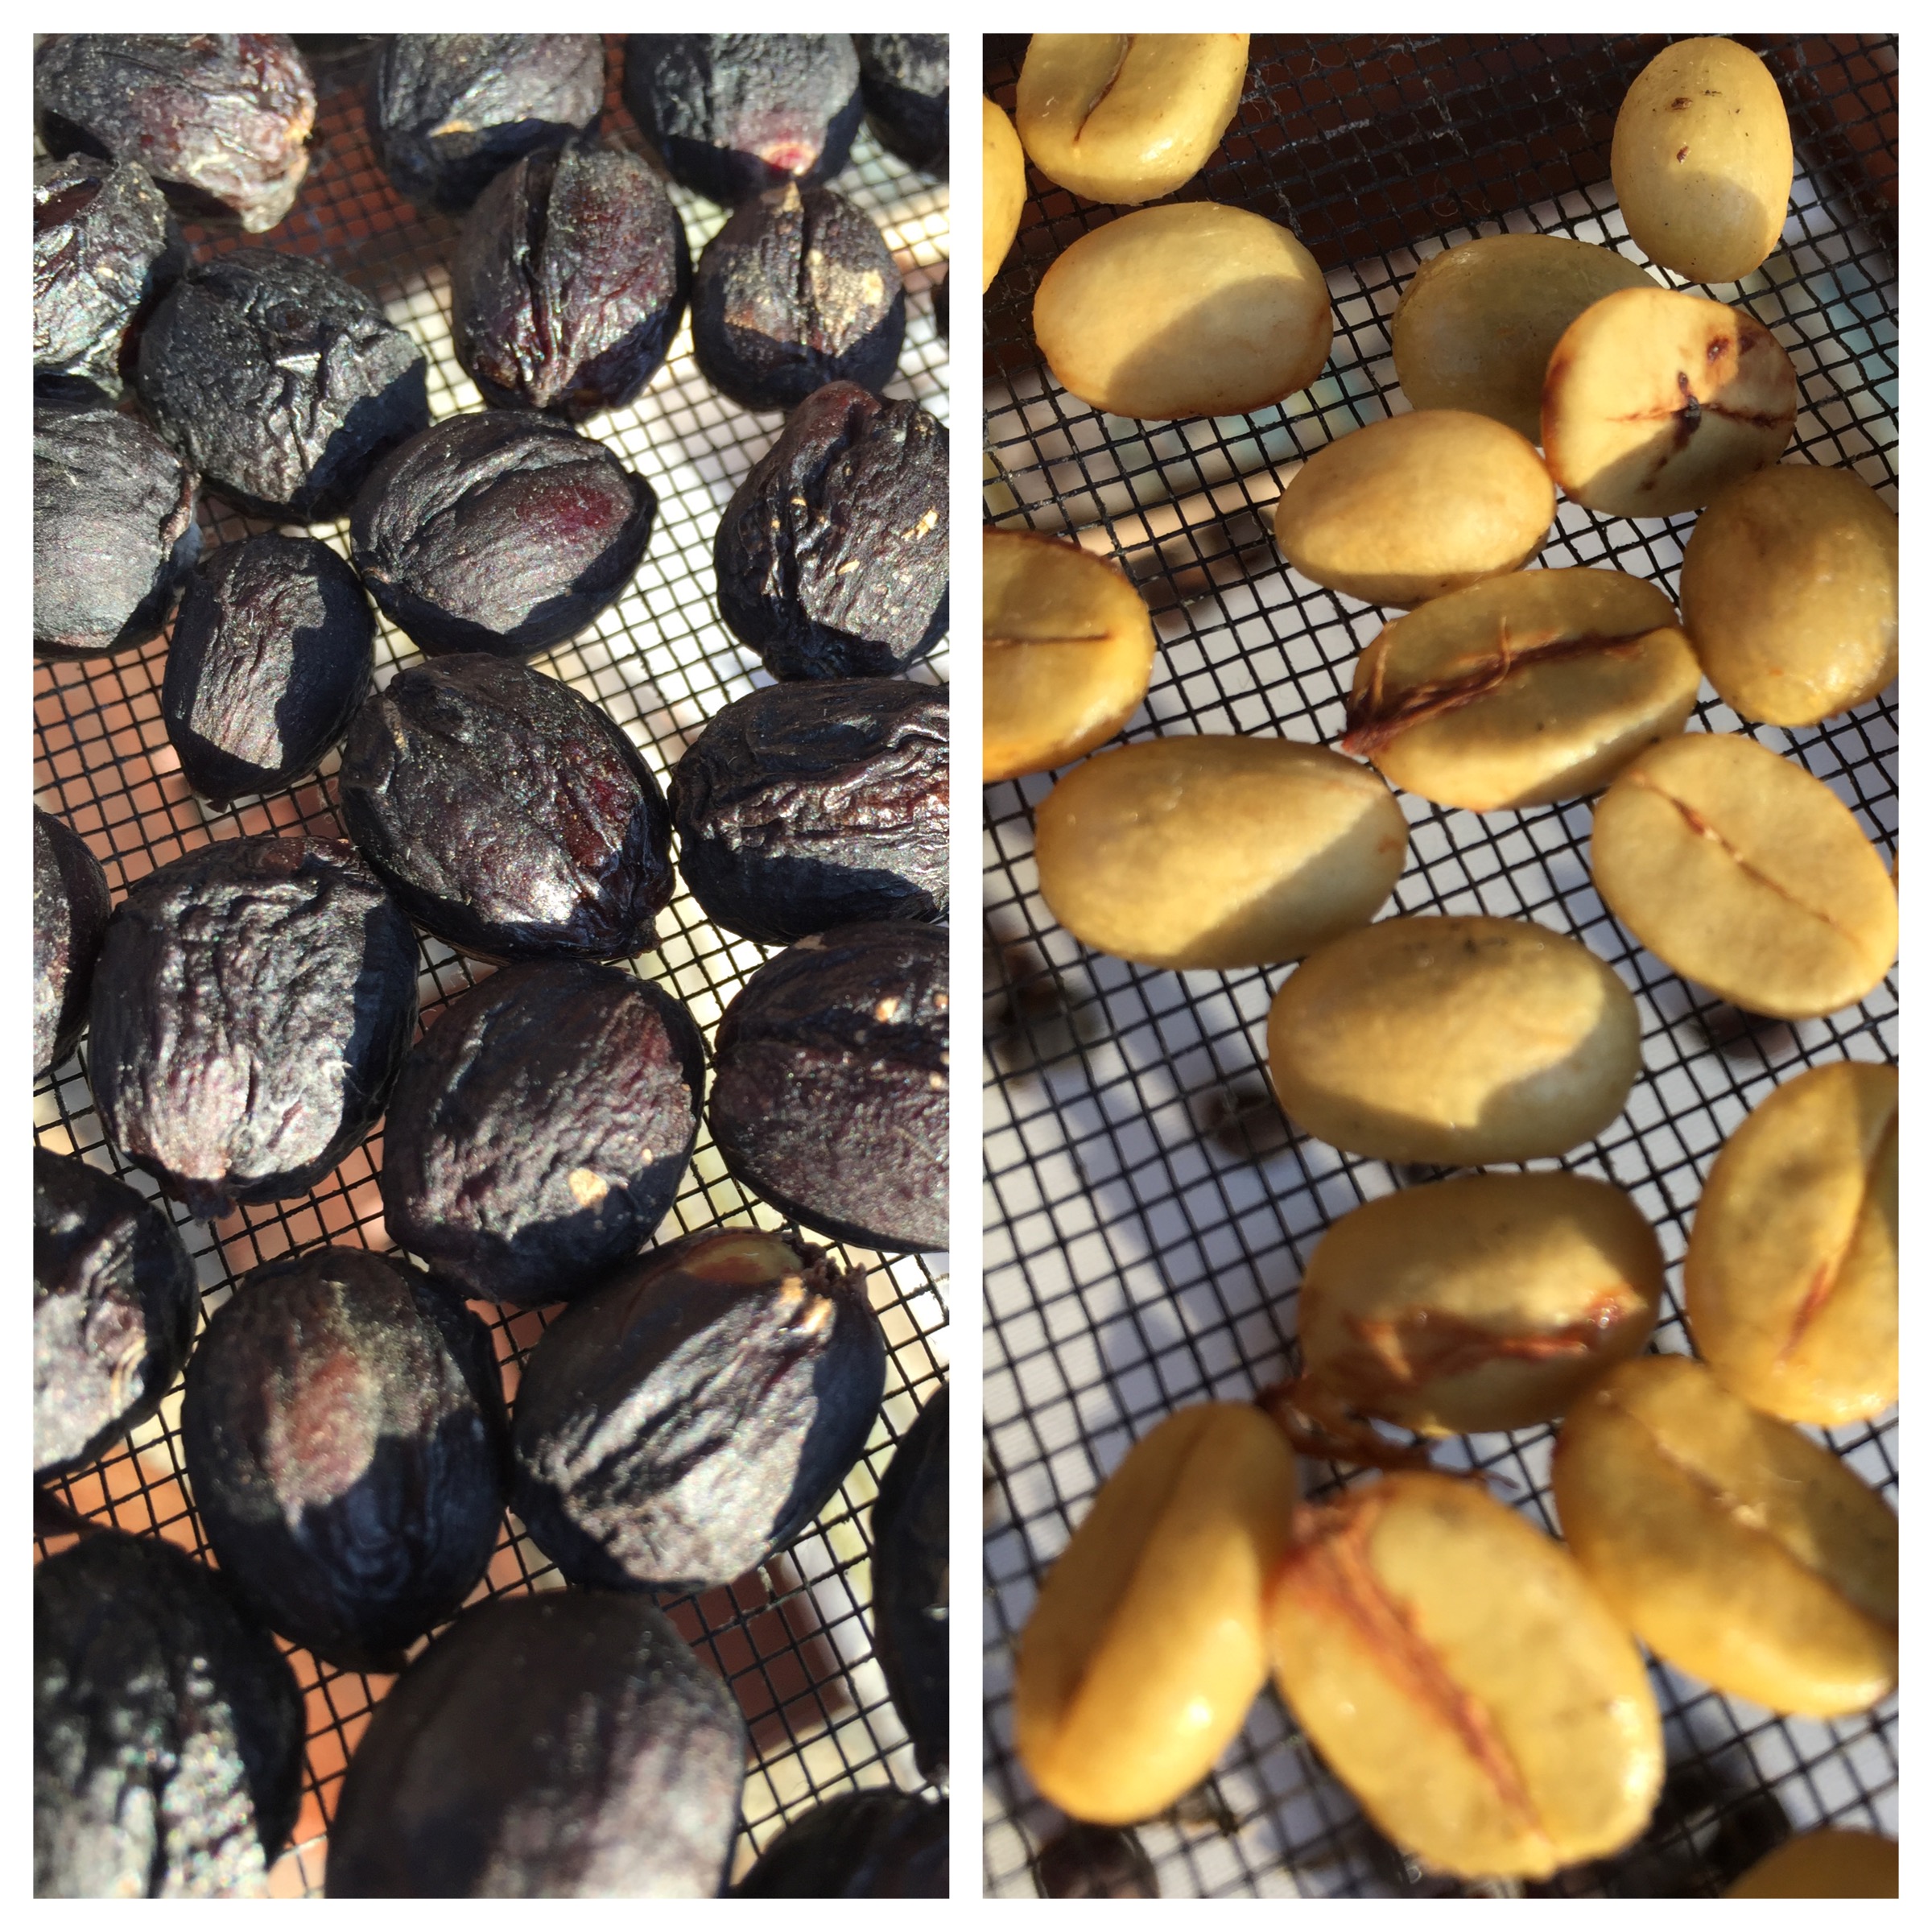
Drying progress one week in.
Further to this point, although the entries were made on 32 individual days, with a few days missed here and there for various reasons, the entire process spanned 50 days in all — perhaps a little long, however we will get into that later. Typically around the time I begin entering data into a spreadsheet is when I also realise a few additional data points or variables collected may have assisted the overall analysis a little — this time was no different. Upon adding the temperature data, it soon became apparent the numbers probably didn’t quite reflect the actual temperature during the day, when those little beans took one for the team, and spent many hours in reasonably hot sun.
When entering the numbers I found myself thinking it had been a very mild October compared with how I remember it feeling day-to-day. It wasn’t long before I realised this was largely due to the fact that the times I had available to snap the photo and add the Day One entry, were either before or after work. Of course both these times occurred when the temperature had either yet to rise, or was already falling — really, must an occupation get in the way of everything — particularly hard-core science?
Thankfully, gathering additional data retrospectively is what we have the Internet for. The Bureau of Meteorology kindly helped out with mean, maximum and minimum temperatures, and a few other pieces of information such as rainfall and average sunshine over the course of the drying period. Would all of this additional data make any difference to how I conducted the drying? Absolutely not, however I think it does provide you with some idea of the conditions at the time, and perhaps whether or not it might be something you’d try yourself relative to how things turned out.
So, those numbers:
- Drying period 50 days through October/November (Southern Hemisphere Spring);
- October mean temperature range 16.3 – 27.1 degrees celsius (actual temperatures 12.9 – 33.8 degrees celsius);
- November mean temperature range 19.8 – 29.2 degrees celsius (actual temperatures 16.1 – 33.4 degrees celsius);
- mean hours per day of sunshine: October 9.1 hours; November 9.2 hours;
- Total rainfall: October 55.8 mm; November 74.2 mm
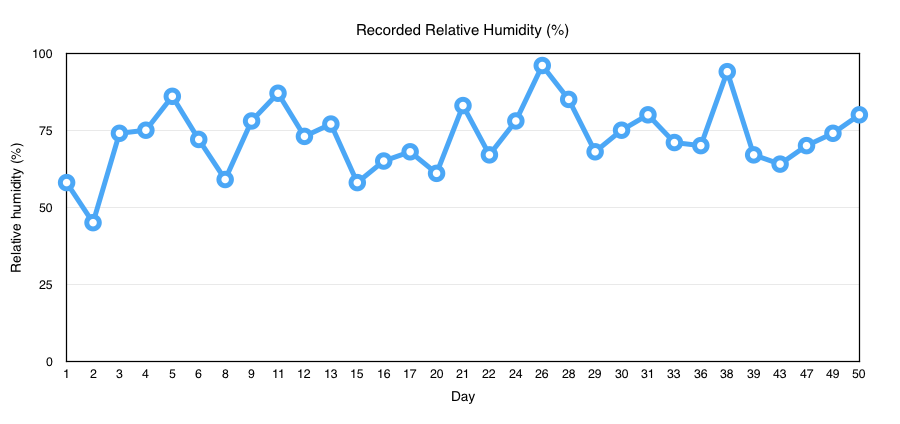
What good is recorded data without a few charts, so I have included daily temperature and humidity recordings below, along with my own bean turning degree of difficulty score — which I understand is quite complex, however if you look hard enough I think it tells a story.


Next: results and a few lessons
This post has started to become a little lengthy, so I have split off a closer look at the results and outcome for next time.
I’ve said it before and I’ll say it again here: the absolute best thing about writing this blog (beyond the knowledge that a few people actually read it), is what I learn along the way. Not simply from the research and dodgy backyard experiments that ensue, but how the act of writing makes me think a little more on the results, and what I might do differently or look into further next time. You know, that realisation you sometimes get: “well now that I say it out loud I’m not sure if it really is such a great idea”.
I hope you’ll join me for a few more realisations in the next post.
Follow @petedenison

Reblogged this on .
LikeLike
Pingback: Coffee: A Natural Processing Experiment Part 3 – Results and Conclusion – Pete Denison